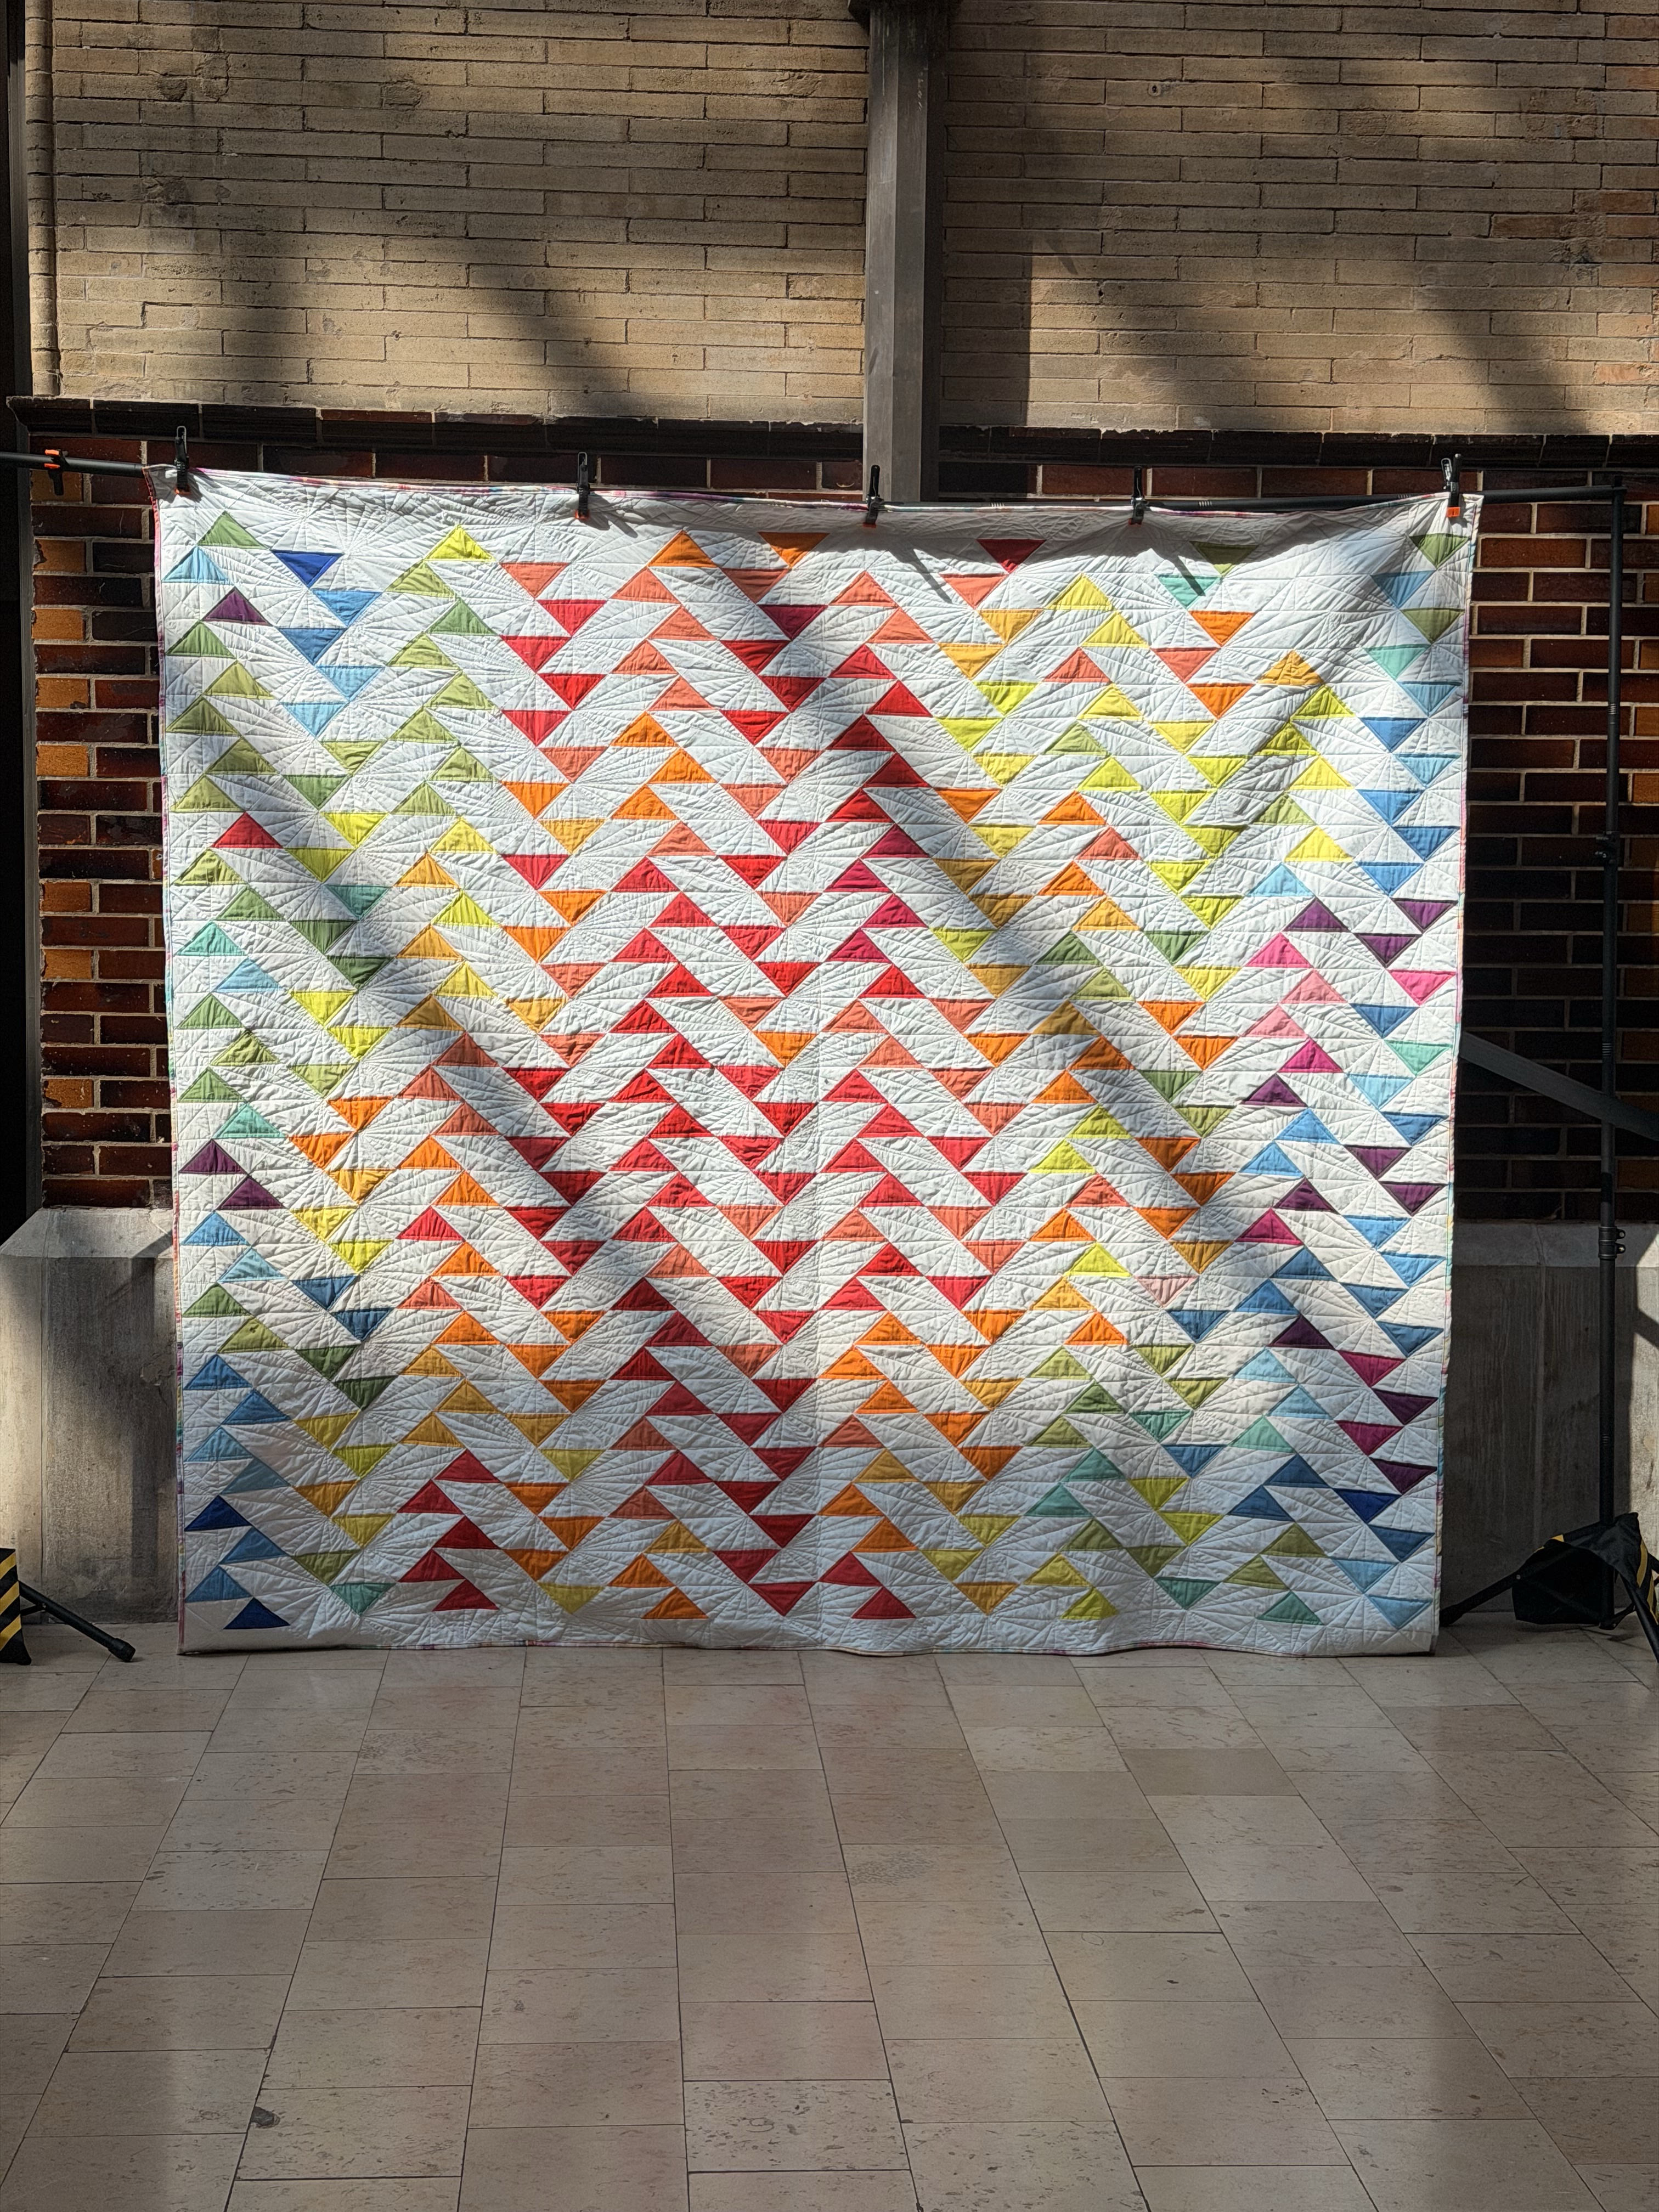
Making a Temperature Quilt
Baby Lock Educator Janis Easter walks us through the process of creating a beautiful, colorful, and elaborate temperature quilt! If you're an intermediate quilter, this is the perfect challenge for you. For more sewing, embroidery, and quilting tips, like Janis' page or join her group.
What is a Temperature Quilt?
A temperature quilt is a quilting project that visually represents the daily high and low temperatures for each day of a year using fabric colors and block designs. You can choose whatever time period you like, and don't have to start with January.
If your climate has a lot of variation, it's easier to represent the full spectrum of the ranbow, but even this can be adjusted depending on how many degrees you assign per fabric color. In this example, Janis had each color represent a range of 5 degrees.
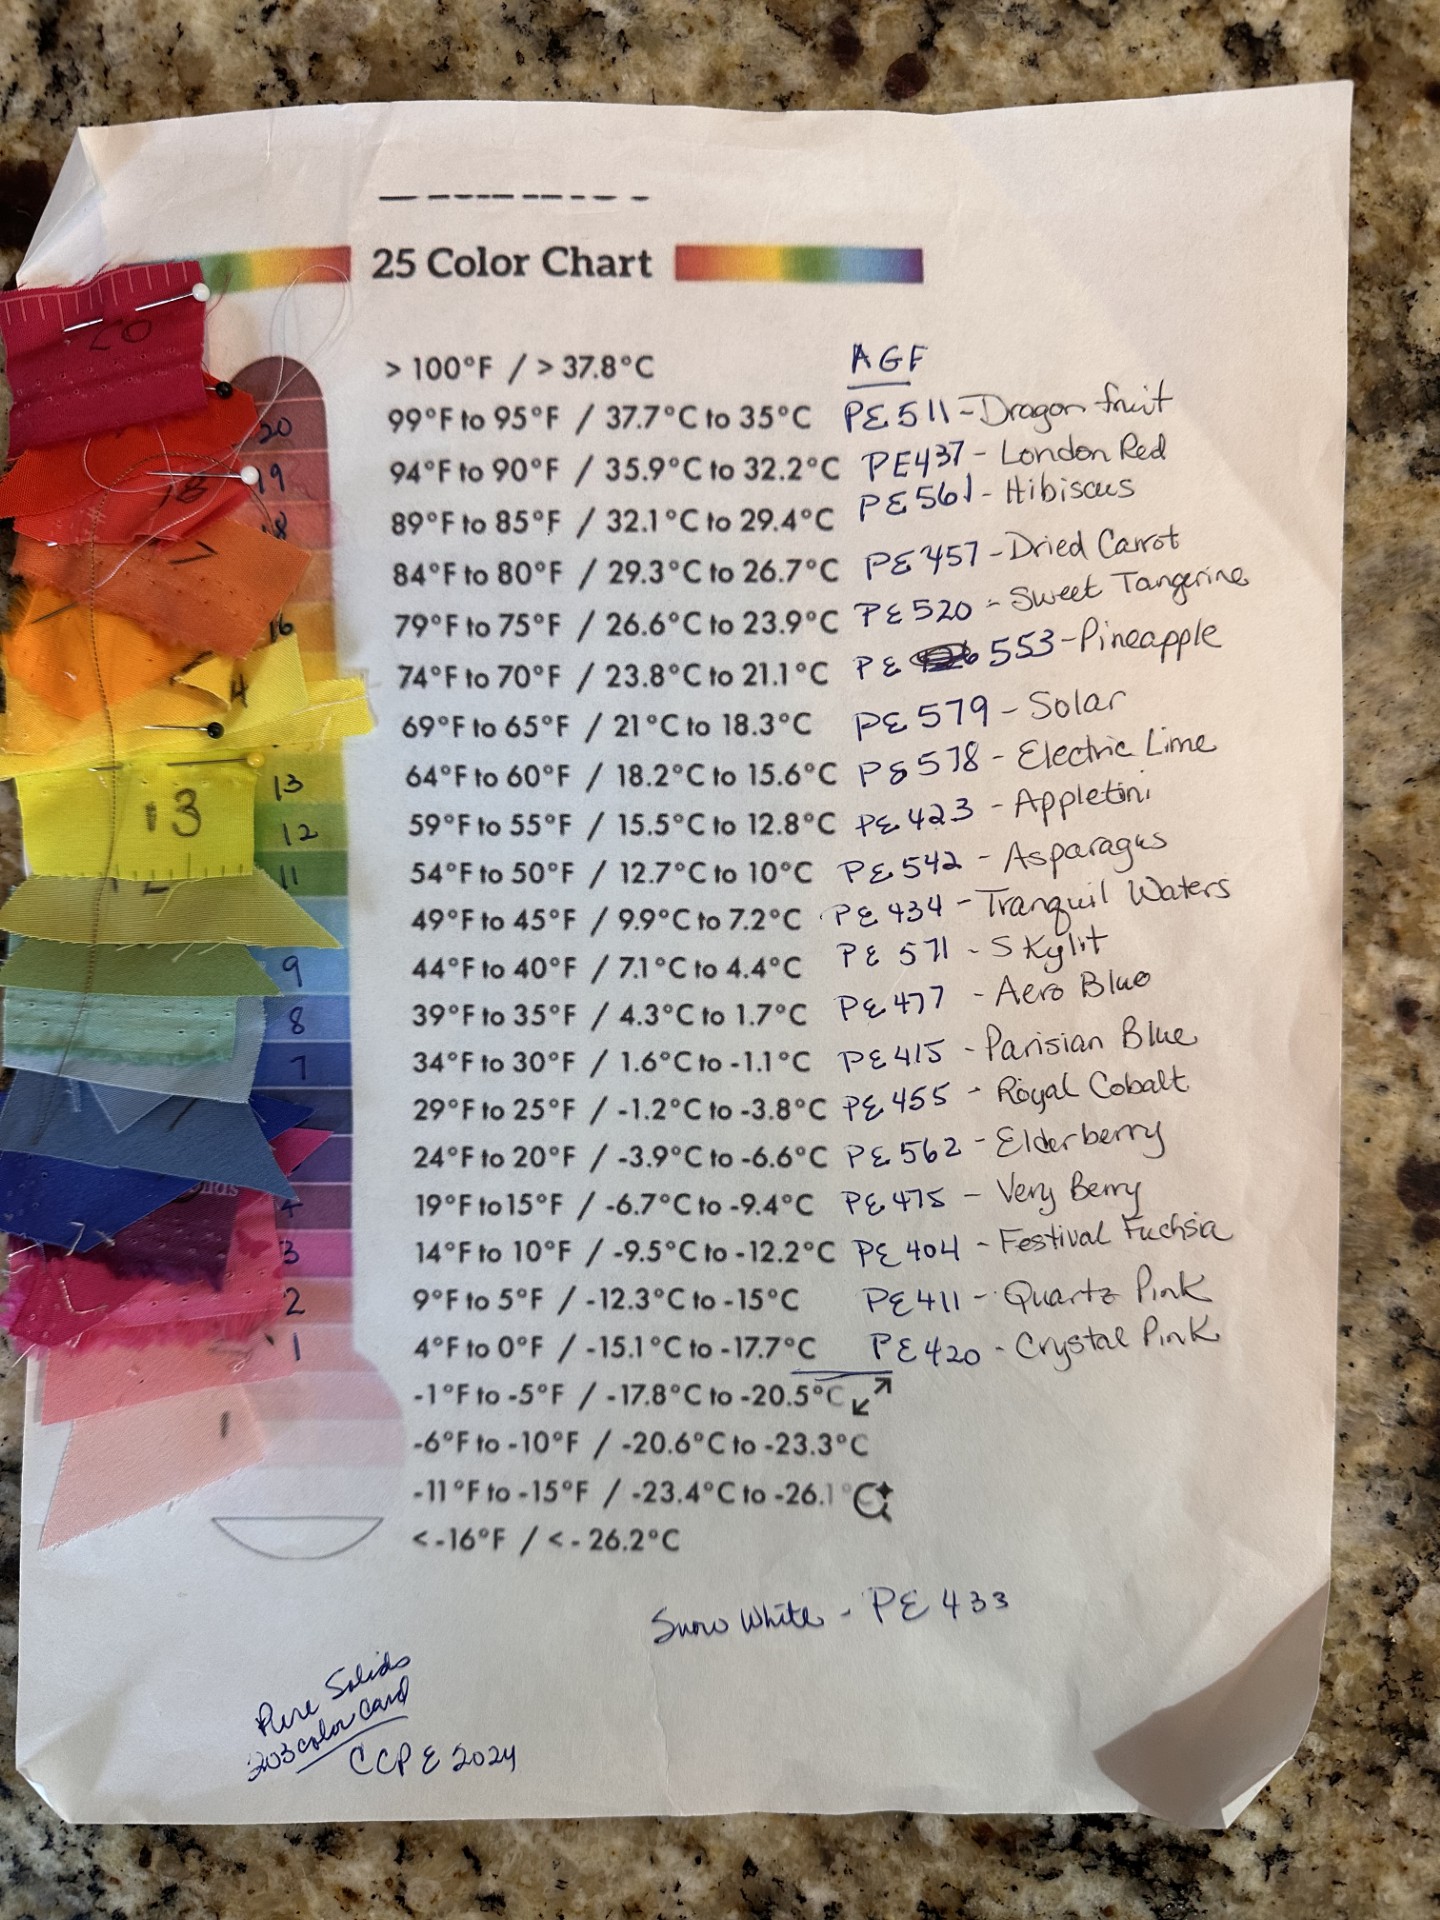
Keep reading to see which resources Janis uses to create the color chart for a quilt like this.
Supplies
• Printable instructions
• Baby Lock Radiance or Anthem Sewing Machine with Stitch Regulator Attachment
• Assorted color fabric
• Backing fabric
• Quilt Batting- Queen size
• Triangle ruler with half inch markings.
• Madeira Quilting Thread
• Multiple machine needles. Change frequently.
• Embroidery tape or paper labels for labeling blocks
• Rotary cutter and cutting mat
• Sorting pouches- enough for each color plus 12 for each month
• Basting safety pins or basting spray (optional)
• Quilting Gloves (optional for grip)
Instructions
1) Determine the time period you wish to create. You can retrieve historical temperature and weather information from WeatherUnderground.com.
2) There are several temperature color charts available on Pinterest which will allow you to select your fabric color choices. There are charts available for five and ten degree ranges. For this quilt I chose a 25 Color Chart that was in five degree increments.
3) Select solids or prints that read as solids to coordinate with each temperature range that is reflected in your time period.
4) Code each color A, B, C, etc. Numbering gets confused with the months. On your printed historical data, mark each day with the appropriate color code.
5) Tally the coded temperatures to determine yardage. With 4 ½” blocks, you can get 20 triangular cuts per quarter yard of fabric. A complete year following this pattern will also require 5 yards of Solid White.
6) Cut all quilt top fabric colors into 3 1/4” strips and sort into coded pouch.
7) Pairing a color strip with a white strip sew along both long edges with 1/4” seam allowance creating a tube. Sew the number of strips that will yield enough of each color to meet the tallied number from step 5.
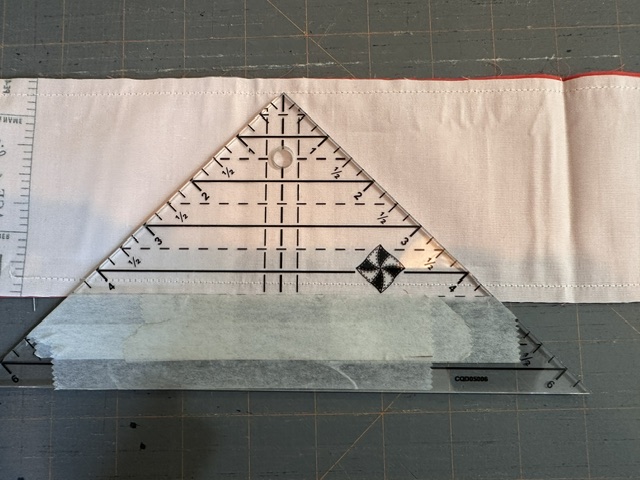
8) Use tape to mark a 4 1/2”alignment on the ruler.
9) Place the alignment of the ruler on one edge of a color tube. Cut both sides. The top point may slightly have a stitch or two to remove to open and press flat into a square. Alternate the point of the ruler so that the previous cut aligns with the next triangle to be cut so that you minimize waste and increase the speed and accuracy of the cuts
10) As you complete pressing a cut strip of pressed squares return to the appropriate coded pouch.
11) Cut 180 4” white blocks from single strips of fabric placing the mark on the edge of the strips and alternating direction to minimize waste as before. These will be in the column between each month and along the top and bottom to help square the quilt.
12) Cut 50 white triangles on the same 4 1/2” mark from 3 1/4” single layer strips. These will be used on the left and right side to square the quilt as well as the top and bottom where needed to create a straight edge.
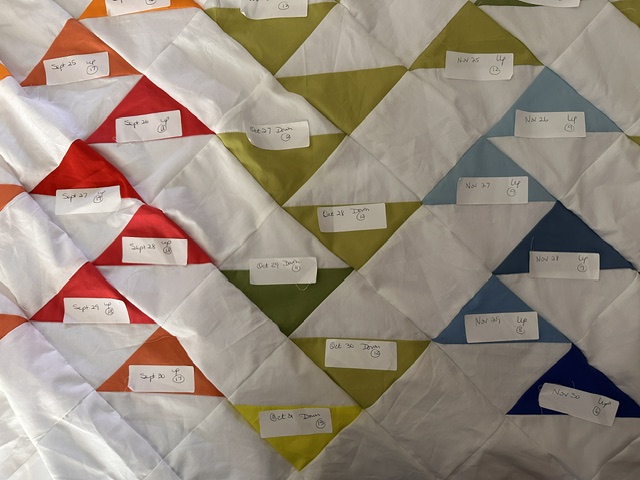
13) Using your coded weather charts from step 4, pull from the coded pouches and tag each with the date with tape or a sticker, whether the month is point up or down and then to a monthly pouch.
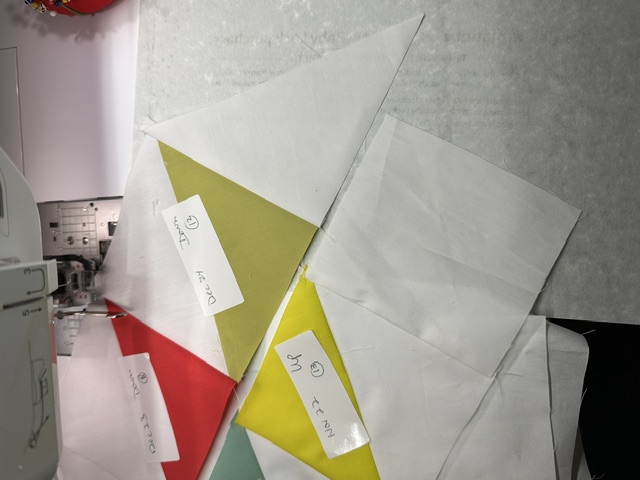
14) Begin assembling. The blocks are set on point. Pull the First and Second day of the month from the pouch and stitch together such that the color side of the block is upward and the second day connects to the first with a color section sewn to a white section. You will sew odd and even days in pairs. Keep the tag that shows the date attached to each section of the block.
15) To the right of each pair sew on a white block. Complete the first month of pairs. For January only, attach a white triangle to the left edge with the long edge on the vertical. This will create the straight edge on the left. Return these blocks to the January pouch. For December, instead of a white square on the right attach a white triangle with the long edge to the right. This will create a straight edge on the right.
16) Repeat the process for February but each color will be pointed down.
17) Continue assembling the pairs alternating the color triangle up and down for subsequent months and continue returning them to separate monthly pouches.
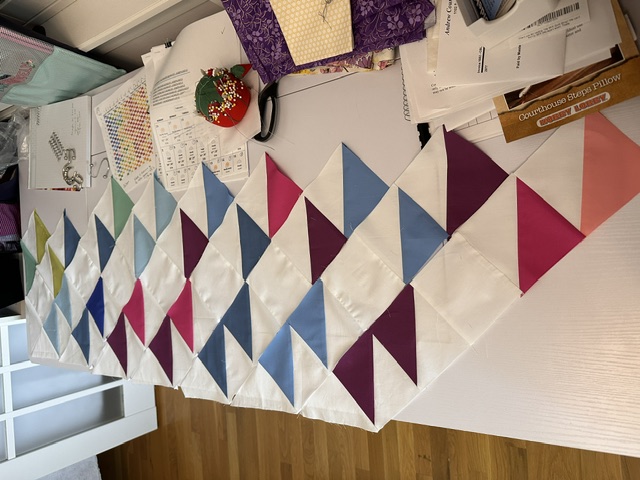
18) Lay out the blocks on large work surface. Remember that every other month points up and down. In order to avoid Y seams, sew together your blocks into diagonal strips. Then assemble the diagonal strips into a quilt top adding white triangles and squares as needed to square the top and bottom. Match your seams as you go.
19) Layer your quilt top with batting and backing and baste or pin frequently. The backing needs to extend at least four inches beyond the quilt top on all sides.
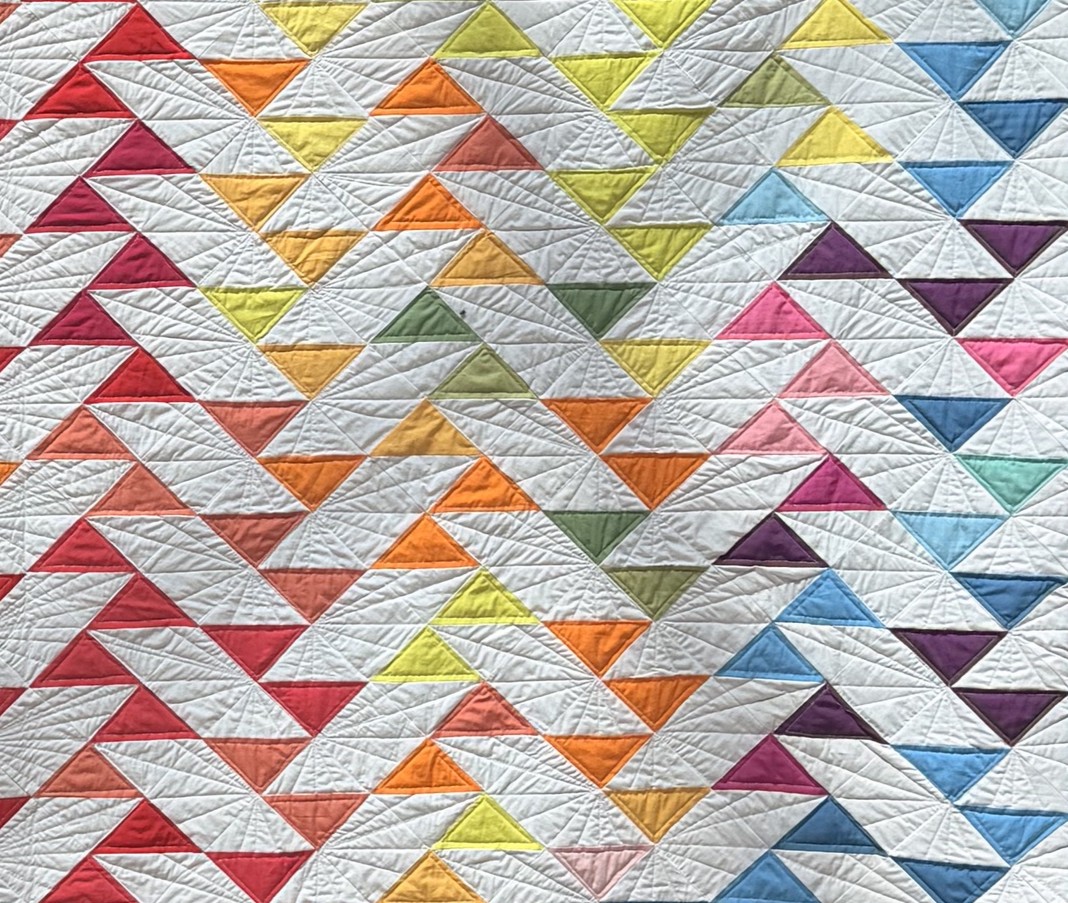
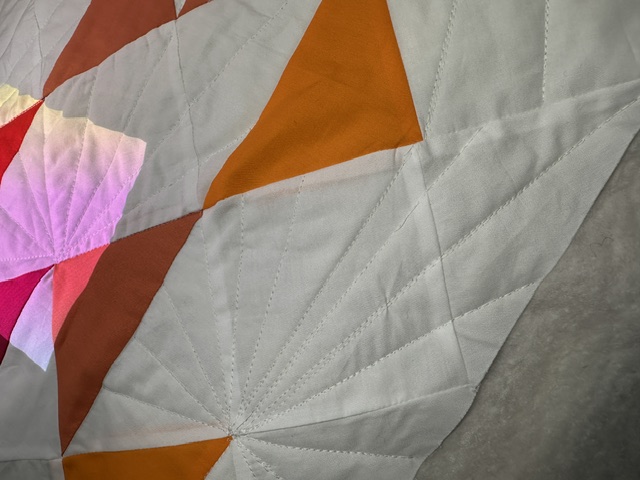
20) If this is your first Free Motion quilting choose a simple quilting design. I used a spider web variation that quilts the white diagonal background as one design and a simple inner outline for the colored triangles. With the Sew Steady ruler foot attached to the Stitch Sync attachment, place the ruler along the front edge of the foot and stitch along the ruler which should be aligned with the other end 1/4” from the intended stitch line. Keep one hand on each end of the ruler to avoid ruler movement with fingers extended to keep the fabric flat. Be sure that fabric extends under the Stitch Sync attachment and that fabric continues to lay flat under the attachment.
21) Bind with your favorite method after quilting the entire quit.
Tips: Should you encounter a thread nest check for threads that may be under the Stitch Sync attachment. DO NOT use the Stitch Sync attachment from the Anthem on the Radiance and vice versa as they are calibrated for each machine. Should there be no movement detected by the Stitch Sync attachment check that you have not stitched beyond detectable fabric or that fabric has become bunched under the attachment. Any quilt layout that allows for columnar layout may be substituted to create a temperature quilt.
For other exciting projects like this one, visit Baby Lock at www.babylock.com
©2026 Baby Lock USA. This project may be freely used by individuals for non-commercial purposes. Project instructions may not be sold or distributed without approval from Baby Lock. Baby Lock must be acknowledged as the source of the project instructions through copyright or online link.