Happy Earth Day! We're celebrating with this upcycled roll top pack project from Delia Creates so keep reading for project instructions. Take it away Delia!

A great way to help save the earth (and a buck) is to reuse old materials and make them new again! The thrift store is a treasure trove for otherwise expensive and hard to source materials. For just under $10 I made this recycled roll top pack from an old wool blazer and some thrifted leather belts.

MATERIALS:
- Size 16 or larger men's wool blazer*
- 3 leather belts (2 belts at least 38 inches long including buckle)
- 3/4 yard lining material**
- 3/4 yard lightweight interfacing
- Small scrap of leather pleather or vinyl ***
- 14 inches of 3/4 inch wide elastic
- Leather needle
- Walking foot****
- Heavy duty thread
- Quilter's clips
- Optional: magnetic purse snaps

Notes:
- Spring time is a great time to thrift for wool coats and jackets. Many thrift stores are trying to make room for next seasons merchandise so look for deep discounts and deals. I found my wool blazer for just 99 cents!
- This is a great time to use fabric from your stash. In the spirit of keeping this backpack as recycled as possible I used scraps from an old drop cloth. I also used reclaimed elastic from an old pair of leggings!
- You only need a small 13 x 2 inch piece of leather so you can reuse an old purse leather jacket or scraps from other leather projects. Just be sure that the leather is upholstery/fashion weight so that you can easily sew through it on your sewing machine.
- You will be sewing through several thick layers of leather in this project so a walking foot and a leather needle is a must.
- SEAM ALLOWANCE: 1/2 inch (unless otherwise noted)
STEP ONE: Cut out your materials.
Cut out your materials according to this diagram. Discard the lining and just keep the wool outer fabric.
[caption id=attachment_13059 align=aligncenter width=600] Click on the image for the full size diagram![/caption]
Remove existing pockets if possible and reuse them if desired.

Please note: The cut diagram indicates that you need to cut the largest bag pieces 25+ inches long. This is to ensure optimal rolling for the top of the bag. Because you are working with recycled materials you may like me not have enough material to meet this requirement. I was only able to make my pieces 22 inches long. To compensate I added the optional magnetic purse snaps at the end to ensure better bag security.


More notes: When using clothing especially jackets as fabric expect there to be some seam lines running through your pieces. You may also expect that because shaping was added to the clothing that the seam lines may curve. This can trick your eyes into thinking some pieces are not straight when they actually are (you can see it in some of my pictures). Use a quilter's ruler to double check your measurements and embrace the imperfections inherent with using used and reclaimed materials! :)
STEP TWO: Add interfacing to main bag pieces.

To ensure your bag is nice and sturdy add fusible lightweight interfacing to the backs of the main bag pieces.
NOTE: If your main fabric is particularly thick you may decide to skip this step or you will want to cut the interfacing 1/2 inch smaller on all sides than the main fabric pieces so that your seams do not become too bulky. My wool fabric ended up being thinner than expected so I added interfacing over the entire main pieces to reinforce the fabric to make it easier to sew and to provide more body.
STEP THREE: Sew leather straps to the main back piece.
Using the main back fabric piece mark a line 12 inches up from the bottom. Fold the fabric in half and mark the center fold with a pin about 3 inches above the line. Align the bottom of the leather or vinyl piece with the marked line and clip into place on the sides with quilter's clips.

Starting with the top closure strap (short strap with the holes) place it at the center of the top of the leather piece right side up. Add the hanging strap next to each side of the top closure strap right sides up. Then the backpack straps outside those straps right sides facing down. You can tape these straps into place with clear tape and sew over the tape or simply mark the strap placement beforehand and then add the straps as you sew.
Sew five evenly spaced lines (3/8 apart) of stitching horizontally across the leather piece with a lengthened stitch of 3.5 mm. The first two lines of the stitching will be a little awkward and challenging to manage so go slowly and be sure at least 1 inch of the ends of the straps are under the leather piece. You may want to sew over the first two lines with a second line of stitching to ensure the straps are secure. Alternatively you can use a triple stitch instead.
STEP FOUR: Create side pockets.
Pin and sew main and lining pocket pieces together along one short end with right sides facing.
Turn and fold the pocket pieces with right sides facing out. Top stitch close to the seam edge and then 3/4 inch below the first line of stitching to create a casing for the elastic.

Pro Tip: When folding the pocket pieces right sides out push the main fabric slightly higher than the lining to somewhat hide the lining and create a cleaner look.
Thread your elastic through the casings. Pull the elastic tight so that the top of the pocket gathers to about 6 inches wide. Baste each end of the casing closed to secure the elastic.

Pin the pockets to the bottom edges of the main side pieces. Pleat the bottom of the pockets as desired and baste in place.
STEP FIVE: Create front bag piece (and add optional pocket).
If reusing pocket pieces from your jacket or blazer sew one to the smaller front piece about 1.5 inches below the 13 inch long top edge.

Place the two main front bag pieces together along the 13 inch long edges with right sides together. Mark the center line with a pin and insert the buckled closure strap in between the layers with the cut side of the strap in line with the raw edges and the right side of the strap facing the smaller front piece. Clip and pin in place. Sew together all the layers and open up the front piece. Flip the buckled strap upward so the right side is facing up and top stitch just below the seam line with a lengthened stitch (3.0 or 3.5 mm).
STEP SIX: Assemble the main bag and the lining bag.
Pin and sew the side pieces to the back piece.

IMPORTANT: Take care to stop sewing 1/2 inch from the bottom of the bag for all seams in this step.
Baste the buckle back straps to the bottom of the main back piece about 3/4 inch away from the side seam lines.

Pin and sew the front piece to the side pieces.

Pin and sew the bottom of the bag in place. Because you ended your seams 1/2 inch short of the bottom the bottom piece should fit in nicely. Sew each side of the bottom piece to the bottom of the main bag pieces starting 1/2 inch from the top and stopping 1/2 from the bottom so that the corners match up as pictured.


Assemble your lining bag in similar manner.

Trim corners to reduce bulk.
STEP SEVEN: Install lining and finish.
Turn main bag right side out and place it inside of the lining (still inside out) so that they are right sides facing.

Pin together top raw edges and sew around leaving a 3-4 inch opening along one of the long sides.
Turn the bag right side out through the opening and insert lining into the main bag.

Fold the raw edges of the opening inward and pin around the top of the bag with the main bag slightly higher than the lining to help conceal the lining. Top stitch close to the seam line from the lining side.
OPTIONAL: Add magnetic purse snaps if needed. Roll the bag first to determine ideal placement.


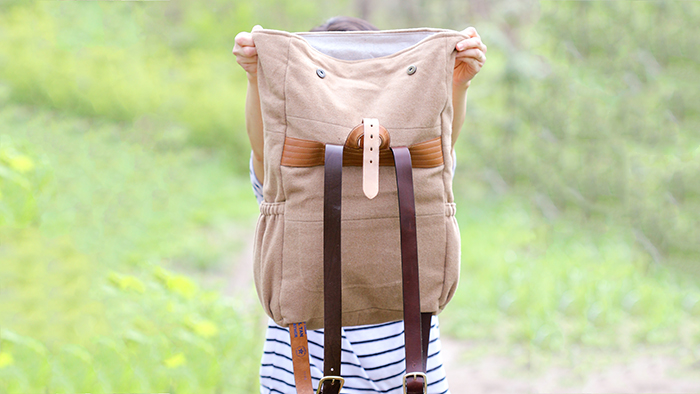
Your bag is complete and ready for your next adventure!


