
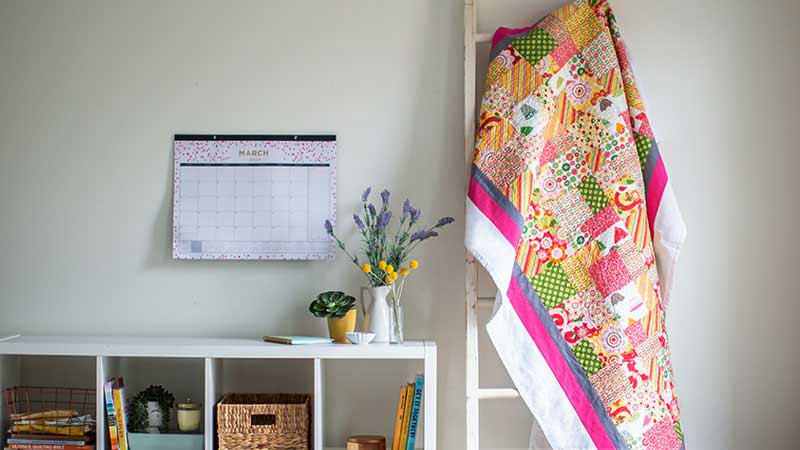
Celebrate springtime with this fun easy quilt. Spend a rainy afternoon sewing and be ready to enjoy a beautiful day using your flowery quilt. Check your stash for some bright and cheery fat quarters to make this whimsical project. Download printable instructions.
Materials:
- Madeira Cotona Thread to match fabrics
- Madeira Quilting Thread
- 14 Fat quarters of a variety of prints cut into 54 9” squares or a combination of 54 9” squares from fabric stash.
- 2 1/3 yards for white border-cut into 5” strips (40” wide)
- de) 2/3 yard for pink border-cut into 3” strips (40” wide)
- ½ yard for grey border- cut into 2” strips (40” wide)
- 6 ½ yards 45” backing fabric
- 3 ½ yards of batting
- Pins
- Rotary cutter mat and ruler
- Iron and ironing mat
Tools:
- Baby Lock Crescendo Sewing Machine
- Baby Lock Crown Jewel
- Pearl Frame
- Pro-Stitcher Software
Steps:
-
Cut 54 9-inch squares from fat quarters or fabric stash.
-
Cut fabric squares vertically 5½ inches from the edge of the fabric.
-
Then cut those cut sections horizontally 3½ inches. You will end up with four stacks of squares.
-
One- 5½” X 5½”
-
Two- 5½” X 3½”
-
One- 3½” X 3½”
-
-
Rearrange the fabrics into different stacks for each section of the cut 9-inch block.
-
Thread the Crescendo with the Madeira Cotona thread. Using a ¼ inch seam allowance and a straight stitch piece the sections together to create a block.
-
Mix and match fabric patterns to add variety to quilt blocks.
-
-
Piece block A and B along the 3½ inch edge.
-
Piece blocks C and D along the 5½ inch edge.
-
Then attach the block A/B pieces with the C/D pieces along the 8½-inch edge.
-
Continue until you have 54 completed blocks. Lightly press.
-
Connect blocks into 9 rows of 6 blocks. Alternate block direction when assembling into pieced top section. Lightly press.
-
Cut eight 5-inch (40 inches wide) strips for white border.
-
Cut eight 3-inch (40 inches wide) strips for pink border.
-
Cut eight 2-inch (40 inches wide) strips for grey border.
-
Attach borders to edges of the quilt.
-
Miter border corners if desired. Lightly press.
-
Load backing batting and pieced top onto the Pearl frame accordingly to quilt with the Crown Jewel and Pro-Stitcher software.
-
Select your pattern. (Note: Clover Edge to Edge was the pattern used for pantograph quilting on this project)
-
Set the sewing area for your designs by selecting one row of the pieced quilt section at a time.
-
Repeat the pattern to fill the area on your quilt top.
-
Skew the design to fit into the sewing area and make any other adjustments to the pattern to customize your quilt design.
-
-
Quilt the middle section of the quilt by repeating the stitch design for each row of the pieced block section.
-
Continue the pattern until the entire center section is complete.
-
Quilt the borders by stitching-in-the-ditch stippling or adding another design with the Crown Jewel and Pro-Stitcher
-
Once your quilting is complete remove the quilt from the frame.
-
Trim to away the excess backing and batting and lightly press.
-
Cut nine 3-inch strips (40 inches wide) for binding.
-
Attach the binding to finish quilt.


