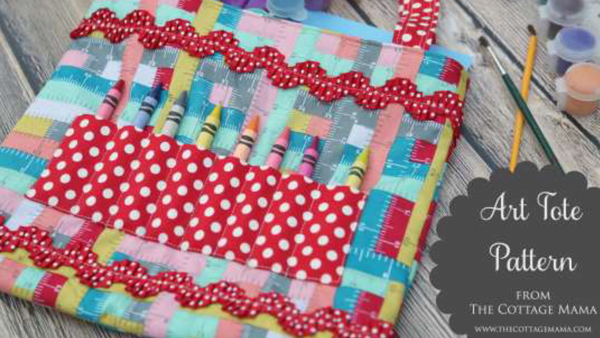
One of my daughters’ very favorite Christmas presents has been a collection of art supplies for her to use and get creative. We are on the go a lot so what better way to bring her art supplies along than an Art Tote just for her? If you have a budding little artist in your life make them their own Art Tote. It is guaranteed to be a present they will treasure for many years to come!
Materials:
- 4 Fat Quarters Quilting Cotton Fabric (2 different prints)
- 1/3 yard fusible fleece
- 1/2 yard single-sided fusible interfacing
- Polyester sewing thread
- 1.5 – 2 yards decorative trim
- Iron
- Basic sewing supplies
Tools:
- Baby Lock Unity Sewing and Embroidery Machine
Steps:
-
All seams 1/4” unless otherwise noted.
-
Before you begin cut out your fabric for the art tote. You will need the following:
~Straps (cut 2 fabric cut 2 interfacing): 18” x 1.5” ~Crayon Pouch (cut 1 fabric cut 1 interfacing): 9.75” x 5.75” ~Tote Exterior (cut 2 fabric cut 2 fusible fleece): 11.75” x 10.25” ~Tote Lining (cut 2 fabric cut 2 interfacing): 11.75” x 10.25”
-
Apply the fusible interfacing to the backside of all pieces (according to package instructions) before you begin bag construction (wait to apply the fusible fleece to tote exterior).
-
Create the crayon pouch on the front of the tote: Fold the crayon pouch piece in half lengthwise with right sides together. Sew down both short sides and one long side leaving a 1” –
Clip the corners turn right side out and press.
-
Press under the 1” – 2” opening so that it is in line with the rest of the pouch. Position the crayon pouch in the center of one of the exterior tote bag pieces and 5.5” up from the bott
The long side where you left your opening should be pointed towards the bottom of the tote.
-
Sew the crayon pouch to the front of the tote by sewing down both short sides and the one long side where you left the opening. Leave the top open. Mark your lines on the crayon pouch appro
Start at the center of the pouch and work your way out (there will be 7 lines total). If they aren’t exactly 1” that’s ok. Just make sure they are somewhat even. If you have the Baby Lock Unity sewing machine this is a great place to use your Guide Beam so that you can easily sew those straight lines onto the pouch. If not mark them with a fabric marking pen.
-
Apply the fusible fleece to the backside of the front and back pieces of the exterior of the tote. Then place the front and back of the tote on top of one another right sides together a
Press seam open.
-
Apply trim to the exterior tote pieces. The trim will be placed 1.5” up from the bottom and 1.5” down from the top. You can use any trim you like. The trim seen here is called Ruffle Rick Ra
You can use Wash Away Wonder Tape (a double-sided sticky tape) to mark your trim lines and then peel off the paper backing to reveal the other sticky side. (Wonder Tape is easy to sew through disappears after washing and won’t gum up your needle.)
-
Place your trim on top of the Wonder Tape and sew it to the exterior of the tote. You can skip the trim step if you would prefer. You can also just pin your trim to the bag.
-
Make the tote straps: Fold the strap pieces in half lengthwise with right sides together. Sew down the long edge leaving the short ends open. Turn right side out and press.
You can use a quick tube turner to make easy work of turning your straps. Do this for both straps.
-
Press your seam down the center-back of the straps. Add some topstitching on the top of your strap. You can do one two or even three rows of stitching to add a little decorative element to
-
Fold back up the exterior tote pieces right sides together and sew the bottom edge and other side edge together (make sure to line up the edge of your trim). Clip your corners turn right s
Baste stitch your straps to the front and back of the exterior of the tote. You will set them in 1” from each of the sides lining up the raw edge of the straps with the raw edge of the top of the tote (as seen in image 9).
-
Sew the tote lining: Place the two tote lining pieces on top of one another right sides together. Sew down both sides and the bottom; however you want to leave a 1” – 2” opening along the
-
Place the tote lining around the exterior of the tote so that the right sides are together. You are basically putting the exterior tote inside the tote lining.
Line up the top raw edge of the exterior tote and the tote lining. Sew all the way around the top. You will catch your straps in this row of stitching since they are sandwiched between the two layers.
-
To turn your tote right side out pull the exterior tote through the bottom opening left in the tote lining.
Press out all the corners once you’ve turn it right side out hand-sew the opening in the lining closed and tuck the lining down inside the exterior of the tote. Run a row of topstitching along the top of the tote bag.
-
Fill your Art Tote with crayons and other art supplies and you now have a wonderful gift for any little girl or boy in your life


