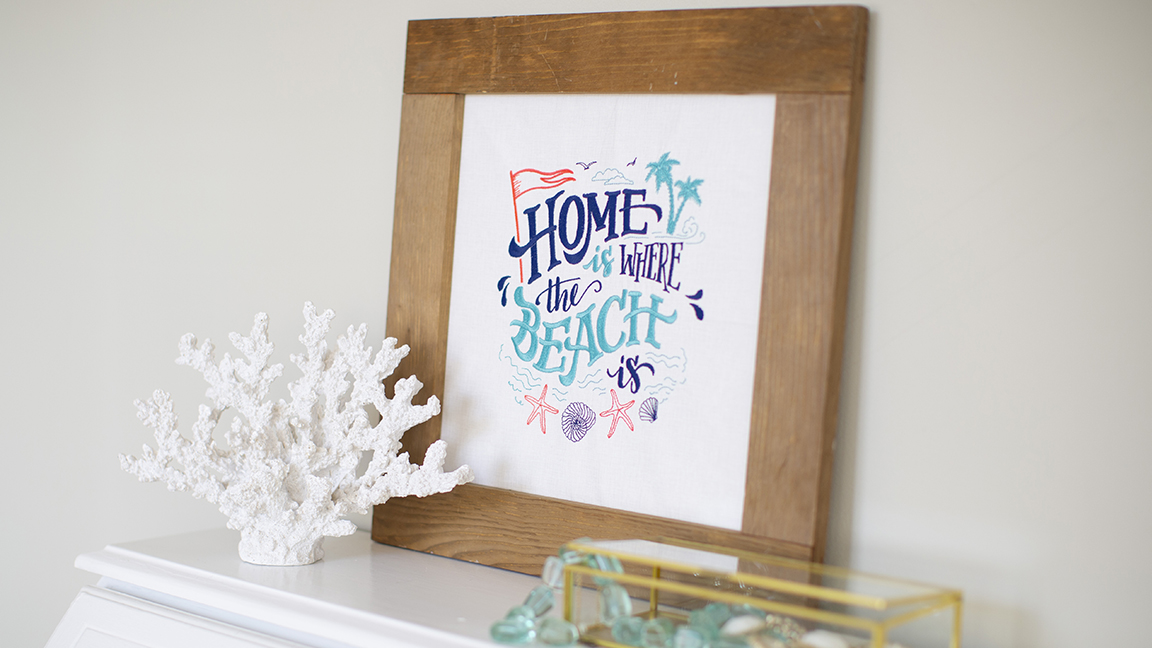
Bring the warm weather indoors when you embroider this framed art. Use Color Visualizer and three different types of thread to complete this beach-themed project.
Materials:
- 20" x 20" of cotton or linen fabric
- 20" x 20" of light- medium weight fusible interfacing
- Madeira® Embroidery Thread (Polyneon Rayon and Frosted Matt)
- Baby Lock Cut-Away Stabilizer
- 12" x 12" mat with picture frame
- Masking tape or decorative duct tape
- Basic sewing supplies
Tools:
- Baby Lock Embroidery Machine - Model# BLTA or BLMA
- Heavy Duty Stapler with Staples
Steps:
-
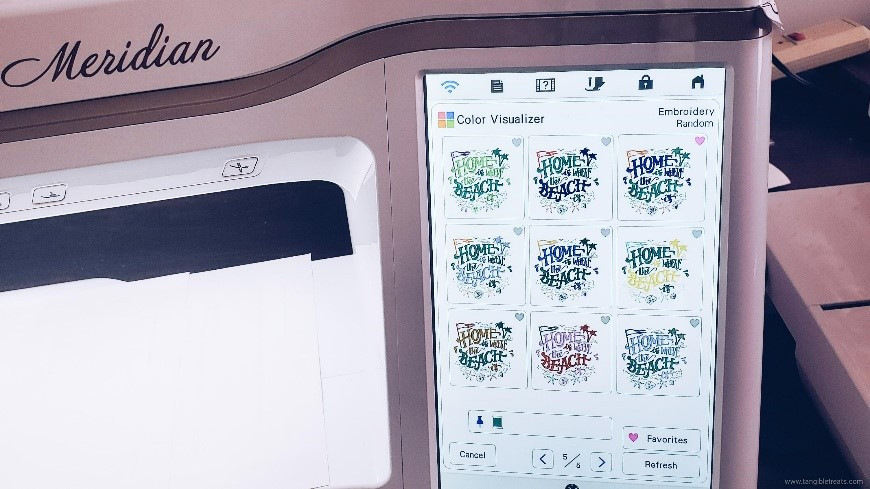
Setup the machine with the embroidery unit and select “embroidery.” Select “explore ” then select the beach design icon (design number 9).
-
Set the design. Select “edit” then the color spool icon.
-
Change your colors manually or use Color Visualizer to preview other color options.
-
Heart your favorites to review and narrow your selection.
-
Touch the your favorite design and choose “set” to save your new color option. Press “OK.” Press “embroidery.”
-
Apply the Fusible interfacing to the wrong side of the backing fabric following the manufacturers’ directions.
-
Determine the center on the fabric and mark the spot.
-
Hoop the cut-away stabilizer and the backing fabric in the largest hoop.
This will give a solid foundation that will hold the stitches securely.
-
Embroider the design using Madeira embroidery thread. For the project as shown these types of thread were used.
-
Madeira Polyneon in neon orange was used for the flag and starfish.
-
Madeira Frosted Matt in Navy was used for the top lettering and the seashells.
-
Madeira Rayon in light teal was used for the lower lettering.
-
-
Remove the embroidery from the hoop.
-
Set up the machine for sewing and change the embroidery foot to the all-purpose foot.
-
Select a zigzag or overcasting stitch from the Utility Stitches category.
-
-
Stitch over the edge of the fabric to secure all the edges and prevent raveling while framing.
-
To frame the embroidery place the embroidered fabric center over the mat. Pull the fabric to the back side of the mat and staple in place.
-
Cover the ends of the fabric with masking or duct tape to give the back a neat and tidy appearance.
-
Hang and Enjoy!


