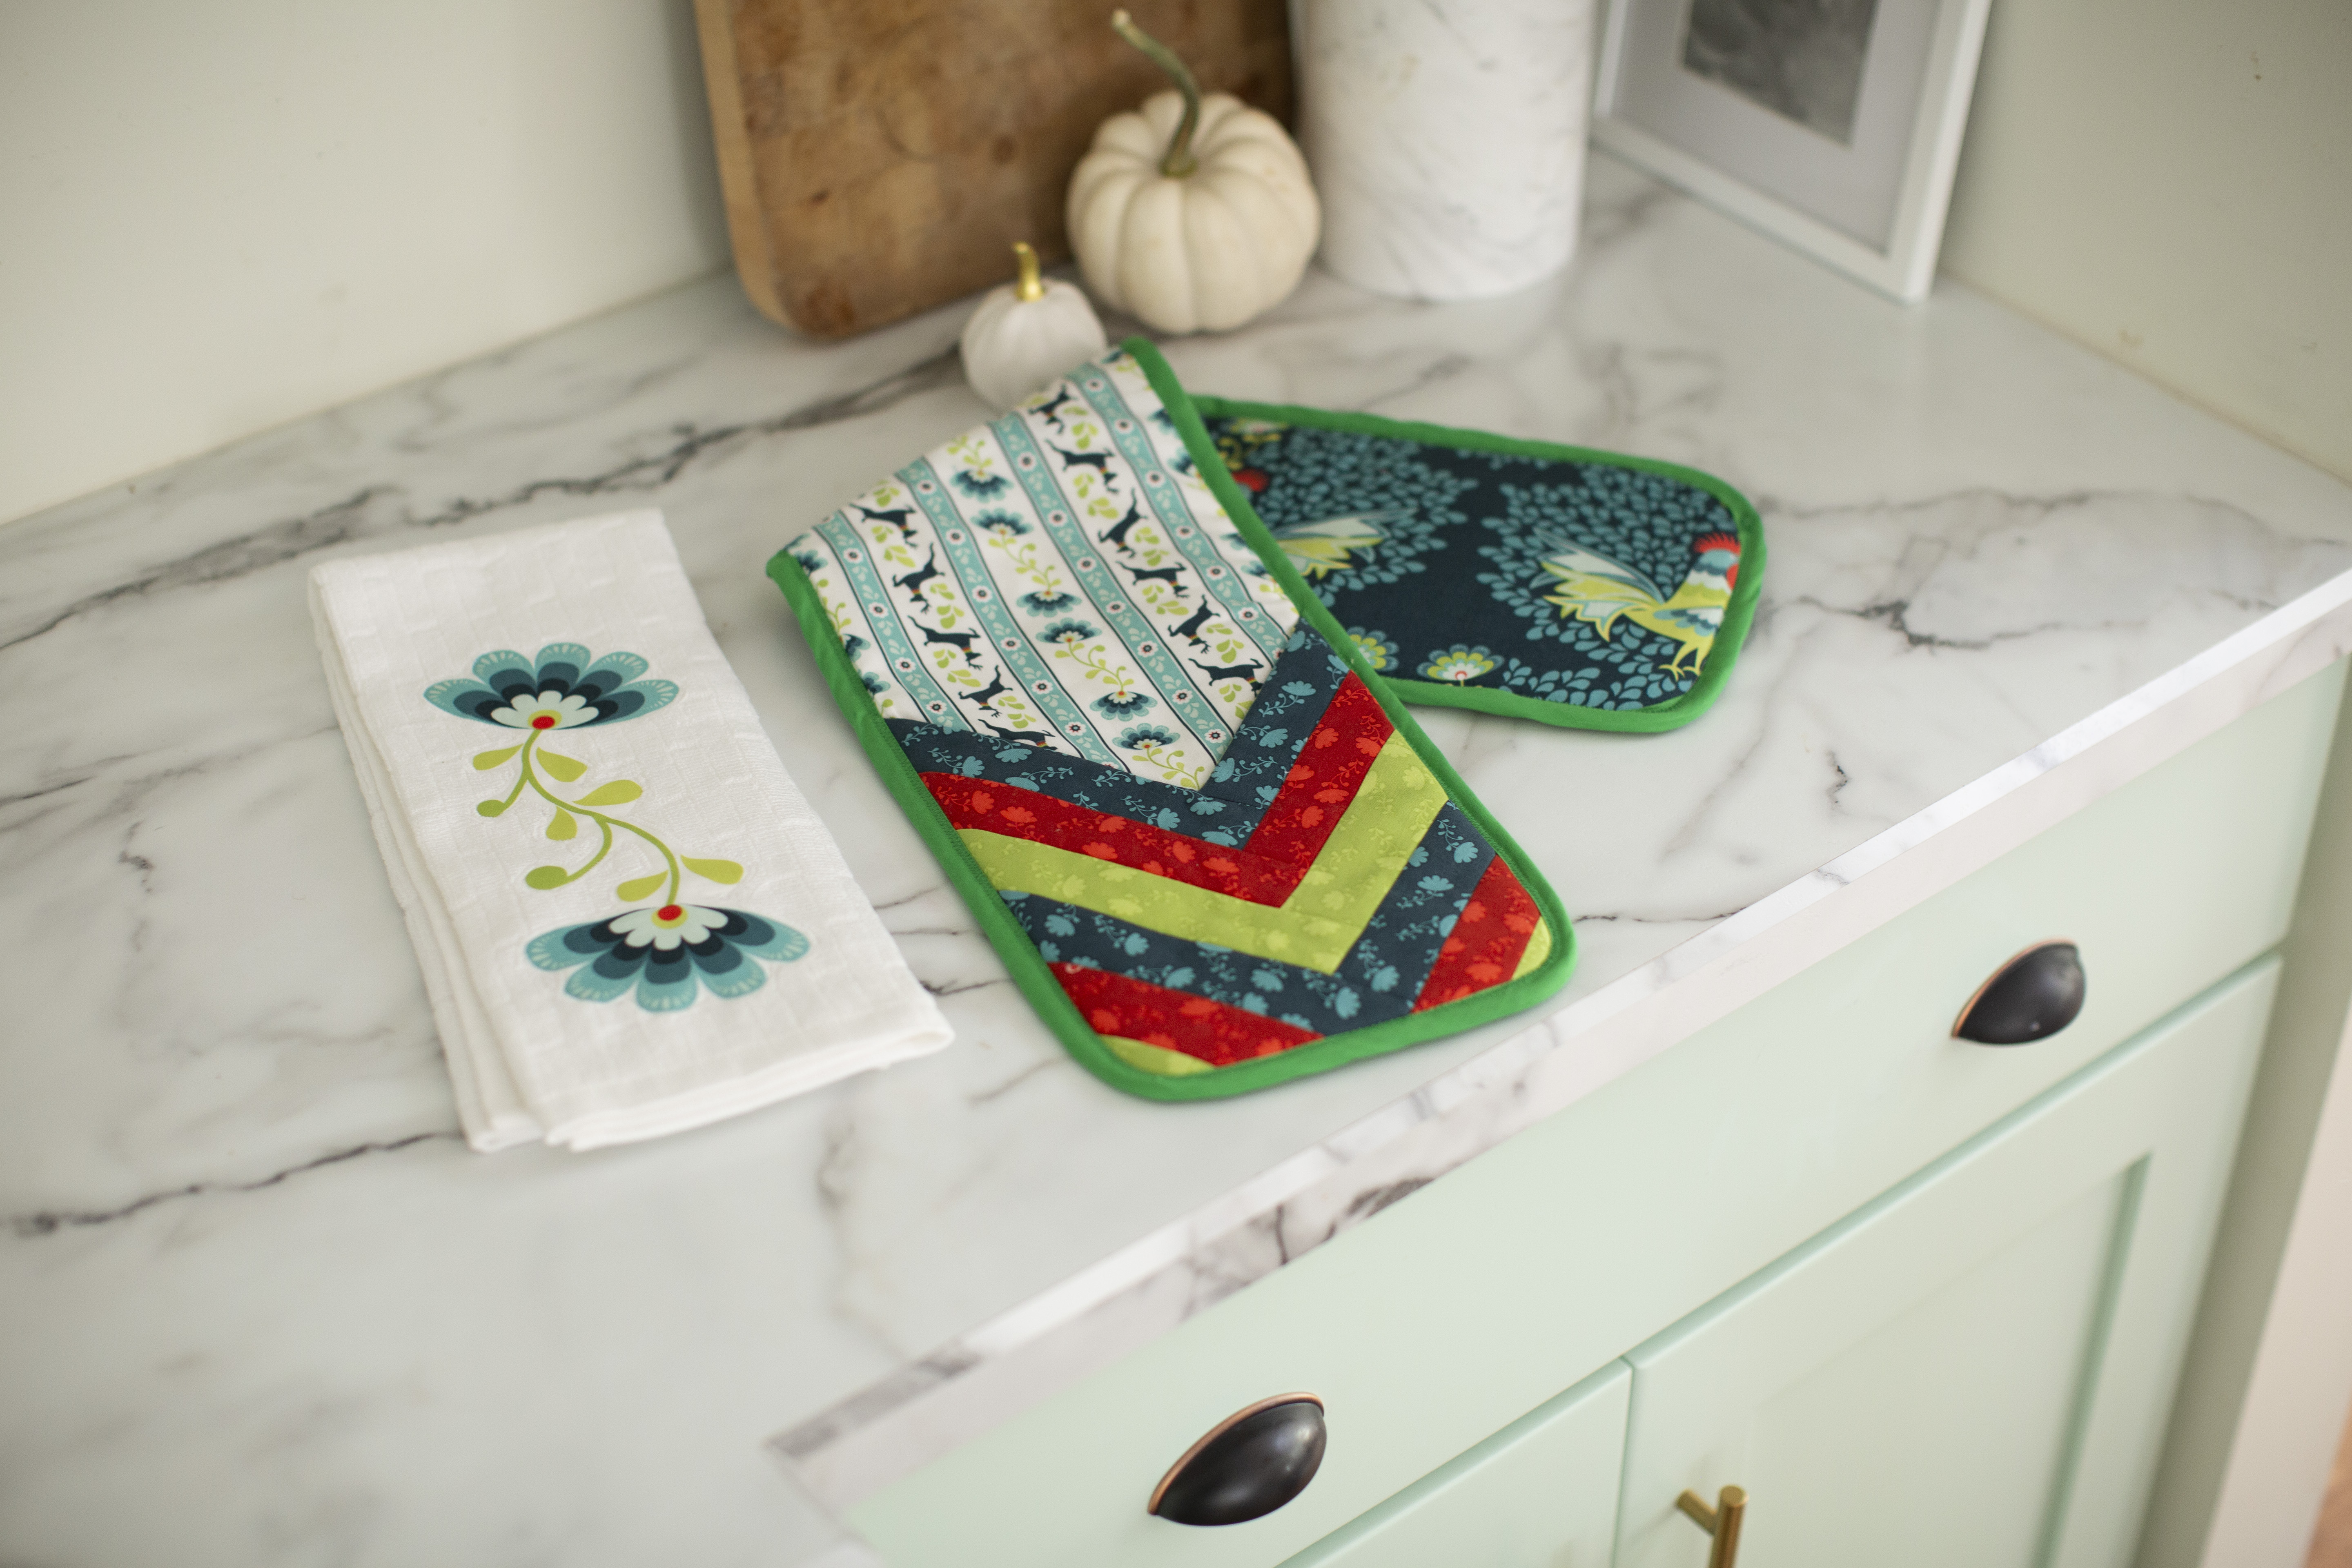
This two-handed potholder is perfect for taking a fresh tray of baked cookies out of your oven. Use your quilting machine to create this fun herringbone design and then use your embroidery machine to make a matching tea towel. Download printable instructions.
Materials:
- ¼-yard of two non-directional fabric prints for front and back of pot holder. If using directional fabrics allow for 30" (linear) of each print.
- Fat quarters of three non-directional prints for herringbone design.
- 1/4 yard of quilt batting
- 1/4 yard of insulated batting like The Warm Company Insul-Bright®
- Three yards (or one package) of pre-made 1/2" Double Fold Bias Tape in coordinating color
- Coordinating thread
- One pre-purchased tea towel
- Scraps of fabric
Tools:
- Baby Lock Sewing and Quilting Machine
- Baby Lock Embroidery Machine
- Steam iron and ironing board
- Rotary cutter
- Non-slip ruler
- Self-healing mat
- Embroidery snips
Steps:
-
Potholder Instructions #1-24. Cut two pieces of fabric at 8" x 30" for the front & back of the pot holder.
-
Cut one piece of batting and 1 piece of insulated batting also at 8" x 30".
-
Cut two pieces of fabric at 8" x 10" for the “pocket" linings.
-
Cut two pieces of batting at 8" x 10" for the “pockets".
-
Cut eight strips of three different fabric prints at 1.5" wide x 7" long (for a total of 24 strips).
-
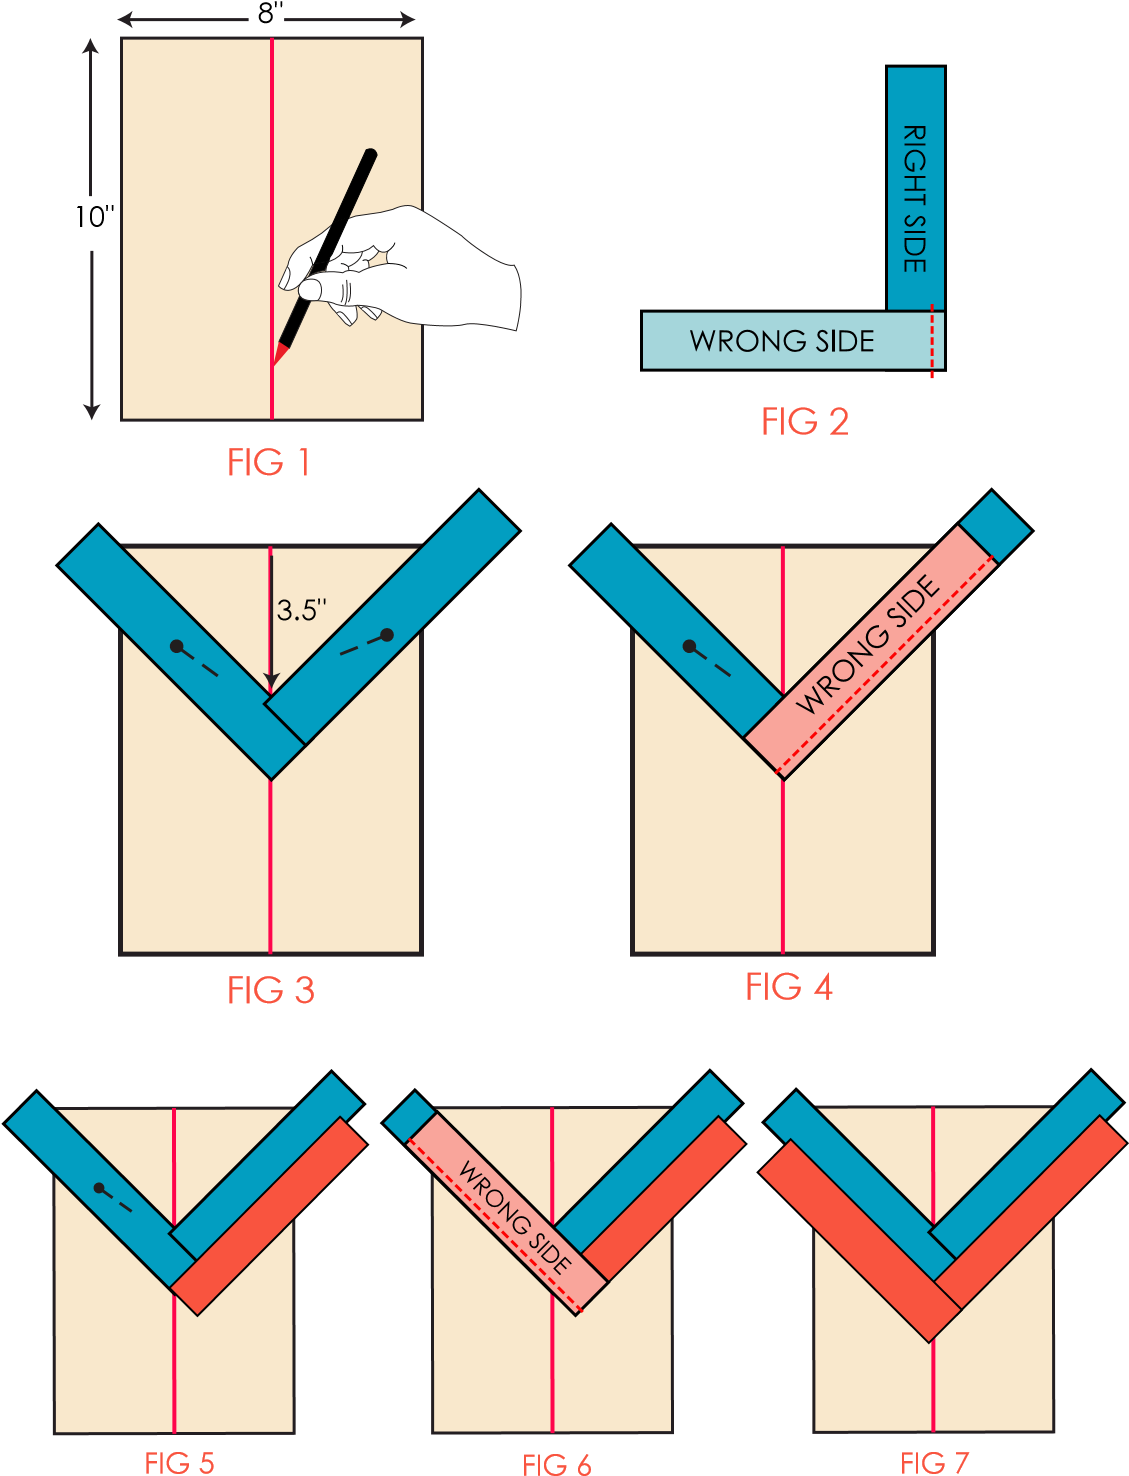
Using a ruler and a fabric marker draw a line down the center of each 8" x 10" batting piece dividing the 8" side in half fig. 1.
-
Take two fabric #1 strips.
-
Align one short end with the long side of the coordinating piece at a 90-degree angle.
-
Stitch the short end to the long side with a 1/4" seam allowance creating a V fig. 2.
-
Flip both strips right side up. Press the seam toward the right side of the V.
-
-
Align the top edges of this V with the top corners of the batting and the center point of the V with the drawn line on the batting.
-
The center point should be about 3.5" below the top edge of the batting. Pin in place fig. 3.
-
-
Align a color #2 strip with the long side of the V containing the seam right sides together.
-
Stitch along the long side through the layers and batting fig. 4.
-
Press open fig. 5.
-
-
Place a color #2 strip right sides together along the opposite side aligning the short end and long side.
-
Stitch along the long side fig. 6.
-
Press open fig. 7.
-
-
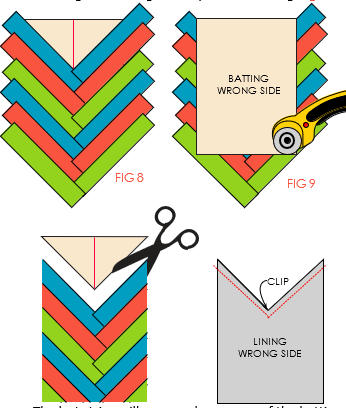
Continue repeating this pattern until all strips are sewn and the batting is covered.
-
The last strips will cover only a corner of the batting fig. 8.
-
-
Flip the finished piece wrong side up and trim the excess fabric along the batting edges creating a 8" x 10" front fig. 9.
-
Flip the piece right side up and trim off the excess batting at the V fig. 10.
-
Use this trimmed piece as a template for cutting the V off the lining piece.
-
Place the quilted front and the lining right sides together.
-
Stitch across the V at the top with a 1/4" seam allowance. Leave all other sides unstitched fig. 11.
-
Clip into the seam allowance at the point to reduce bulk then turn right side out pressing the top seam well.
-
-
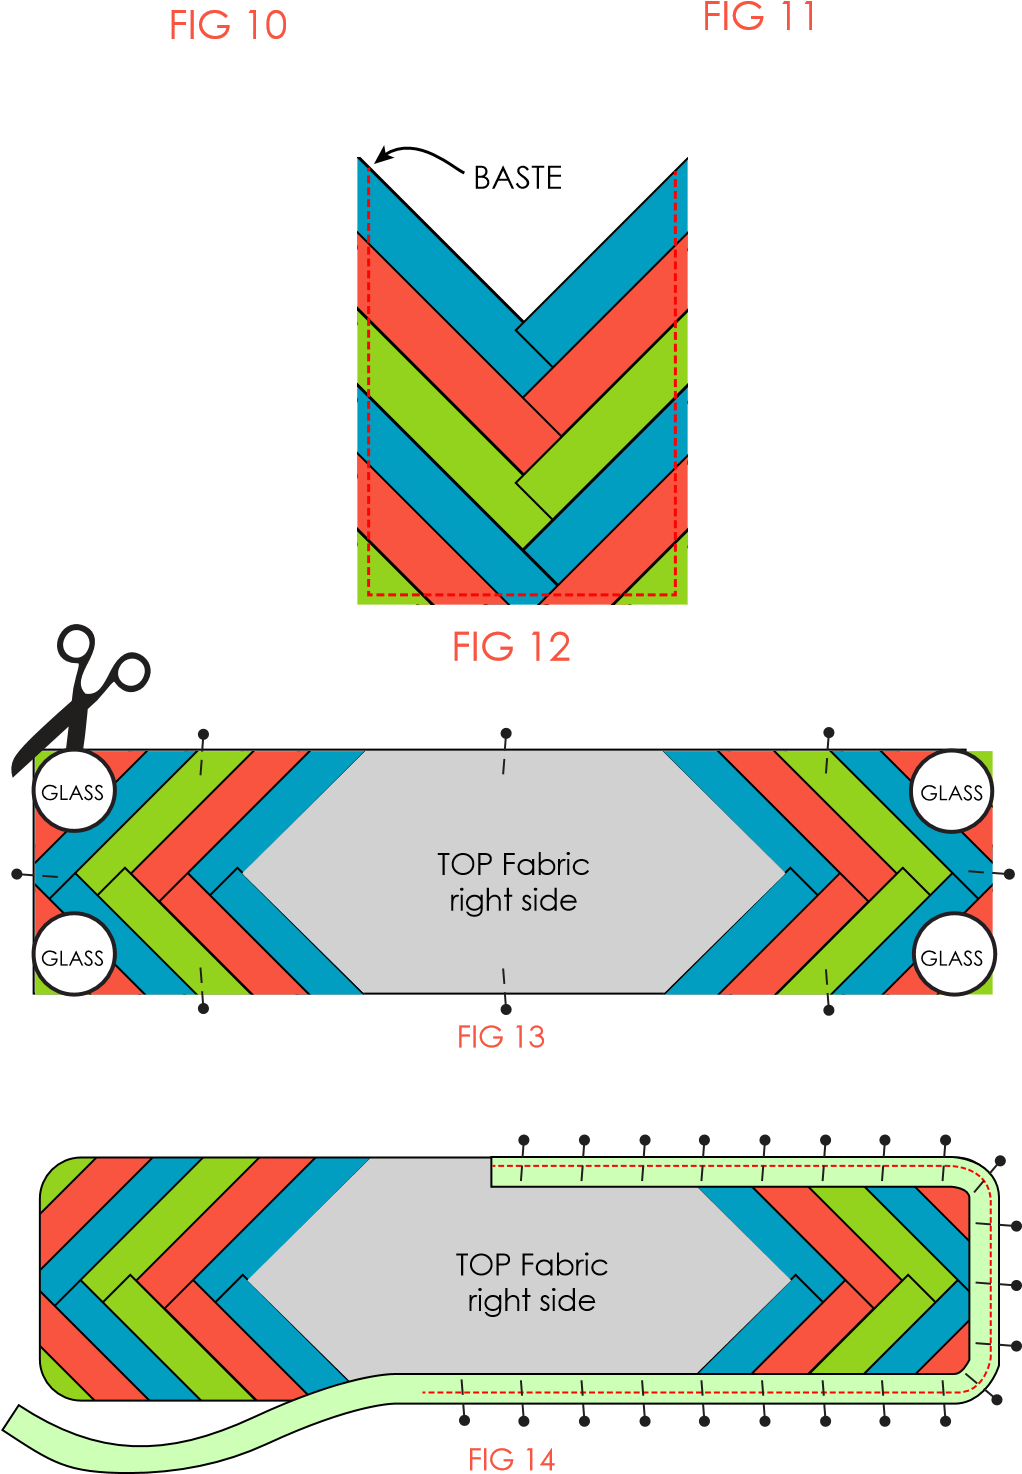
Baste along the other three sides close to the raw edge fig. 12.
-
Set aside and repeat all above steps for the second piece.
-
Once both pot holder pockets are finished layer all the pieces to get them ready for binding. The order should be:
-
Backing 8" x 30" piece - wrong side up
-
Insul-Bright®
-
Quilt Batting
-
Top 8" x 30" piece - right side up
-
Both “pockets" aligned at either end right side up with the V facing in toward each other
-
-
Pin the layers loosely and use a drinking glass as a template to round all four corners of the pot holder fig. 13.
-
Baste along all outer edges to keep the layers from shifting. I like using a zig-zag stitch for this because it flattens down some of the bulk.
-
Place the pre-made 1/2" double fold bias tape right sides together along the edges of the pot-holder and pin or clip all around.
-
Overlap or seam the edges at the end as preferred.
-
-
Stitch the bias tape to the pot holder along the crease closest to the outer edge fig. 14.
-
Fold the rest of the bias tape toward the back side of the pot holder encasing all raw edges and pin in place.
-
Topstitch the bias tape from the front side making sure to catch the edge of the bias tape on the back side.
-
Tip: Since there are so many layers involved and the binding tends to shift easily I found that topstitching with a zigzag stitch has a better chance of catching the back edge.
-
-
Embellished Tea Towel Instructions #25-29: Use embroidery snips to fussy cut 1/4" (or more as desired) around fabric design.
-
TIP: Make sure you wash and dry both the towel and the fabric before beginning as they might shrink at different rates later and the appliqué might end up puffy or stretched out.
-
Use a fabric glue stick to loosely adhere your fabric design to the tea towel. It is easier than using pins and you can easily reposition it to get the perfect look.
-
Stitch the design on using a zig-zag stitch on the sewing machine.
-
If desired embellish the edges of the towel with decorative ribbon or lace.


