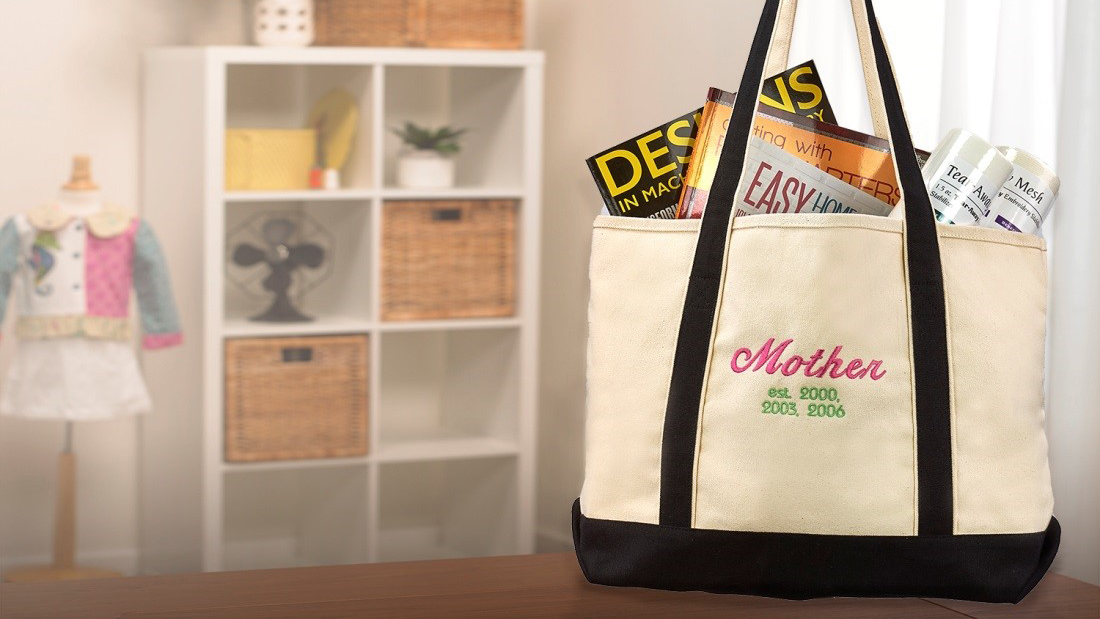
Trying to think of a fun creative and heartfelt way to celebrate mom on Mother’s Day? Embroider a tote bag for her! This personalized carry-all can utilize your embroidery machine’s lettering skills to customize mom’s name and add her children’s names or their birth years. This simple embroidery project that incorporates an already-made tote is sure to become a treasured keepsake. Download printable instructions.
Materials:
- 1 blank tote bag
- Durkee frame for the Valiant
- Madeira embroidery thread
- Placement stickers
- Rotary cutter and mat
- Basic sewing supplies
Tools:
- Baby Lock Valiant embroidery Machine - Model# BMV10
- Baby Lock Palette Digitizing Software - Model# ECS10
- Baby Lock Stick-Tear tear-away stabilizer - Model# BLT102
Steps:
-
Open the Palette software program.
-
Select the Text icon.
-
Select a Script font.
-
Set the size of the font to 20mm.
-
Select the thread color to pink.
-
Select Not Sewn for an outline.
-
Refer to the illustration above for the settings.
-
Type “Mother” or “Mom.”
-
-
To create the years of birth for her children follow the next set of steps:
-
Click on Text.
-
Use the same font as for the first line.
-
Set the size to 8mm.
-
Change the thread color to green.
-
Select Satin Stitch for the stitch.
-
Click on the workspace and type in “est." (lower case) and the years. When you want to use more than one line of text hold down the Ctrl key and hit enter.
-
-
Resize the letters as needed.
-
Place the design in the center of the hoop.
-
Save the design and send to the machine for embroidery.
-
Select the hoop that will be needed for embroidery.
-
Cut a piece of stabilizer slightly larger than the chosen hoop. Peel off the shiny side to expose the sticky side of the stabilizer.
-
Be sure that the hoop is large enough so that the needle will not hit the side of the Durkee frame. This could damage your machine.
-
-
Press the sticky side of the stabilizer to the backside of the hoop. The sticky side will be facing up. Set aside.
-
Place a placement sticker centered on the front of the bag where the embroidery will be placed.
-
Slide the hoop inside the bag so that the placement sticker is close to center in the hoop. Press the bag to the hoop until it is secured.
-
With the machine on place the hoop on the bracket and attach to the arm of the machine. Tighten the screws to secure the frame to the machine.
-
Click on the placement sticker icon. The machine will scan the area and automatically reposition the design into the correct orientation and angle.
-
Embroider the design.
-
Remove the hoop from the machine and remove the bag from the stabilizer.


