
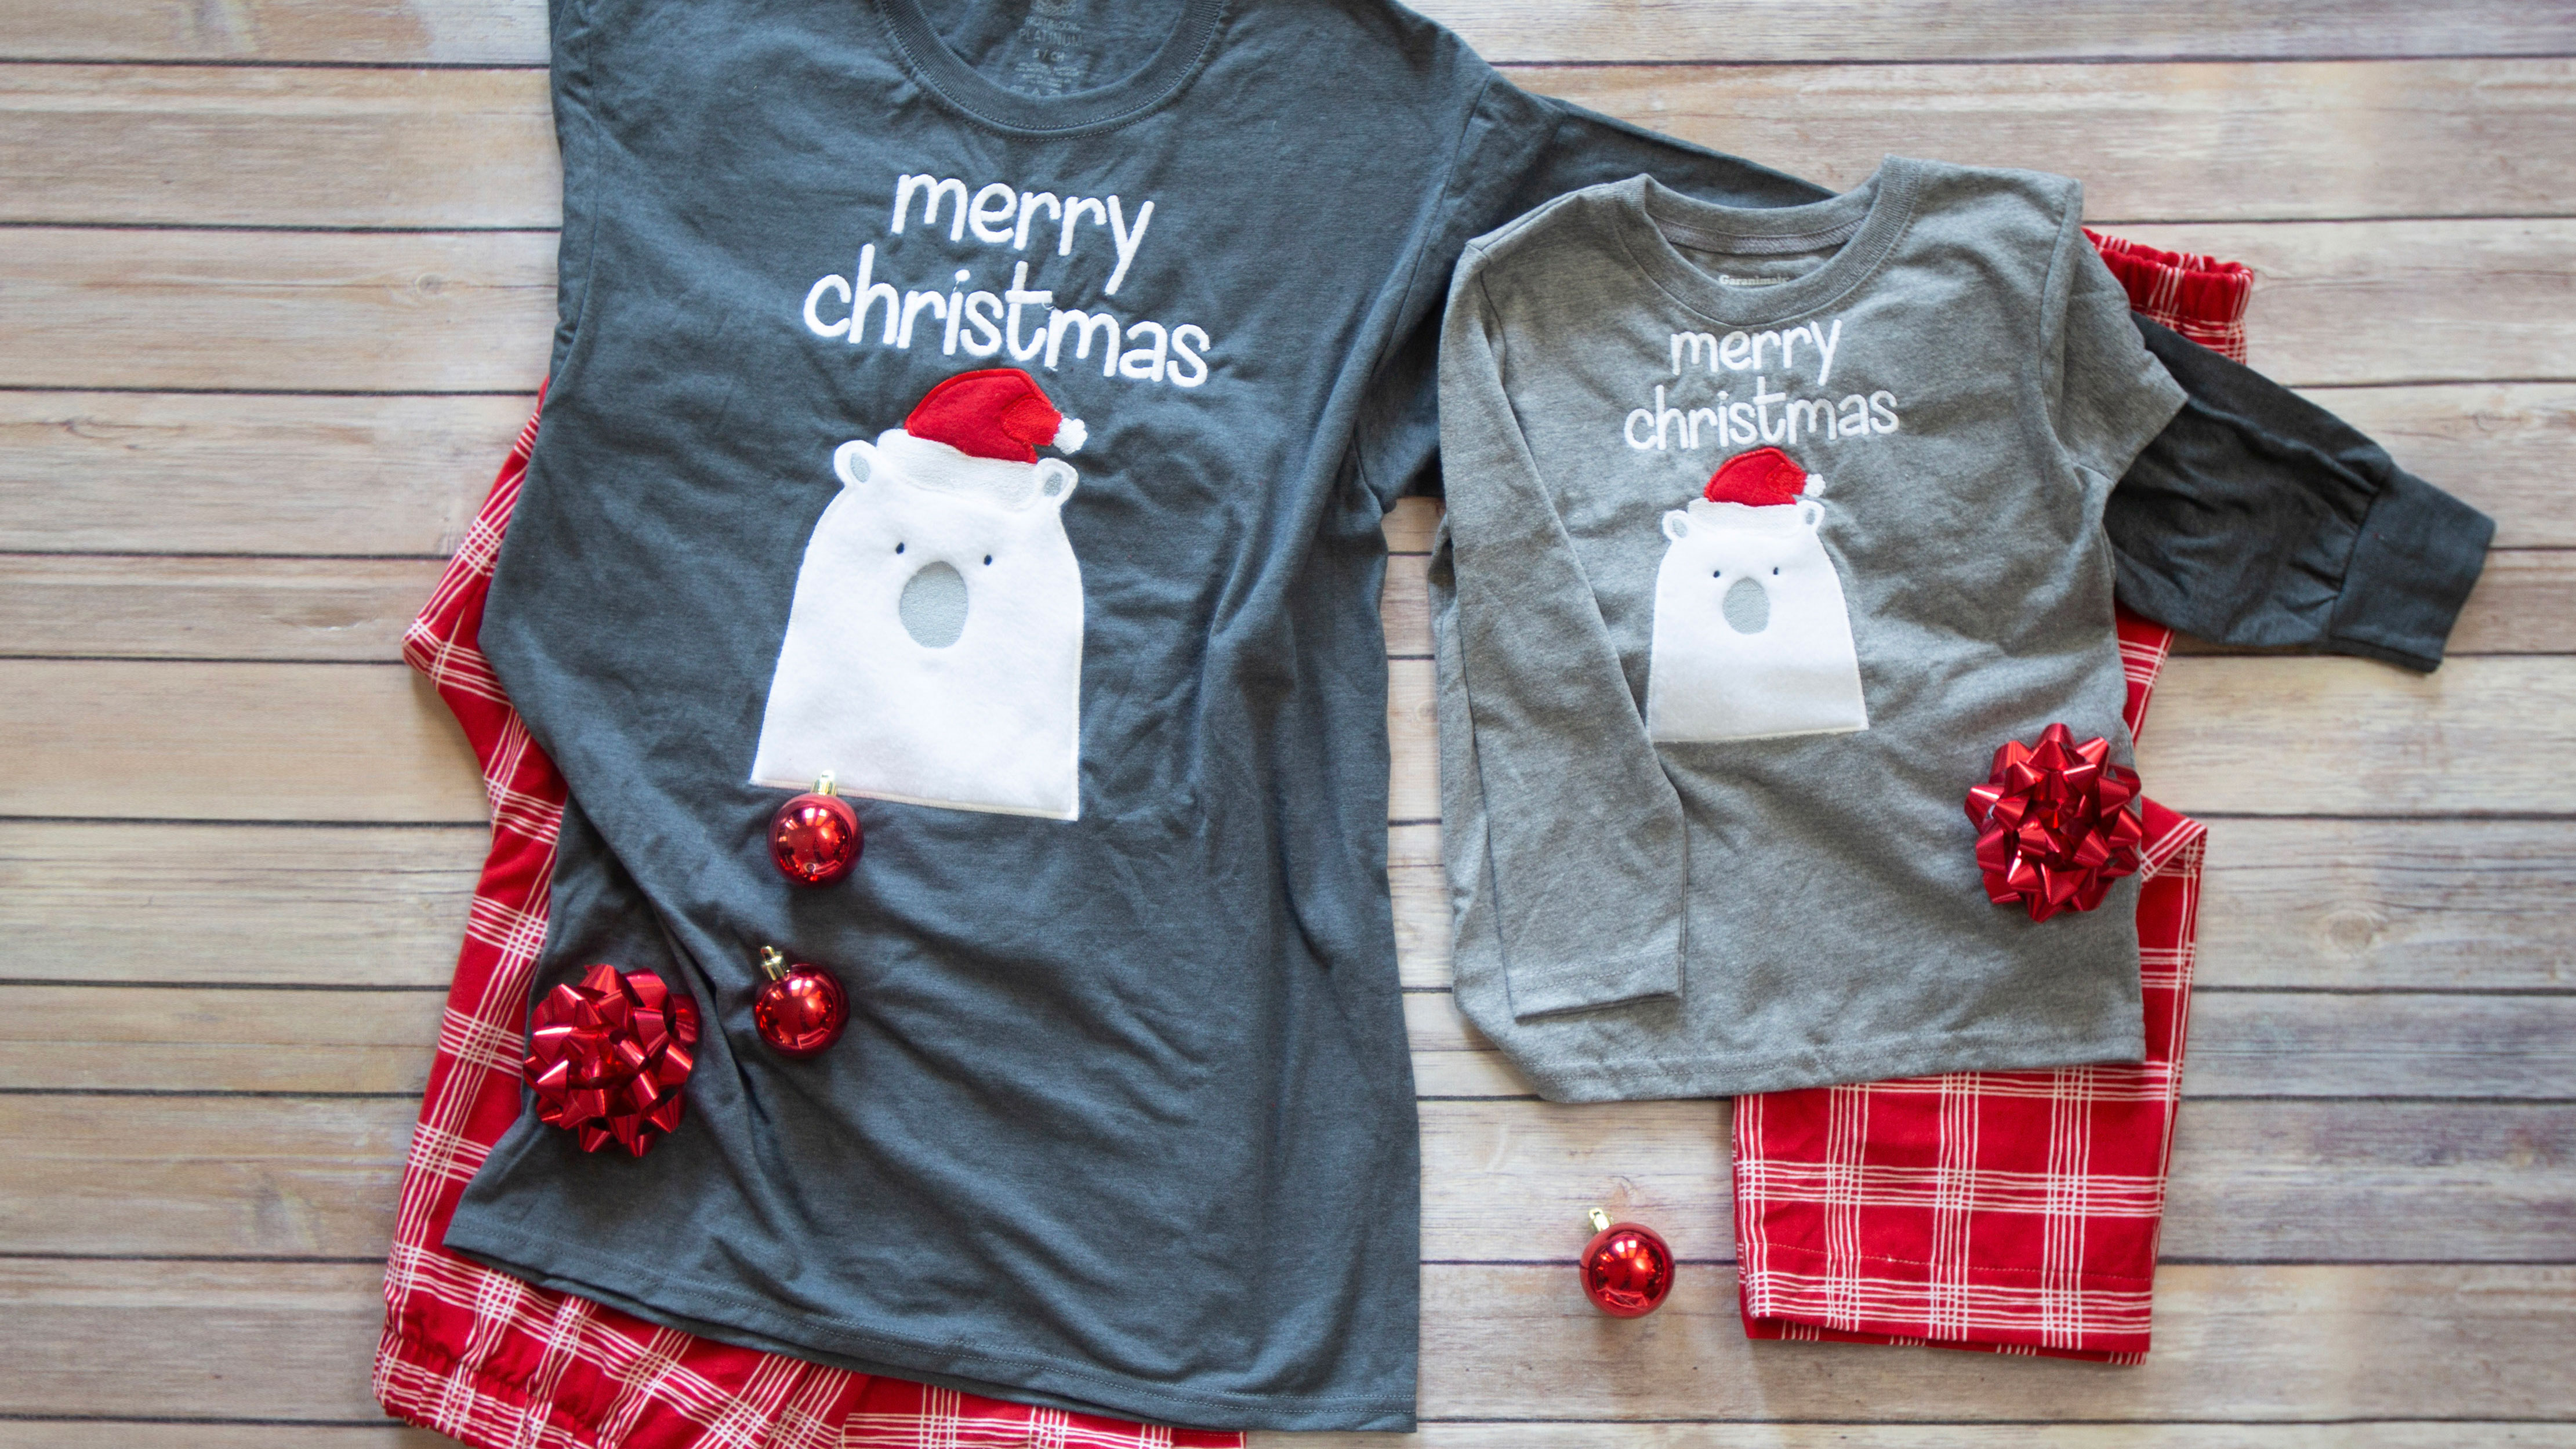
Holiday pajamas are so cute and popular so why not make matching ones for everyone in your family! These embroidered polar bear jammies can be made for adults and children and are perfect for a Christmas card photo! Download instructions. Download adult-size applique.. Download child-size applique.
Materials:
- Purchased t-shirt
- 8"x9" white polar fleece for adult 6"x6" for child
- 5"x4" red flannel for adult 3"x3" for child
- 1 yard lightweight heat and bond for adult 1/2 yard for child
- White red gray pink and black Madeira embroidery thread
- Iron-on poly-mesh
- Tear away stabilizer
- Simplicity Pattern 2290 (or other one pattern piece pants pattern)
- Material yardage as suggested by pattern
- Elastic as suggested by pattern
- Matching thread
Tools:
- Baby Lock Embroidery machine
- Baby Lock Serger
Steps:
-
Prepare t-shirt for embroidery
-
Turn t-shirt inside out and Iron on fusible poly-mesh to inside front of t-shirt
-
Hoop t-shirt with tear-away stabilizer
-
Place hoop in machine
-
-
Embroidery:
-
Embroider color 1: “merry christmas”
-
Embroider color 2: placement line for red cap
-
Center red flannel over placement line
-
Embroider color 3 and sew down line
-
Trim away excess
-
Embroider color 4 satin stitch outline and the completed hat
-
Color placement line for Polar Bear
-
Center polar fleece on placement line and sew Color 7 the sew-down line for polar bear. Trim to sew down line.
-
Sew color 7 satin stitch hat band and ball
-
Sew color 8 ears
-
Sew color 9 nose
-
Sew color 10 eyes
-
-
For the pajamas:
-
Prepare your serger for a 4-thread overlock stitch.
-
Use needle positions 01 and 02 and set the stitch length to 2.75 and the stitch width to 6.5
-
Cut out the fabric according to pattern instructions.
-
For each leg piece put right sides together and pin. Serge along the straight seam on the inner leg.
-
Place one leg inside the other right sides together. Stitch crotch seam.
-
Turn one leg inside out. Slide one leg inside right sides together. Once leg is inside other turn to expose crotch seam and serge.
-
Measure waist and cut elastic to size. Divide elastic into quarters and mark. Mark waist of pants as well.
-
Serge elastic ends together right sides together creating a circle of elastic.
-
Mark center front and center back of pants.
-
Serge elastic to top outside edge of pants.
-
Stretch elastic as you serge so that the quarter marks match the center back and center front marks and side seams.
-
Pin hem.
-
Serge around top of raw edge
-
Cover stitch or use sewing machine to stitch hem in place.
-
*Note: you may use seams-great to sharpen your hemline. Simply iron to wrong side of hem turn up and wobble stitch.
-


