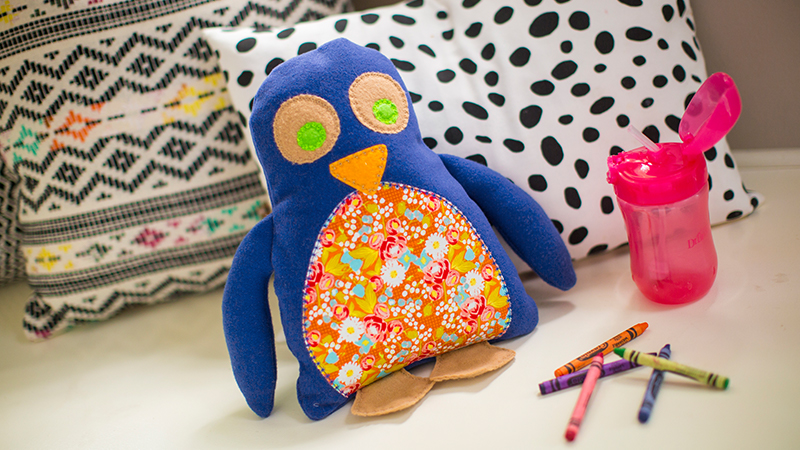
Looking to make a cute penguin plushie for a little one in your life? In Amy Struckmeyer’s book A Bit of Appliqué she walks you through how to easily use machine applique to create this fun stuffed animal project. Download printable instructions.
Materials:
- A Bit of Appliqué book by Amy Struckmeyer
- Blue wool felt for main sections of the body
- Beige orange and green felt for body parts
- 1 small scrap of cotton print fabric for chest section
- Fusible web (Steam-a-Seam II)
- Fiber fill
- Universal 80/12 needle
- Madeira® Cotona thread for sewing
- Basic sewing supplies
Tools:
Steps:
-
Follow the directions found on page 66 of the A Bit of Appliqué book by Amy Struckmeyer. Read all directions before you begin.
-
Set up the machine for sewing.
-
Before you start any new project always change the needle. In this project an 80/12 Universal needle was used. Insert a new needle.
-
Wind a bobbin following the directions found on page B-13.
-
Thread the machine with the Madeira Cotona thread that will match or coordinate with the different fabrics.
-
Work through steps 1-3 from the instruction book.
-
Adjust the tension as needed.
-
-
To apply the appliqué stitches around the shapes select a decorative stitch as shown on page S-41 in the manual.
-
In the sample decorative stitch 3-06 was used.
-
For best results use the “N” foot.
-
Go at a slow steady pace while working your way around the appliquéd sections.
-
Tip: Sew on a sample piece of fabric using the same fabric that will be used in the penguin.
-
Adjust the tension as needed.
-
Once the settings are made and the stitch looks great go ahead and stitch on the real thing.
-
Appliqué all of the body parts to the penguin front section.
-
-
Continue with the Assembling the Penguin Steps 1-4 to finish the penguin.
-
Stuff the penguin with the fiber fill. Hand-sew the opening closed.


