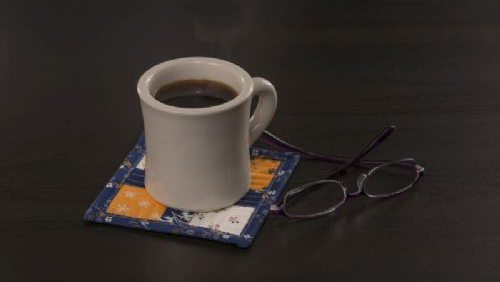
Mug rugs are coasters that add a special touch to your home or office while protecting your furniture. Blend colors or use solids to match your décor while using the Baby Lock Presto 2 Sewing and Quilting machine. Download printable instructions.
Materials:
- 1 Jelly Roll of assorted prints
- 1 Colored fat quarter to coordinate with the Jelly Roll fabric for the backing
- Batting
- Madeira® Cotona Sewing and Quilting threads
- White bobbin thread
Tools:
Steps:
-
To make four mug rugs cut the following:
-
Cut 16 assorted 2 ½” squares from the Jelly Roll fabric.
-
Cut eight 2 ½” x 1 ½” from the Jelly Roll fabric for the short sashing sections.
-
Cut eight 5 ½” x 1 ½” from the Jelly Roll fabric for the long sashing sections.
-
For the binding use two Jelly Roll sections.
-
From the backing cut four sections 2” larger around than the mug rugs section.
-
-
Turn on the machine as set up the machine by following the next set of steps:
-
Select the center needle straight stitch position stitch.
-
Wind the bobbin.
-
Thread the machine with the Madeira Cotona Cotton thread.
-
Attach the “J” foot.
-
-
With right sides together place the 2 ½” x 1 ½” sashing section on top of the 2 ½” square section.
-
Place the edge of the two sections under the presser foot with the right side of the presser foot even with the raw edge of the unit.
-
Sew the two sections together.
-
-
Press the seam toward the sashing section.
-
Place another 2 ½” square on the opposite side of the sashing section. Sew the sections together. Create eight units.
-
To create one completed section of four units follow the next set of steps:
-
Place the long sashing section by the long side of the two-part section and sew together while placing the right edge of the foot along the raw edge of the unit.
-
Press the seam allowance towards the center.
-
-
Sew together another two piece unit to the opposite side of the sashing. Press toward the sashing. Trim as needed. Create four units.
-
Create a sandwich with the backing batting and pieced unit.
-
Quilt the layers together by sewing rows of stitching on the front side of the mug rugs.
-
Trim the unit as needed.
-
To bind the Mug rugs follow the next set of steps:
-
On the binding strips cut them down to 2 ¼” wide.
-
Fold the strip in half and press.
-
To create a 45˚ angle fold on one of the ends in. Press.
-
Place the binding on the back side of the rug mug . Pin in place.
-
Place the unit under the presser foot with the raw edge is even with the right side of the presser foot.
-
Start to sew approximately 1” from the turned down section on the binding. Stop sewing and cut the thread when you get ¼” from the corner.
-
Take the binding strip and fold the strip up and away from the mug rug to creating a 45˚ angle.
-
Fold the strip down while aligning the raw edges on the binding with the raw edge on the mug rug.
-
Sew this side of the mug rug. When you get to the next corner stop ¼” from the corner and follow the directions as above to create the 45˚ corner.
-
Continue in this manner until you have turned the last corner.
-
Trim the end of the binding so that it fits inside the starting point of the binding.
-
Tuck the ending point of the binding inside the starting point on the binding and pin in place.
-
Finish by sewing the last side of the binding in place.
-
Press the binding to the front of the mug rug.
-
Pin the binding to the font side of the mug rug forming a nice 45˚ corners.
-
Topstitch close to the binding edge to secure.
-


