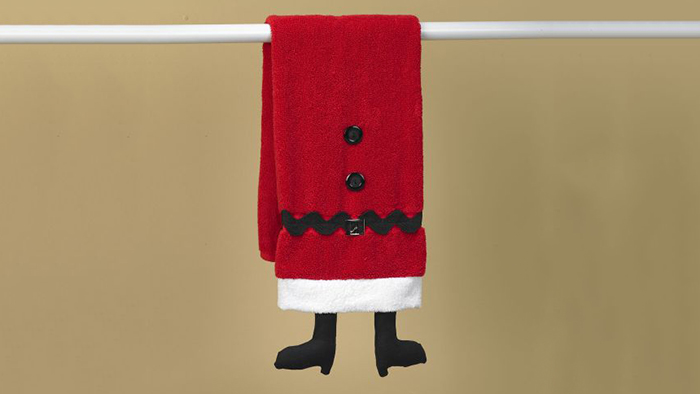
Add a little whimsy this Christmas with this fun Santa hand towel! Perfect for the kitchen or bathroom your guests will admire its clever design. You can even make one for a hostess gift for the next party you attend. Download the template and printable instructions here.
Materials:
- 4 Spools Maxi-Lock serger thread (optional)
- All-purpose thread
- Red terry cloth dish towel
- 1/8 yard white terry cloth
- Black fat quarter
- 1/2 yard jumbo rick rack
- 2 large black buttons
- Small doll or purse buckle
- Bamboo stiletto
- Stuffing
- Scissors
- All-purpose thread to match fabrics
- Rotary cutter mat and ruler
Tools:
- Baby Lock sewing machine
- Baby Lock serger (optional)
Steps:
-
First cut the pieces you will need for this project. Using the attached pattern cut 4 Santa shoes from the black fabric. Cut 4-2” x 3” pieces for the legs.
-
Match raw edges of the 2” side of the leg to the top of the shoe. Wrong sides together and using a scant 1/4” seam attach one leg to each of the shoes.
-
Press seams open. Wrong sides together and using a scant 1/4 – 1/8” seam sew two leg pieces together creating two legs. Leave the top of the leg open for turning and stuffing.
-
Trim the corners and clip the curves. Turn right side out and lightly press. Use stiletto to push the edges of the shoe out.
-
Cut a piece of the white terrycloth 4 1/2” x width of your towel+1”
-
Hem the short ends of the terry cloth but folding the ends ½” and straight stitch.
-
Fold in half lengthwise and stitch or serge the raw edges to the towel edge with right sides together.
-
Pin rick rack on top of the woven border on the towel (approximately 3” up from the edge if your towel does not have a border).
-
Fold under the raw ends of the rick rack at the edges of the towel. Using a straight stitch sew in place.
-
Sew the buckle on the rick rack.
-
Sew the buttons on to the center of the towel just over Santa’s rick rack belt.
-
Stuff the legs with stuffing. Use the stiletto to push stuffing down into the toe and heel of the shoe.
-
Fold under 1/4” at the top of the leg and pin to the bottom of the towel. Stitch along the folded edge of the leg and again 1/4” from the folded edge.


