
The Baby Lock Solaris Vision includes filled yarn couching letters. These can be used as letters or combined together to create fun designs. Think of using them as shapes and your world will open up to how you can use these designs to create more of a punch needle embroidery look for your embroidery projects.
CLICK HERE TO DOWNLOAD PRINTABLE INSTRUCTIONS WITH ADDITIONAL PHOTOS.
Supplies
- Baby Lock® Solaris Vision or Solaris with Upgrade 3 sewing and embroidery machine
- Embroidery Couching Foot (Y Foot) and EC Yarn Guide
- Thread Stand
- 10 5/8” X 16” Hoop or appropriate hoop for the number of letters/numbers
- For this project the DIME Magnetic Hoop was used for ease in hooping the jean jacket
- Multiple colors of yarn for Couching
- Large Tapestry Needle
- Baby Lock Tear-Away Stabilizer BLT103
- Jean Jacket
- Madeira® Rayon/Polyester thread to match fabric & embroidery bobbin
Instructions
Combining letters together to create designs can be a lot of fun. The editing tools help you to rotate resize recolor and re-sequence the designs to help you optimize you stitching.
Setting up the Machine for Yarn Couching
- Set the machine up for Embroidery Couching. Use the Built in Video for assistance with properly setting up the machine for yarn couching and calibrating the Y foot!
- You will want to use the thread stand as well and will need to help manage your yarn as this is stitching.
- One suggestion when you start to stitch is to turn off the End Trim color to assist with managing the yarn with multiple designs.
Selecting the Embroidery Design
- Select Embroidery.
- Open Category C for Couching Designs.
- Select Tab 2 with the Fill letters. Choose the letter of choice and touch Set.
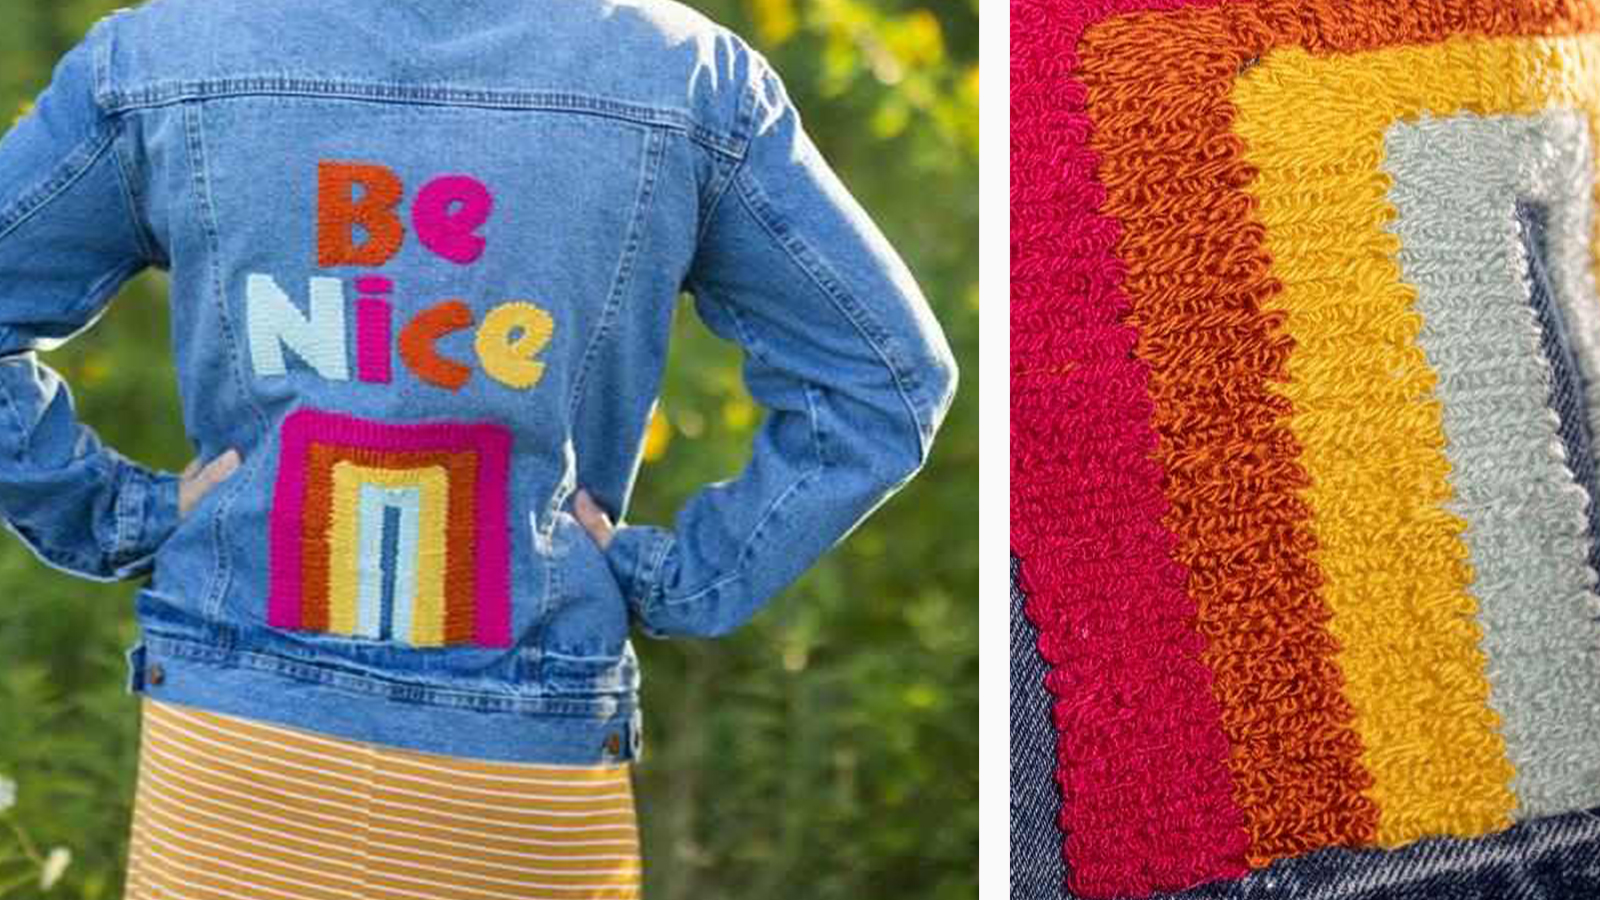
- For this design the letters “J” “I” “j” “i” were used to create the rainbow.
- Select Add and go back to the Couching category and select the next letters.
- Letters can be duplicated on the Embroidery Editing Screen if needed.
- Please note: Couching designs can’t be combined with other embroidery designs but can be combined with other couching designs.
- To get a better sense of how this design was layer to create this design use this link to watch a quick video of the stitch simulator with this design.
- Here are the letters used to create the various rungs of the boho rainbow:
- Blue – i j j i (all lowercase)
- Yellow- I J J I (all uppercase)
- Orange- I J I J I (all uppercase)
- Hot Pink- I J I I I (all uppercase)
- This design will need to be edited using the Edit tools.
- Many of the letters were mirrored or rotated to optimize the stitch order. Please note: This does not always work on an entire design but anything you can do to eliminate extra yarn tails to bury is preferred.
- Letters were also resized or overlapped to fit into the needed spaces. The Yarn couching can stitch over itself without issues.
- Also the colors of this design could be changed using the Color Key to coordinate the sections together to make it easier when stitching out the design.
- Please note for this design you will note that the tops of the lowercase i and j were changed to a different color. These were skipped during the stitching as they were not needed and would just add extra stitching to the design.
- Position the designs on the Embroidery Editing Screen to make the rainbow shape.
- Use the Re-sequence key as needed to get the designs to stitch.
- The Stitch Simulator Preview on the Solaris Vision helps to view how the design is going to stitch out as you are laying out rotating and re-sequencing parts of the design.
- Once you have the rainbow created save the design to memory.
- Select Add and go back to the Couching category and select the letters to create the “Be Nice”.
- Place those letters around the rainbow.
- Once you have the design as you like again update the colors and then save the overall design.
- Touch Embroidery
- At this point you should be ready to stitch out the design.
- For this project the jean jacket was hooped with the tear-away stabilizer using the DIME magnetic Hoop. You could use the Baby Lock Magnetic Hoops or float your stabilizer and secure the jacket with pins or temporary adhesive spray.
- Please note that the Baste stitch is not available with the yarn couching designs.
- Be sure to leave a long thread tail at the beginning and end of the letter to pull to the back of the vinyl when embroidery is completed.
- Once you have completed stitching out the design remove the jacket from the hoop and trim away any excess stabilizer from the back.
- Using a large tapestry needle take the long tails to the back of the vinyl. If this is a challenge you can also bury it into the letters to secure and then trim the excess yarn.
- Your jacket should be ready to go at this point!!!


