
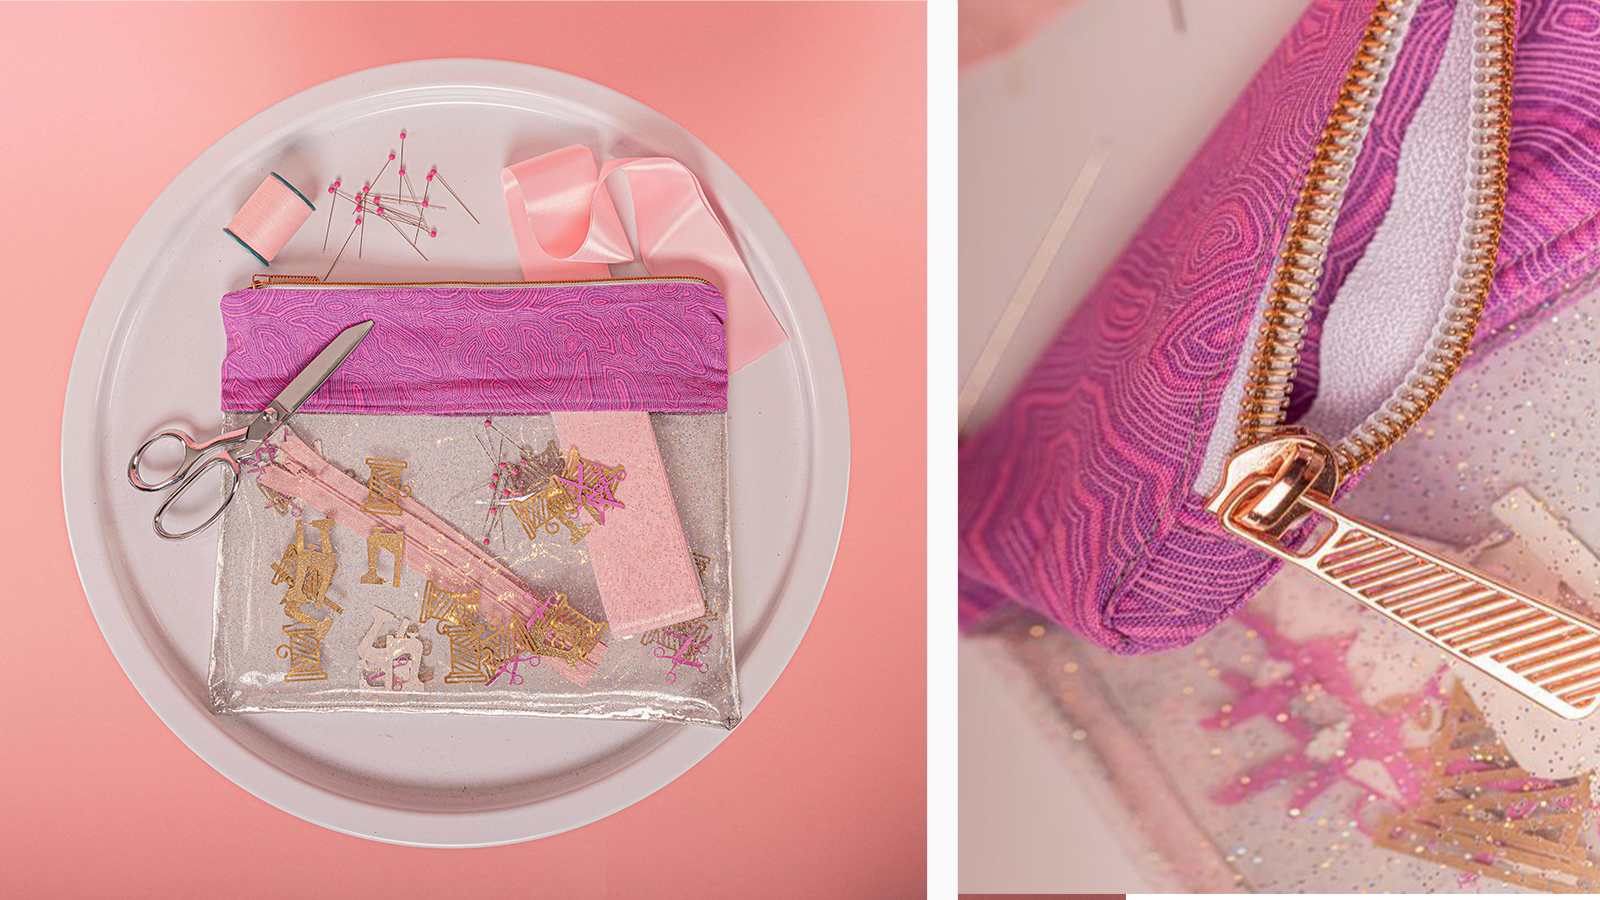
Jazz up a zipper bag using clear vinyl and your favorite confetti! Using your sewing machine and teflon foot you can easily create this fun bag that’s perfect for holding notions makeup or other items.
CLICK HERE TO DOWNLOAD PRINTABLE INSTRUCTIONS WITH ADDITIONAL PHOTOS.
Supplies
- Baby Lock Sewing or Quilting Machine
- 1 Cotton Fat Quarter
- Cut (2) 6.5” x 12.5” (Pieces A)
- Cut (2) 2” x 3” (Pieces B)
- (1) 18" x 48" roll clear 10 gauge vinyl
- Cut (4) 7.5” x 12.5” (Pieces C)
- 12” (or longer) coil zipper
- Polyester Sewing Thread
- Confetti
- Baby Lock Teflon Foot Zipper Foot J Foot
Instructions
Getting Creative
- Vinyl: You can choose a bigger/smaller gauge vinyl for a more relaxed or stiffer zipper bag!
- Interfacing: You can choose to line your fabric with interfacing for a more structured fabric top.
- Take one Piece A and fold in ¼” on each long side one at a time. Press. Repeat. Fold in half and press.
- Take one Piece B and fold in half meeting the short ends together. Press. Unfold and place each short end right on the middle seam. Press again. This creates a zipper tab for each end. Repeat.
- With Teflon foot attached take two Pieces C and place wrong sides together. On one long end sew a ¼” seam from end to end. Repeat with the other two Pieces C. This will be your guide!
- With J foot attached take one folded Piece A and meet each folded edge on the sewn ¼” seam of two Pieces C. Top stitch. Repeat with the other Piece A and two Pieces C. This will make each sides of your zipper bag.
- Take the two zipper tabs from Pieces B and sew them onto each end of your 12” zipper.
- With Zipper foot attached carefully top stitch each panel onto each side of the zipper tape as shown.
- Once zipper is attached fold the bag right sides together making sure to leave your zipper open so you can flip it right side out.
- With J foot attached sew from the bottom of the panels to the zipper of each side of the bag with a ¼” seam leaving the bottom open. Make sure to stop once you reach the zipper on each side!
- Place even amounts of confetti inside each bag panel.
- Sew the bottom of the bag trapping the confetti inside each panel. Flip right sides out! If you find that your vinyl got crinkled during this process you can use a hair dryer on high heat to relax the vinyl.
- Enjoy your bag!


