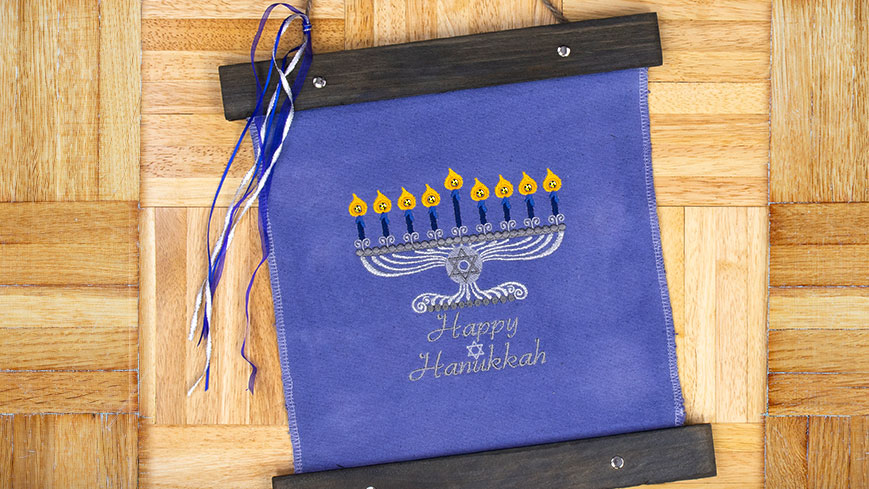
Quickly transform a blank hanging canvas with embroidery to create a fun wall hanging to celebrate the Festival of Lights. Perfect to add a bit of festivity when entertaining you’ll be able to create this décor in a snap! Download printable instructions.
Materials:
- Madeira embroidery thread in assorted blue gold and silver colors
- Baby Lock Stick-Tear Stabilizer (BLT102)
- Hanging Canvas embroidery blank 12” x 14” (JB1276)
- Amazing Designs Hanukkah design (ADC-251BBS133)
- Amazing Designs Happy Hanukkah Design (ADC-251BBS134)
- Basic sewing supplies
- Assorted Ribbons
- OPTIONAL: Rit Brand fabric dye in royal blue disposable gloves container to dye fabric disposable foam brush
Tools:
- Baby Lock Embroidery machine
Steps:
-
Optional Steps for Dying the Canvas:
-
Cover work area with plastic table cover and have paper towels handy to protect against any possible spills.
-
Read and follow the manufacturer’s directions for best practices of mixing and applying the dye.
-
Wearing rubber gloves use a disposable foam brush to apply the dye across the fabric in even strokes.
-
Allow the dye to set for 20 minutes. Wash in warm water rinse and dry.
-
To further set the dye use a hot steam iron. Sandwich the treated area between two clean cloth pieces or paper towels then press.
-
If the canvas comes out too light repeat the spot dyeing process.
-
The canvas must be completely dry before proceeding to your embroidery machine to prevent possible staining of the machine.
-
-
Set up your machine for embroidery mode.
-
Purchase and download the Hanukkah designs from Amazing designs or use your favorite special occasion design.
-
Transfer the design to your machine and select the first design. Add the second design to the first then size and edit the designs as desired.
-
Hoop your Baby Lock Stick-Tear stabilizer in the largest machine hoop. Stick the canvas banner to the stabilizer floating it above the hoop.
-
Attached hoop to the machine.
-
Use your trial settings to ensure design is aligned.
-
Thread machine with chosen color and stitch out your design following each color segment.
-
Once the embroidery is complete remove the hoop from the machine and remove the canvas banner from the hoop.
-
Remove the excess stabilizer from the back of the banner and trim any loose threads.
-
Embellish or accent the top of the banner with a few ribbons.


