Learn & Create
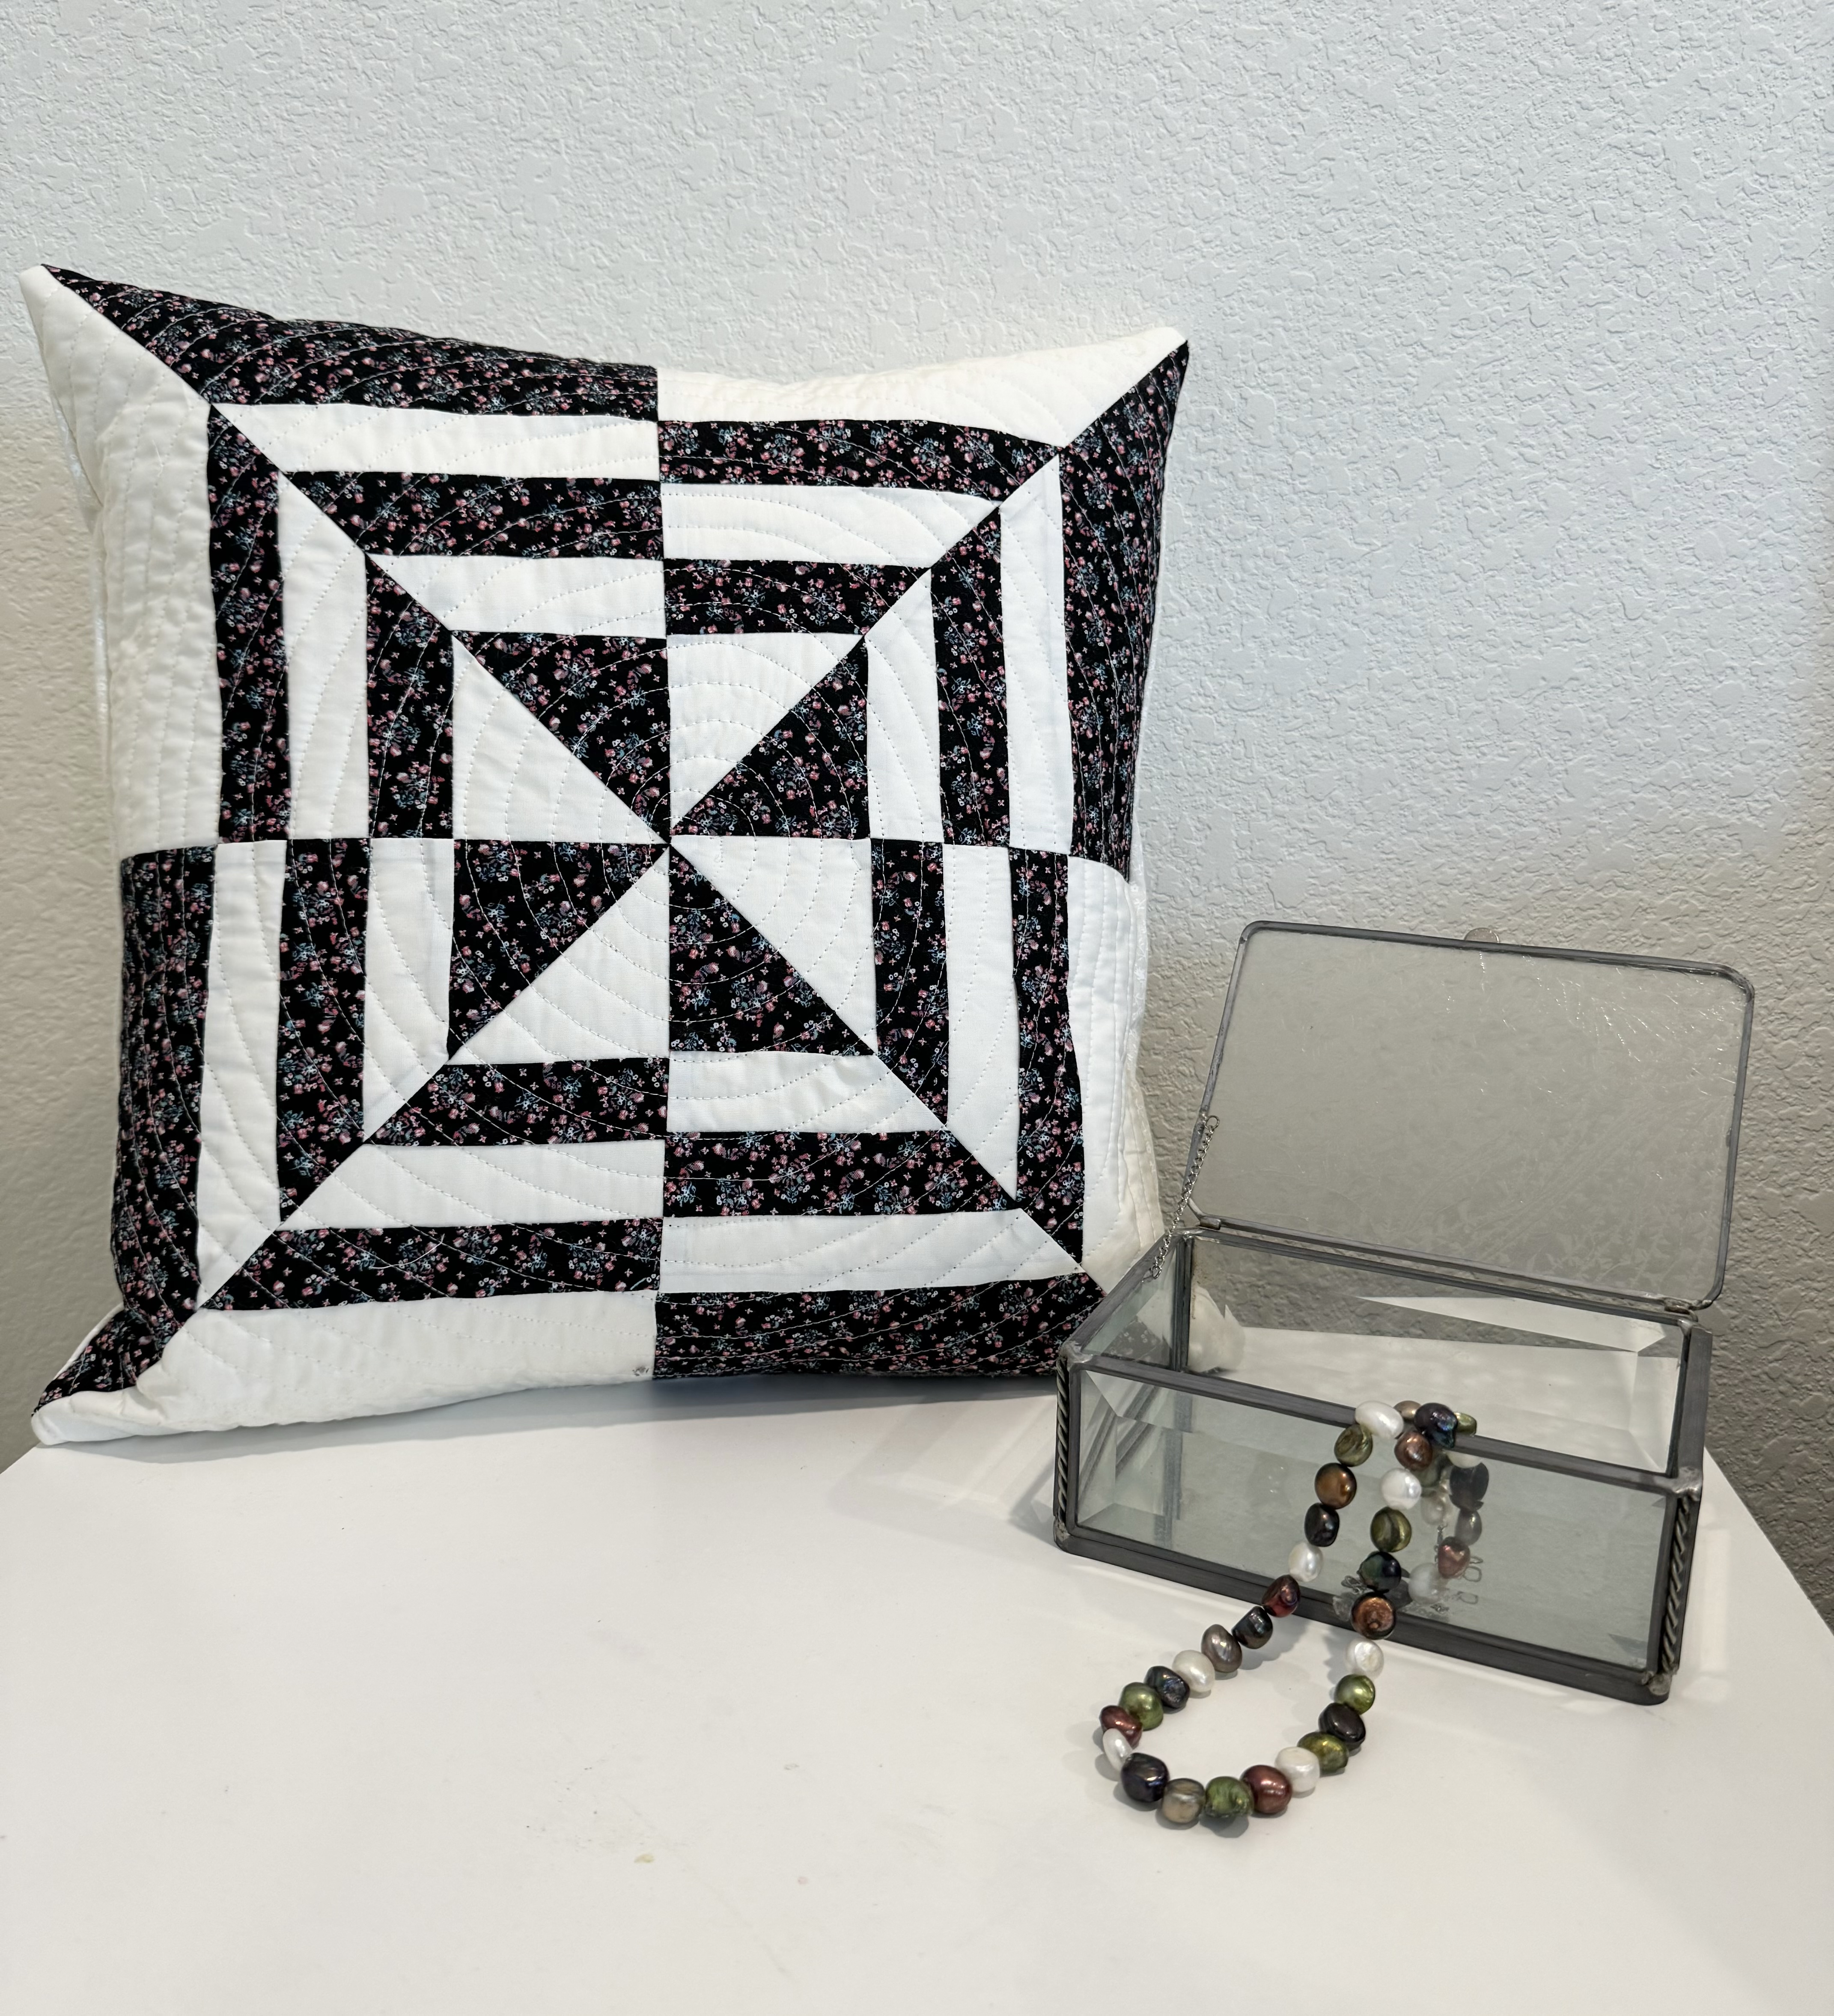

Baby Lock Ambassador Mary Davis shares her process for creating a quilted illusion pillow.
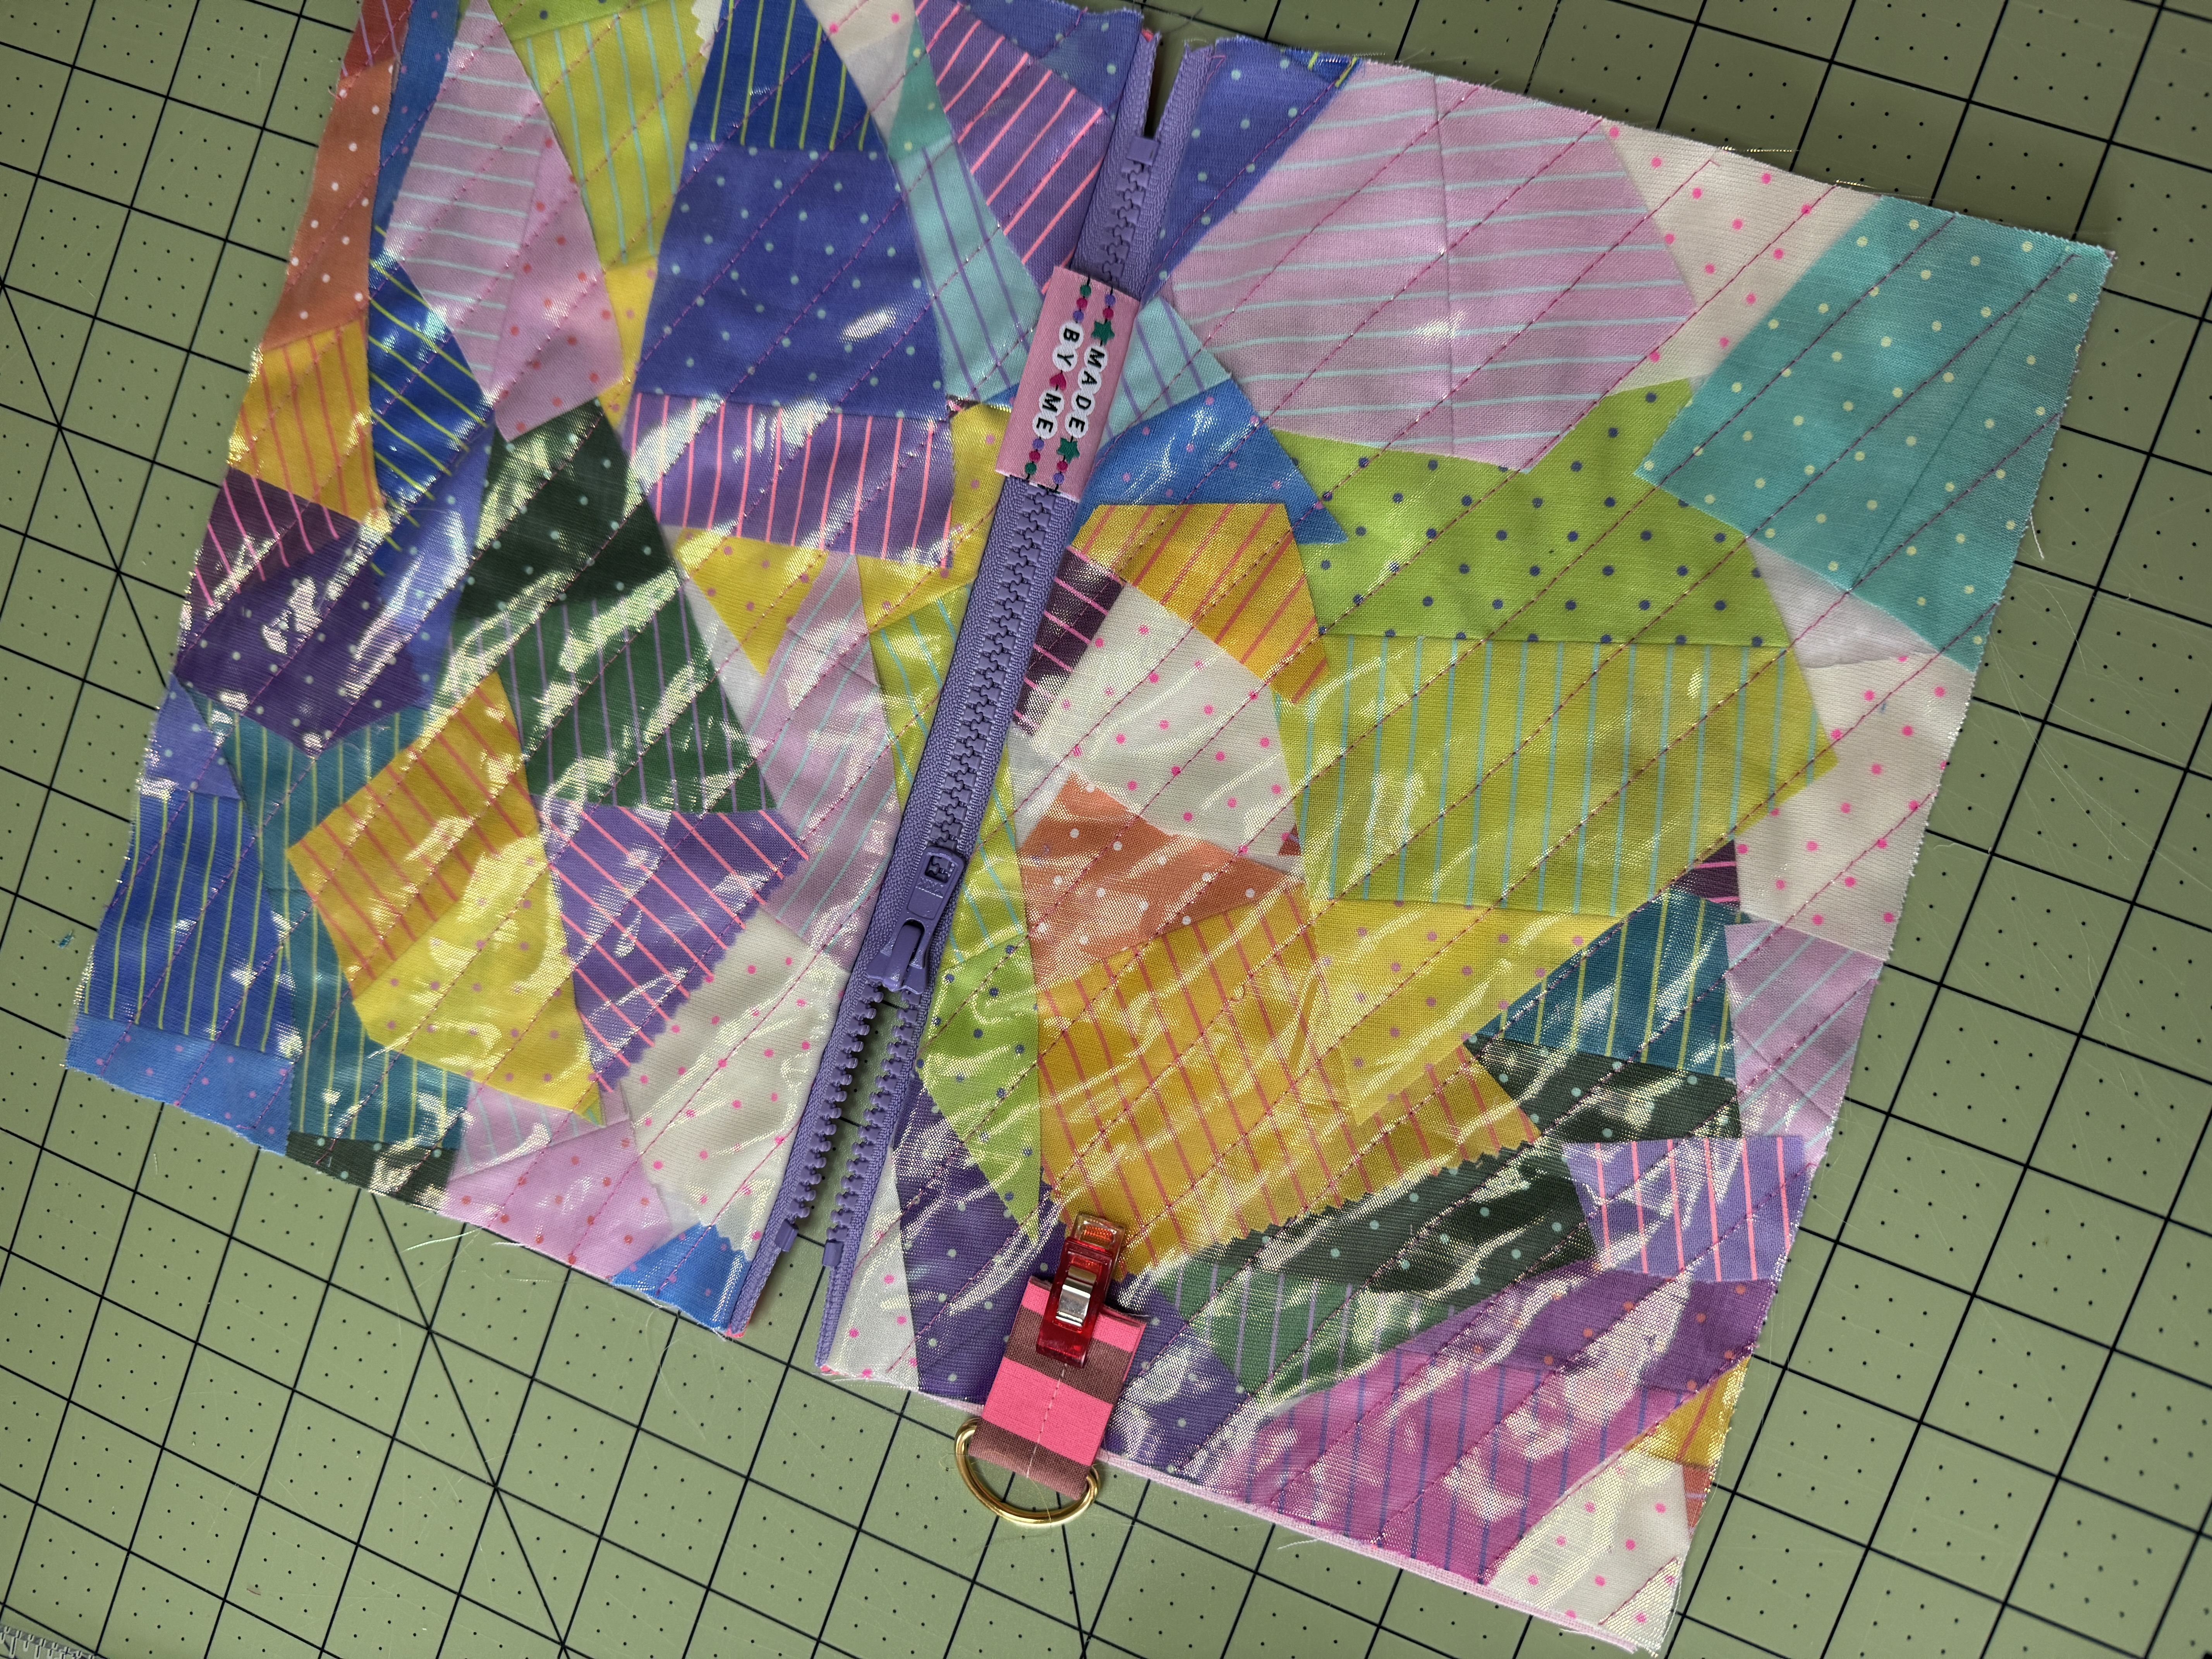

Baby Lock Ambassador Sarah Hearts shares how to create vibrant, elegant projects with your leftover scraps!


In celebration of the 55th Anniversary of the first household serger, the EF-205, Baby Lock is commemorating this milestone in sewing history by launching a new 55th Anniversary Limited Edition 4-Thread Serger. Keep reading below to learn more about the history of the 1st Baby Lock serger.


Baby Lock Educator Cassie Cartmell of Faodail Creation demonstrates her collage quilting process.

A serger is a wonderful machine for piecing a quilt. Whether using a four-thread three-thread or chain stitch piecing on a serger is easy and fast.

Baby Lock Ambassador Ledine shares a quick-sew Valentine's Day wall quilt using her Baby Lock Ballad sewing machine.


Baby Lock Ambassador Marcia Spencer shares this fall runway-inspired look! Create it yourself by following her process.


Baby Lock Ambassador Lindsay Conner shares this fun and easy scrap-buster sewing project- scrap-happy quilted coasters!


Baby Lock Ambassador Faith StJules shares 5 handmade Christmas gifts that with surely spread joy and creativity this holiday season.

Baby Lock Ambassador Mary Davis walks us through these easy quilt-as-you-go placemats, perfect for hosting during the holidays.
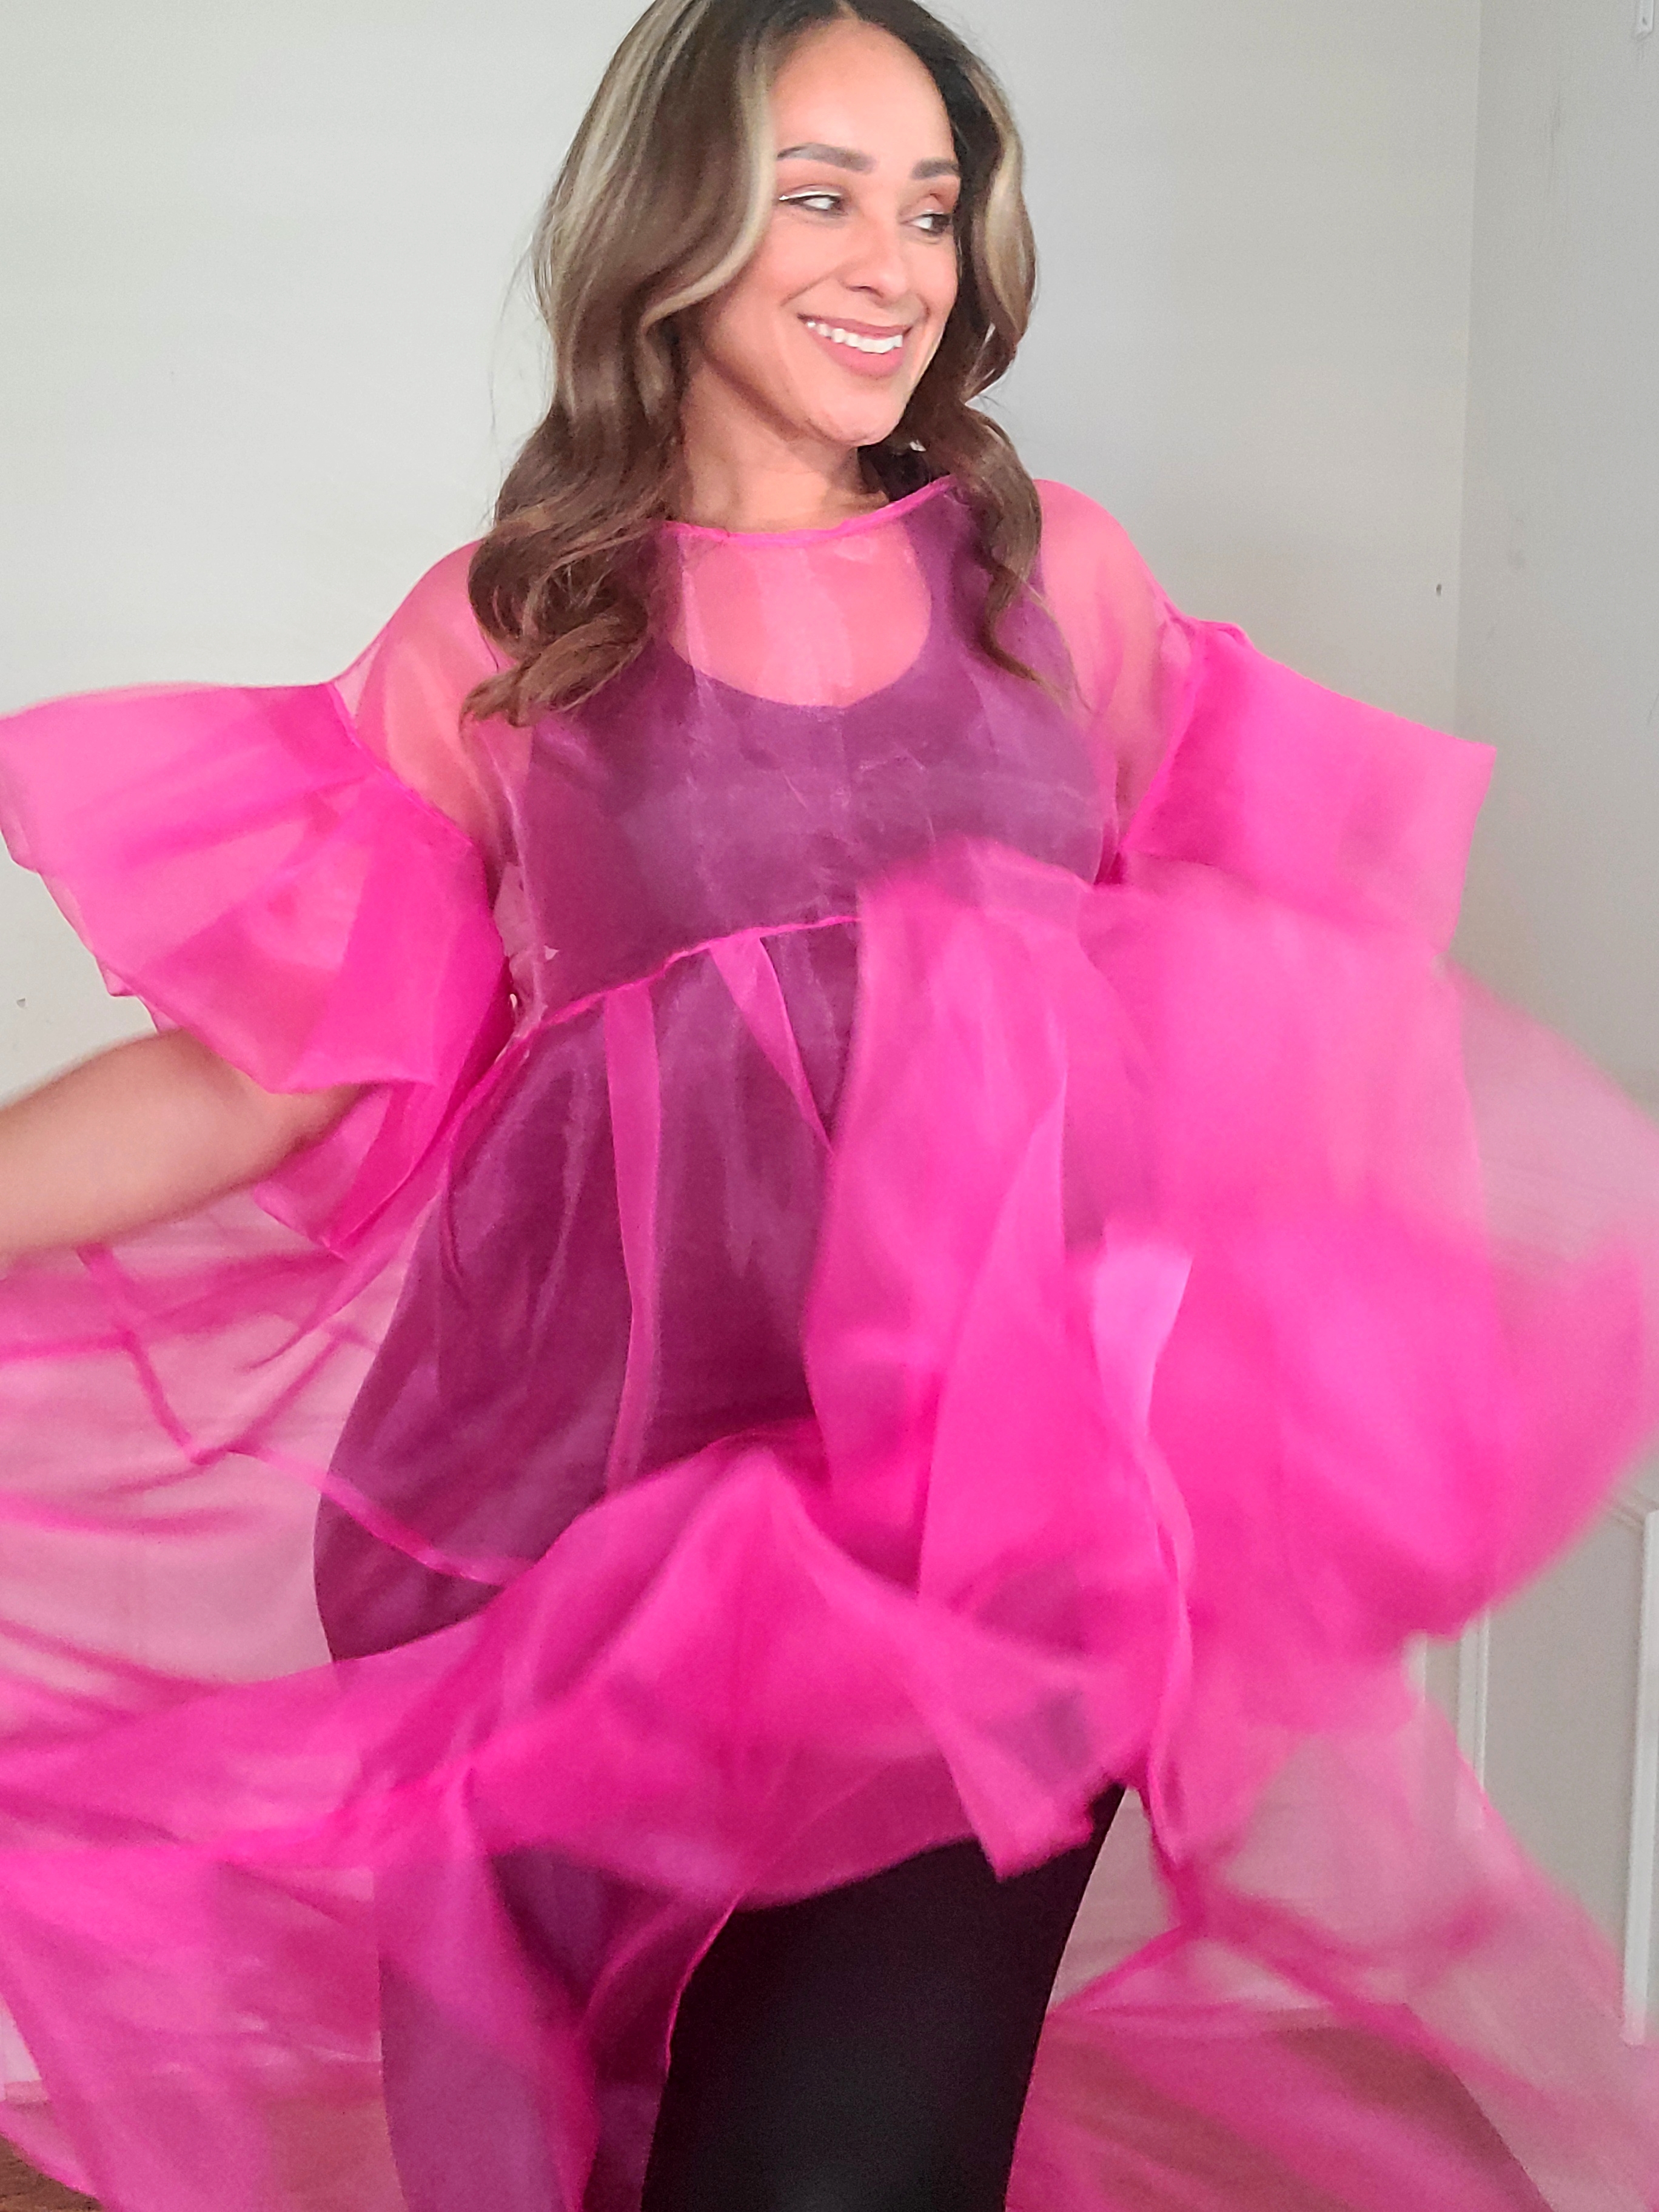
Follow how Baby Lock Ambassador Marcia Spencer creates her own fashion-forward patterns! Will you dare to wear this gorg organza look?!

Baby Lock Ambassador Mary Davis shares her process for creating a strip-piece quilt. This easy-to-follow tutorial will help you build quilting confidence!

Baby Lock Ambassador Faith StJules shares this teenager-approved Halloween upcycle!

Baby Lock Ambassador Faith St. Juliette shares why she loves working with our sewing and embroidery machines. She recently upgraded from an Accolade to a Bloom.


