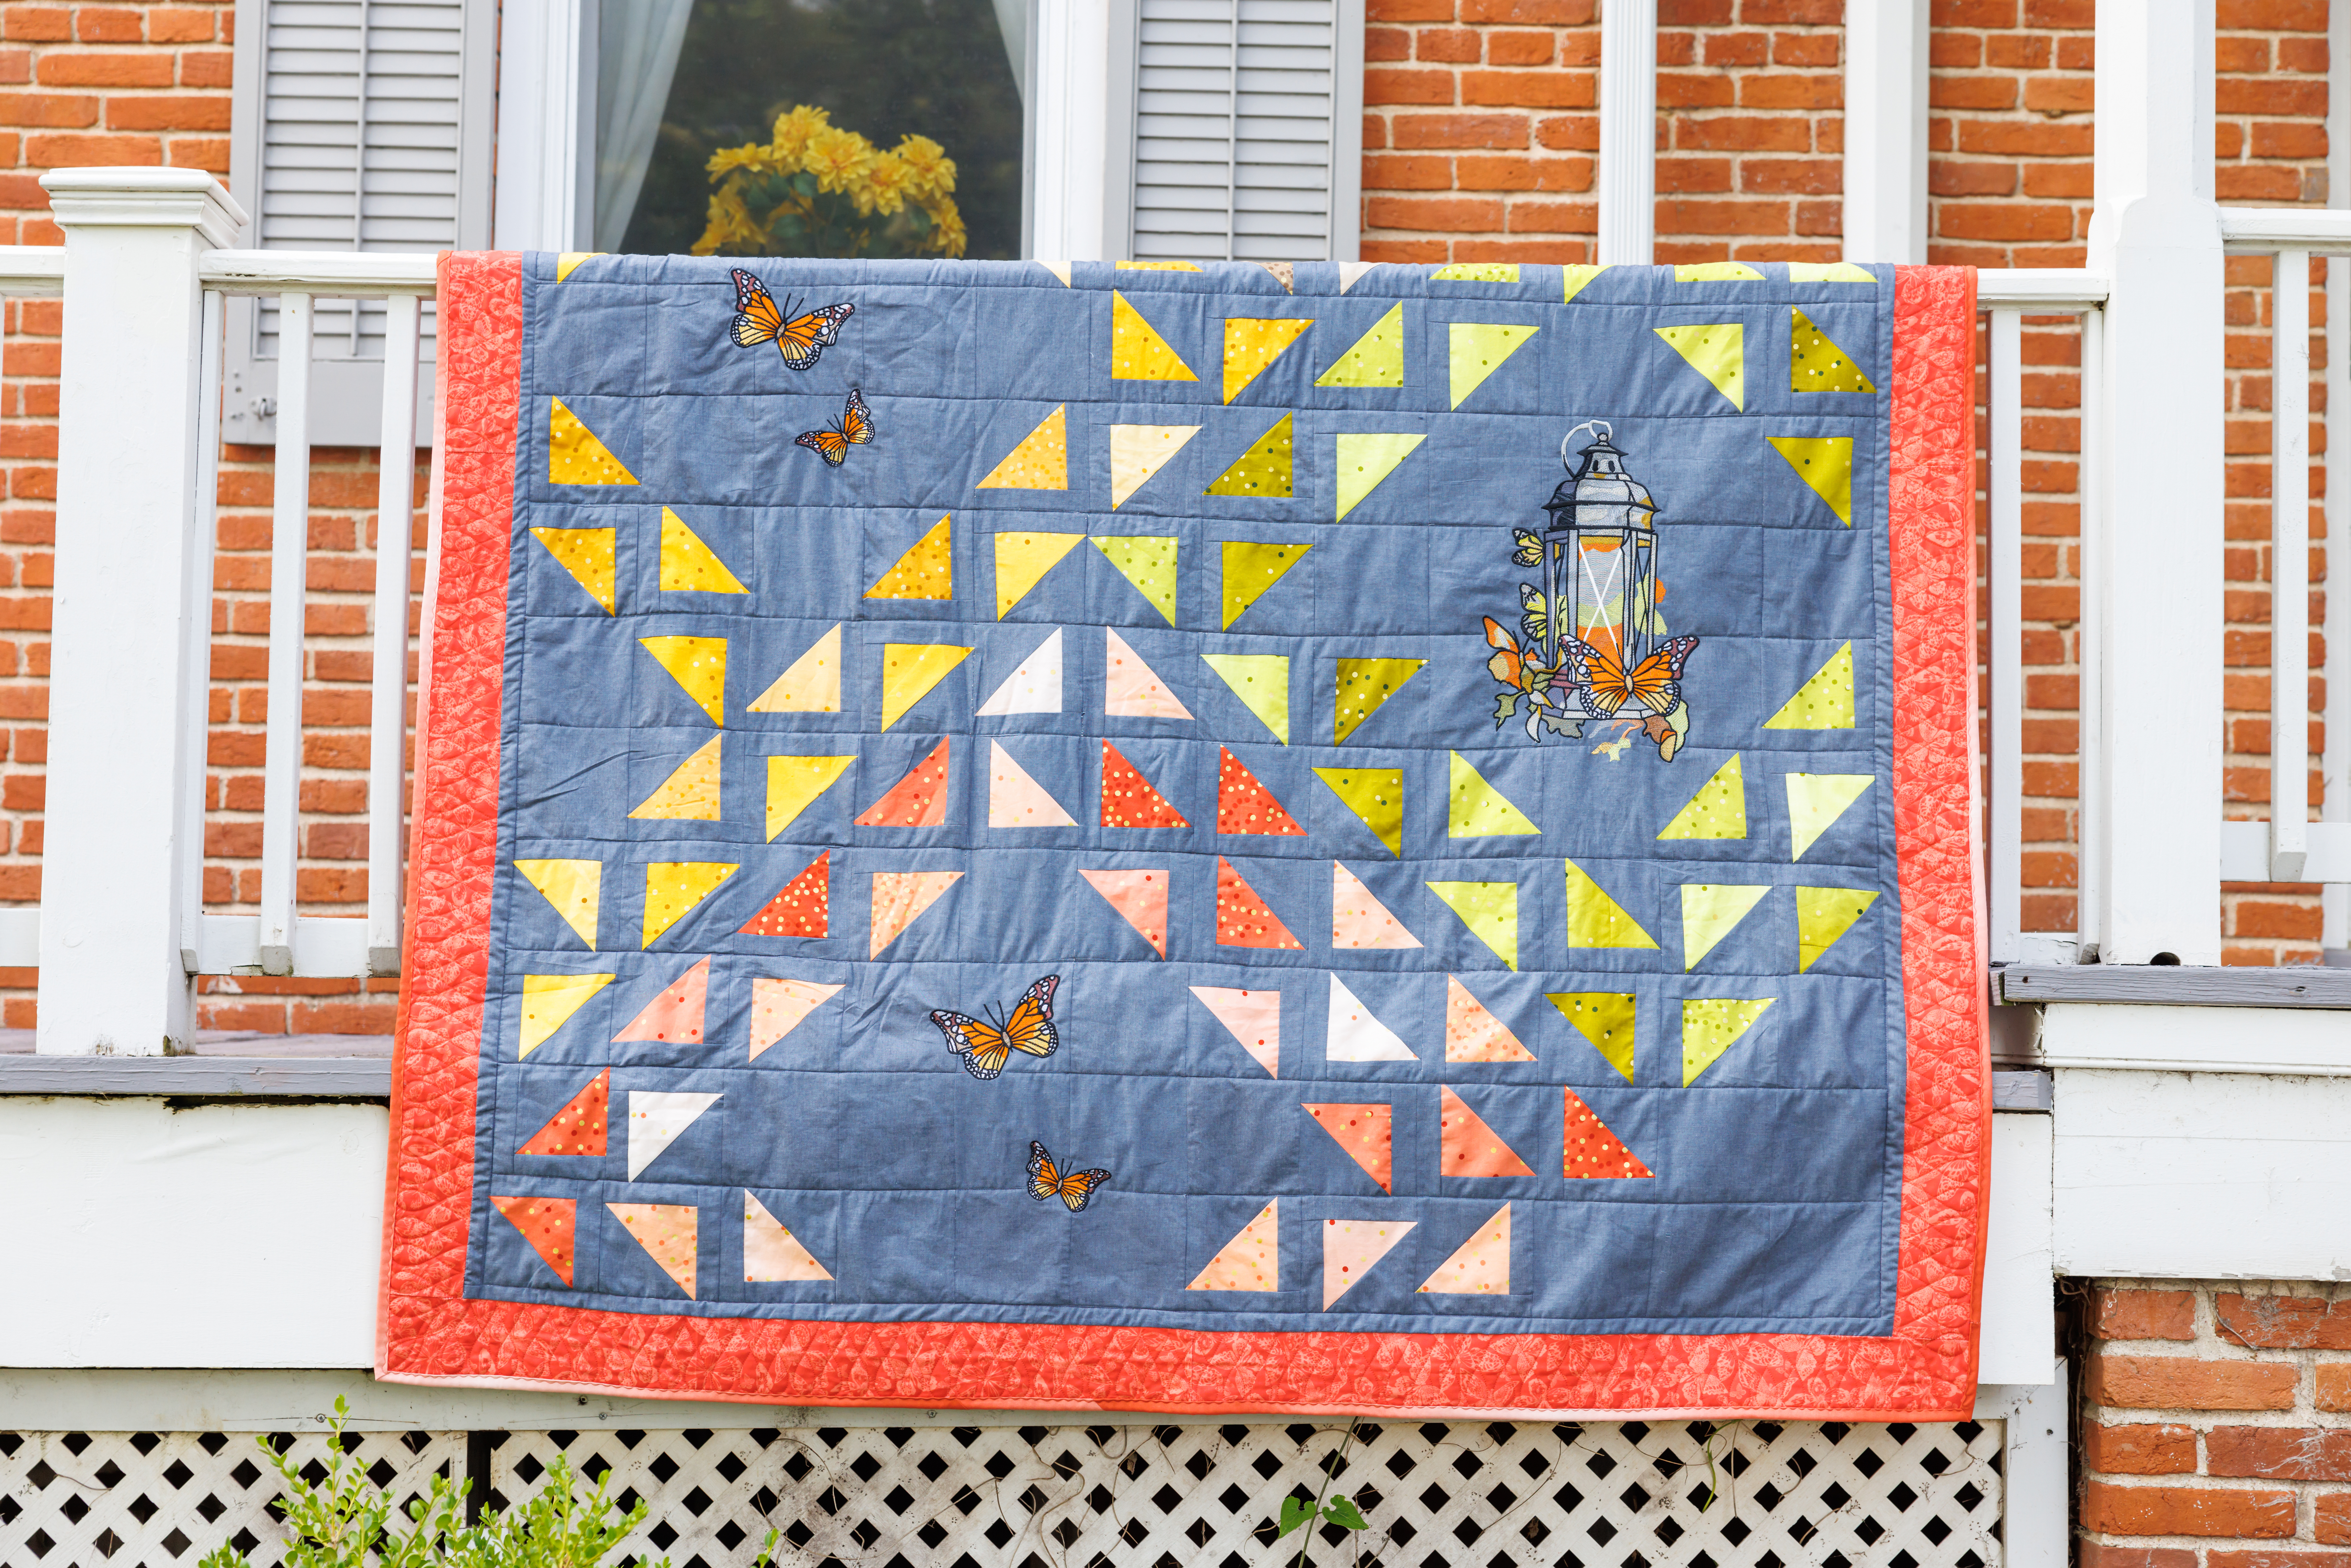
Showcase the beautiful embroidery designs from the Baby Lock Design Suite Radiance Collection in this fun quilt. This modified version of the Prism Quilt pattern allows large areas for designs that fill the Radiance’s large embroidery field. Use any of the embroidery patterns to enhance this project. Finished size approximately, 69” X 85”.
Click HERE to download printable instructions with additional photos.
Supplies:
- Baby Lock® Radiance sewing and embroidery machine
- ¼” piecing foot BLSO-QGF
- W Foot for Embroidery
- Digital Dual Feed Foot with standard sole
- 11 5/8” X 18 ¼” Embroidery Hoop
- Baby Lock Design Suites – Radiance Collection for Embroidery Designs shown
- Prism Dreams Quilt Pattern by Maylilyquilts.com. Click HERE to link to purchase the pattern.
- Chambray quilting fabric was used for the background and a mix of Ombre Confetti Dot fabrics were used from V and Co
- For the fabric measurements, refer to the pattern requirements, but plan on additional fabric, backing, and binding fabrics needed. For this project, the Baby Size blocks were used, but we added 4 columns and 2 rows. This resulted in the need for 180 total blocks versus the 88 blocks needed.
- 2 yards of border fabric. A border was added to the quilt not featured in the pattern.
- 4-5 yards of backing fabric
- ¾-1 yard of binding fabric cut into 2 ½” strips
- Pellon SF101 – Shapeflex Fusible Stabilizer
- Baby Lock Tear Away Firm Stabilizer BLT103
- Quilt Batting for selected quilt size
- Madeira® Aerofil and Rayon/Poly embroidery thread to match fabric
- Rotary cutter, mat, and ruler
- Iron, pressing mat
- Basic sewing supplies, pins, wonder clips, scissors, etc.
Note: Some images shown showcase the Solaris Vision and DIME Magnetic Hoop.
Instructions:
The fabric requirements, cutting instructions, and pattern instructions are all included with the Prism Dreams pattern. Follow those instructions to create the quilt top. Reminder to cut enough for 180 blocks. Below is a revised layout of the project. Creating the 5” block size for the Baby Size Quilt.
Sewing the Quilt Top:
1. Set up the machine for sewing:
- Thread the machine.
- Attach a ¼” piecing foot to the machine.
- Wind the bobbin with the same thread as used for the upper thread.
- Set to machine to a center needle stitch to create a ¼” (Q-01)
2. Following the pattern instructions, sew the blocks together using a 1/4” seam allowance.
3. Since making ½ square triangle blocks, use the Radiance Projected Guideline marker to sew with both the main and subline. Set the subline distance to ¼” to aid you in sewing these blocks together without having to mark any lines.
4. Press the seam toward the darker fabric. Note: pressing is very important and should always be performed after each seam has been stitched. The quilt top will have a neater and more professional look.
5. Continue to sew the sections together in the order per the quilting pattern. Using the ¼” piecing foot ensures all the seams are consistent throughout the quilt. Again, this foot will require a center needle position. Again, use the Guideline Marker for consistent seam allowances.
6. Once the quilt top is completed, add a 4” border around the quilt top (if desired). Remember that if you add a border, you need to allow for extra backing fabric.
7. Press the quilt top. Layer together the quilt top and batting.
Embroidering the Blocks:
1. Next, fuse the open background areas of the quilt with SF101 Shapeflex stabilizer or some type of fusible interfacing. Place the stabilized quilt top in the largest hoop centering over one of the open background areas. Another layer of a thinner tearaway like Baby Lock Tear-Away Firm BLT103 is a good option for the blocks. Be cautious to not over-stabilize the quilt.
2. Select an embroidery design from the Design Suite Radiance Collection.
3. For this project, one of the large lantern designs and butterflies were used to embellish the quilt.
4. Place and stitch the lantern design using the IQ Live Stitch Projector or the Camera features on the Radiance.
5. Once stitched, re-hoop another of the open areas. Select additional designs and stitch.
6. See the layout used below or place as desired. Use the Resize, Move and Rotate keys to get the designs as desired.
7. Stitch as much or as little as desired on the quilt.
Finishing the Quilt:
1. Once the Embroidery is completed, press the quilt top and layer with batting and backing fabric.
2. To quilt this project, the Digital Dual Feed foot was used to stitch-in-the-ditch in between the 5” blocks.
3. The Enhanced Border feature was then used to quilt the border. Chose a border of choice. Then, enter the measurements of your quilt and the selected hoop being used.
4. Follow the process in the machine to quilt the entire border of the quilt.
5. Once completed, trim any extra batting and backing fabric.
6. Attach the binding to the back of the quilt using a ¼” seam allowance and your favorite binding method.
7. Press and fold to the front and use a decorative stitch, such as a serpentine stitch, to attach the binding to the front of the quilt.


