Learn how to make a very basic t-shirt quilt with no sashing between t-shirts no batting a microfleece (or other fabric) backing and no binding.
Steps:
-
Gather the Supplies
- Baby Lock Sewing Machine
- T-shirts
- Lightweight Fusible Interfacing (I always get a ½ yard per t-shirt)
- Backing (we’ll discuss how much in step 9)
- Thread
Check Out Our Video On What Supplies You Will Need For Your DIY T-Shirt Quilt
-
To start you’ll want to decide how big your quilt is going to be and the dimensions.
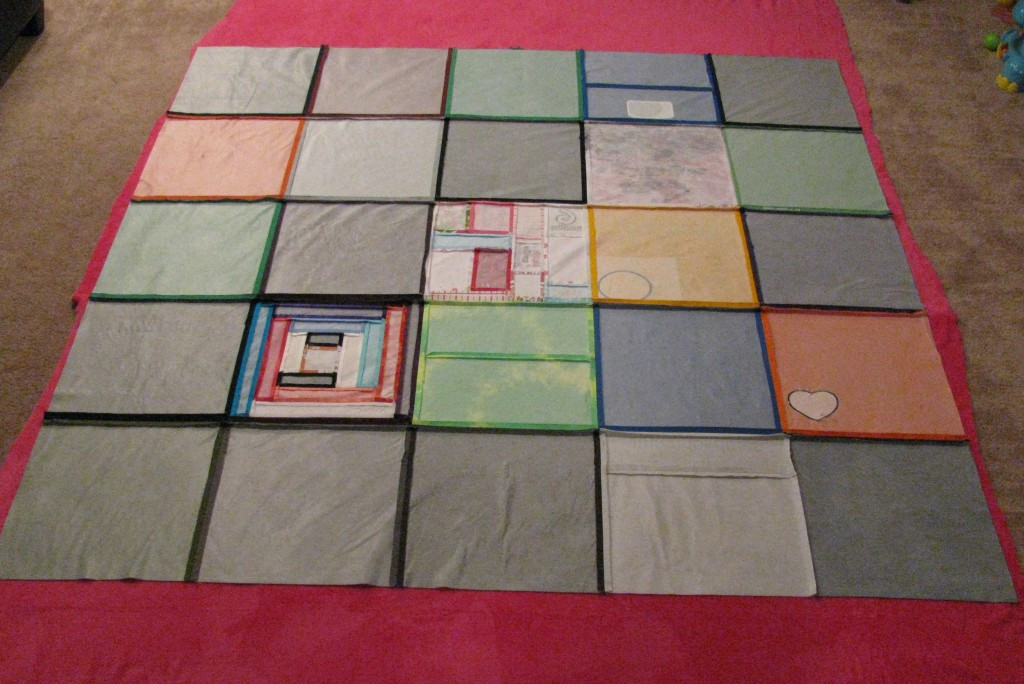
Below is a chart for estimated finished measurements. If you have 9 squares you’ll want to do 3 x 3 shirts (this will make for a pretty small lap quilt and this might be where you’ll want to add sashing check out this tutorial here. If you have 12 shirts either 3 x 4 or 4 x 3 shirts. 16 = 4 x 4 shirts 24 can be 4 x 6 shirts 25 = 5 x 5 shirts and so on. I like to draw out a diagram because I am so visual and it helps me figure out how much backing I need.
-
T-Shirt Quilt Size Chart
Quilt Title | Approx. Size | Est. # of T-shirts
- Lap | 45” x 45” | 9 or 12…
- Large Lap | 45” x 60” |12 or 16…
- Twin | 60” x “90 or 75” x 75” (long twin) | 16 20 24 25…
- Full | 75” x 90” or 90” x 90” (wide full) | 20 25 30 36…
- Queen | 90” x 105” | 25 30 36 42…
- King | 105” x 105” | 30 36 42 49 56…
-
-
Next you’ll want to take your smallest shirt and the shirt with the largest graphic and measure.
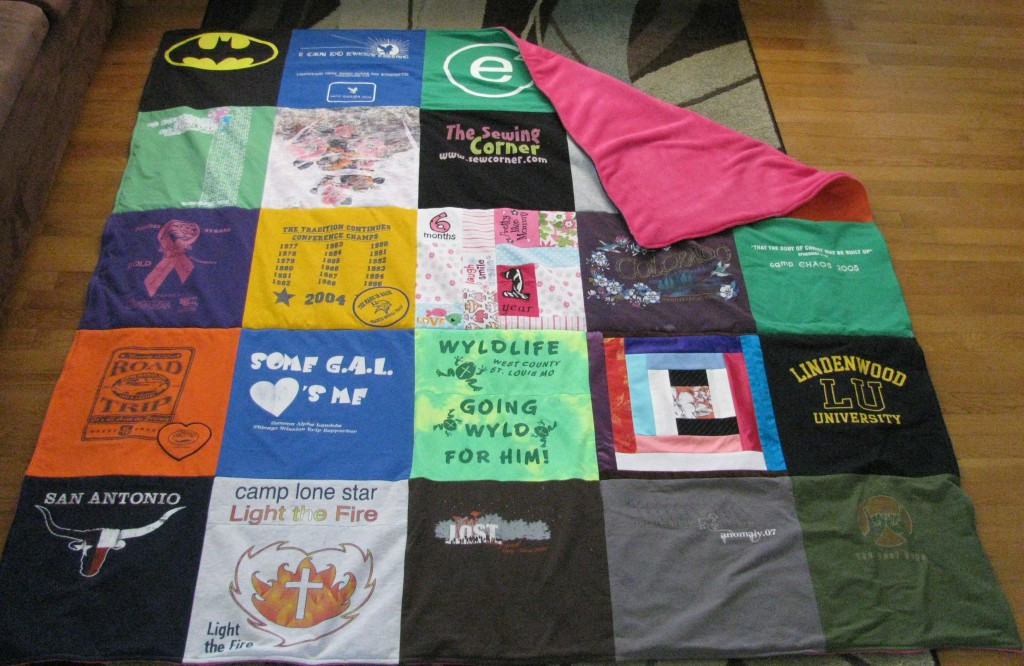
This will determine the size of each square; you may have to sacrifice part of some graphics if you have really large ones. A good size is 15” x 15” or 16” x 16” …remember the sewn square will be a 1/2" smaller on all sides because of a half inch seam allowance. You can do bigger or smaller squares (if you have lots of t-shirts you have the option to do smaller squares so that the quilt doesn’t get too big). The quilt in the example is 25 squares with a finished measurement of 75” x 75” (and each square was cut at 16” x 16” making them 15" x 15" sewn).
-
Now that you have your measurements it’s time to start cutting!
If you are using both sides of the shirt cut as evenly as you can with scissors up the sides making sure that you will have enough to cut your desired measurements out of it (if you have some that need fabric added to make it the desired size see this tutorial). If you are only using one side just cut up the back. Cut some of your sleeve off not all because you may need some of it to keep the width of your cut square. Then cut the shoulder seam open. If you cut up the back you can trim the sides a bit so you don't have too much excess (see picture of cut shirt).
-
-
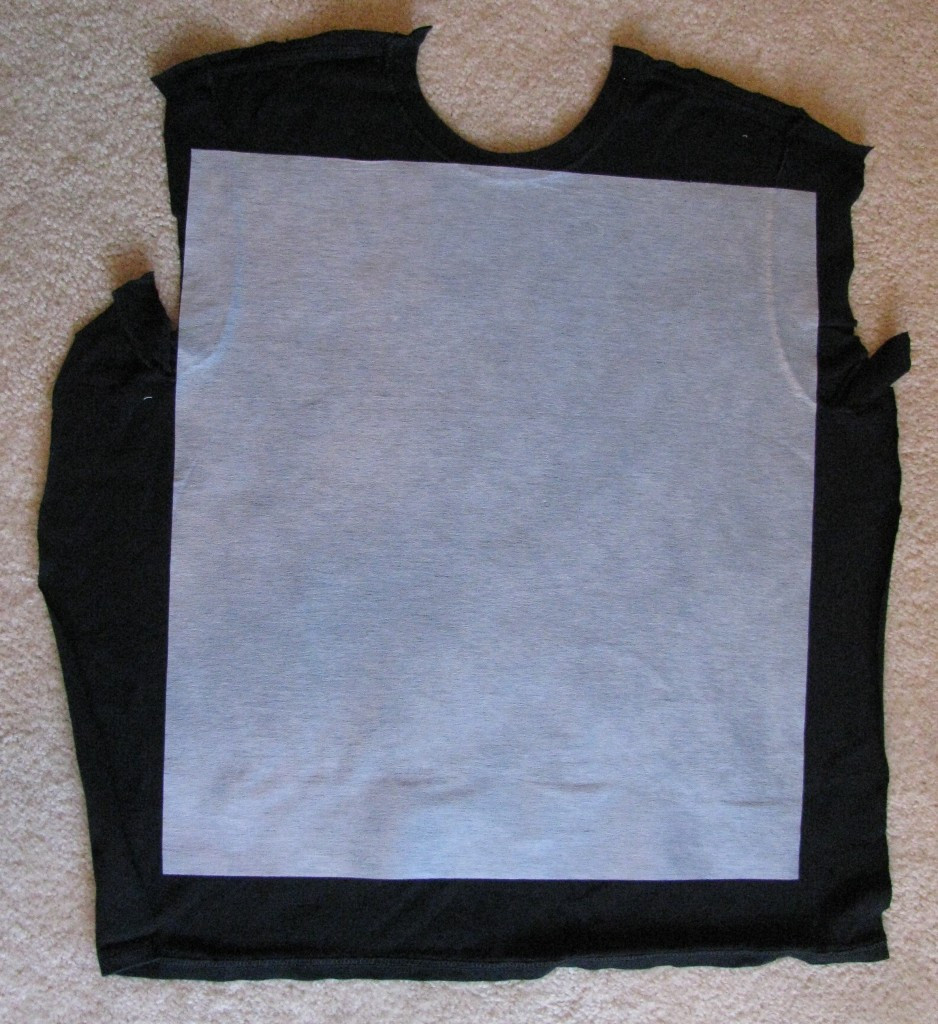
To interface each shirt: Cut ½ yard pieces of interfacing per shirt.
Press your cut shirt (face down) be careful not to stretch as you iron. Then start at the top; lay a piece of interfacing on your shirt (try to lay it center and as straight as possible). Using a cover cloth (this lightweight interfacing likes to stick to the iron if you don’t) start at the top and work your way down. This will stabilize your shirt really well to ensure even and accurate cutting. Take your time so that it fuses well. (Note: some t-shirt quilters do not use interfacing; they like that the shirt has a little give and it’s more lightweight. I like it for stability and accuracy)!
-
After you have interfaced you are ready to cut your squares
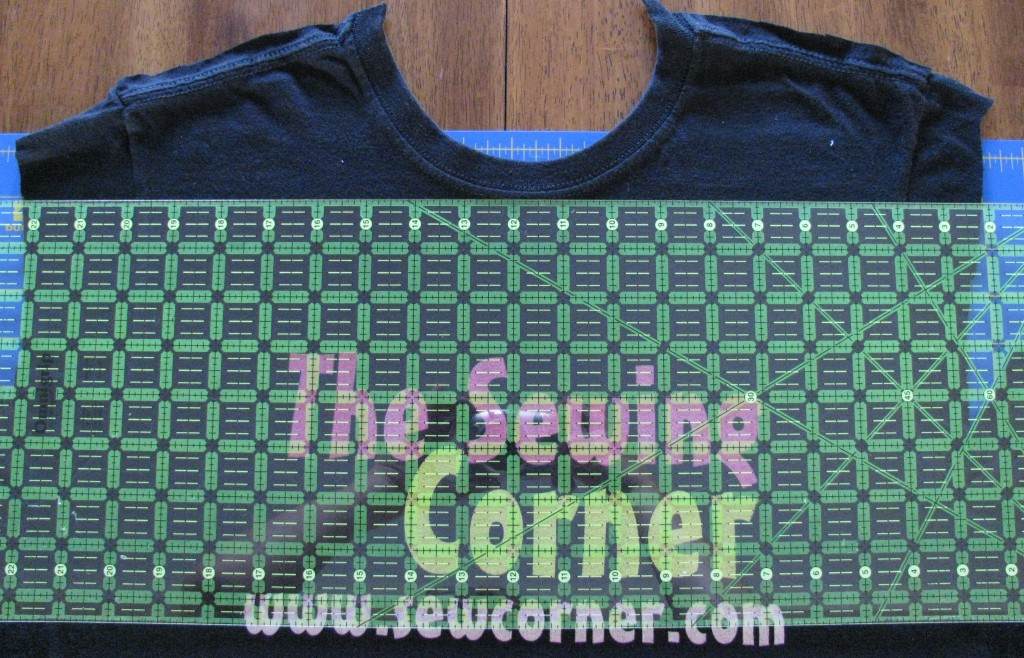
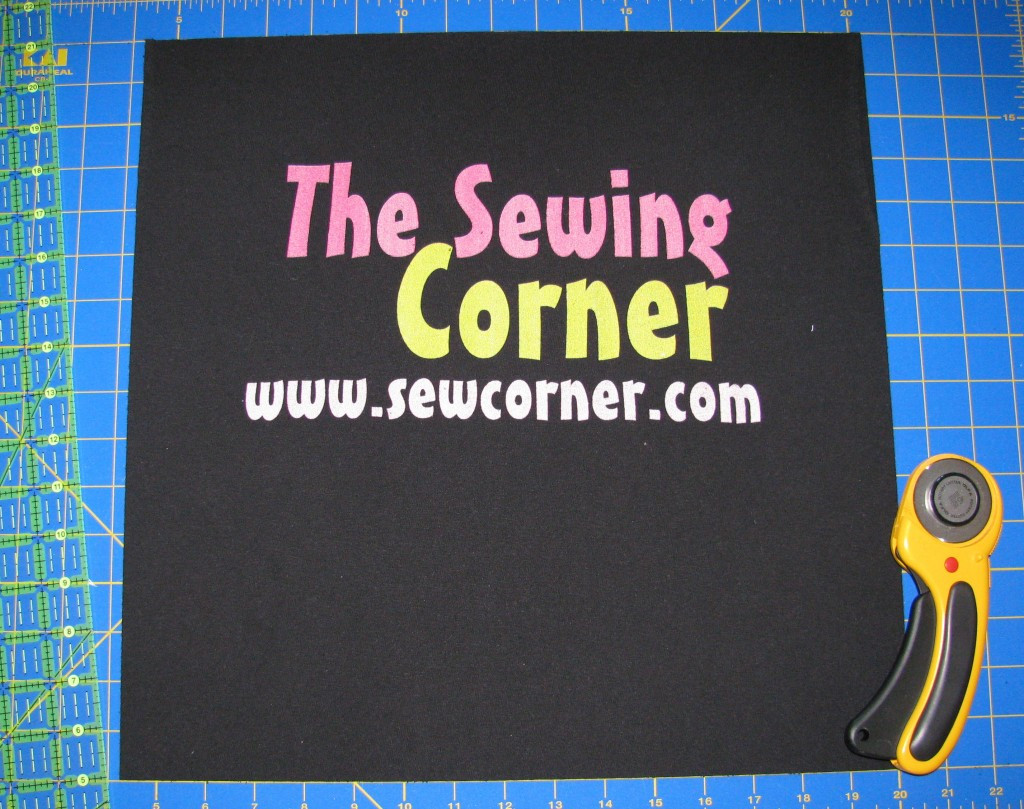
I like to cut even squares so that I don’t mess up as easily but if you do have some long graphics and would like to cut rectangles you definitely can just make sure that you remember your measurements each time you go to cut! I use a rotary cutter for more accuracy but you can use a square ruler and scissors (draw your lines and cut…you could even make a pattern or cut your first one really well and use it as a pattern). To use a rotary cutter lay your shirt out on the mat and eyeball or measure to make sure that it is straight. For most tees cut as close to the top edge first (the neckline) as possible (most graphics are closer to the top so you want as much space above the graphic as possible so that it looks more even above and below). After you have cut the top measure your distance down and cut. Then cut your sides. I always cut big and move inward to make sure that the graphic is centered (t-shirt graphics aren’t always completely center or even this is why I try to eyeball it more than measure…it has proven successful)! When I am cutting I measure re-measure and measure again to ensure accuracy…it stinks to cut it an inch too short (see this tutorial if you need to add sashing. Cut as even and as accurate as possible to ensure accuracy when stitching and lining up seams when you sew your rows together!
-
Starting at the top...
-
Cut as close to neckline as possible! Cut bottom and then sides (try to keep graphic center if that is what is desired).
-
-
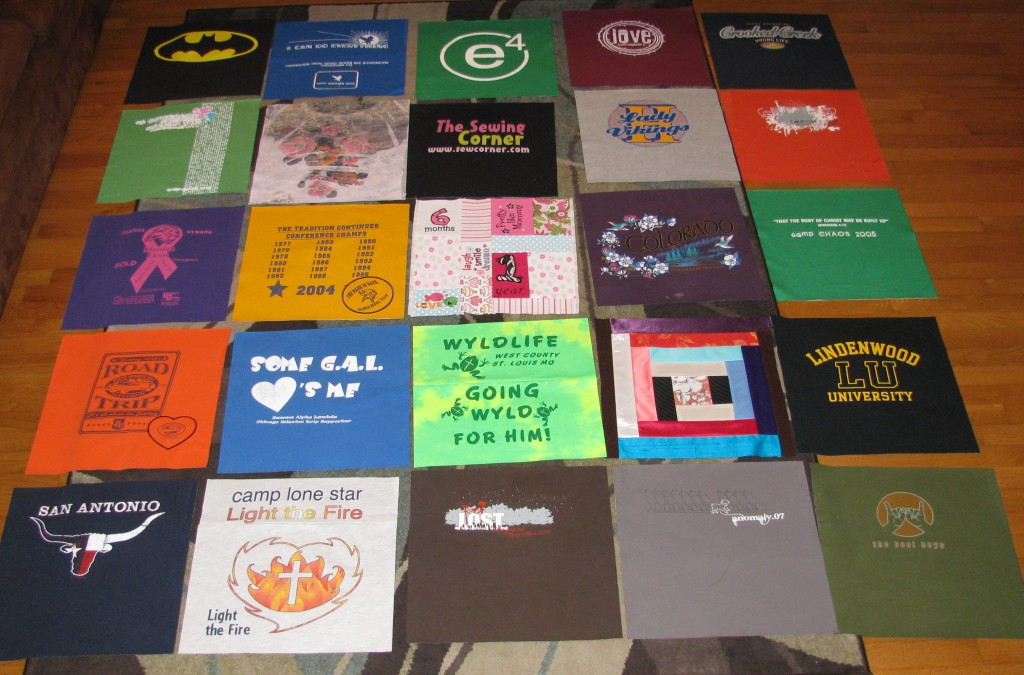
Now lay your t-shirts out to see how you want to organize them. I like to make sure that the colors are spread out well and are as eye-appealing as possible.
-
Watch How We Cut and Prepared Our T-Shirts
You are ready to sew your squares together to make your rows!
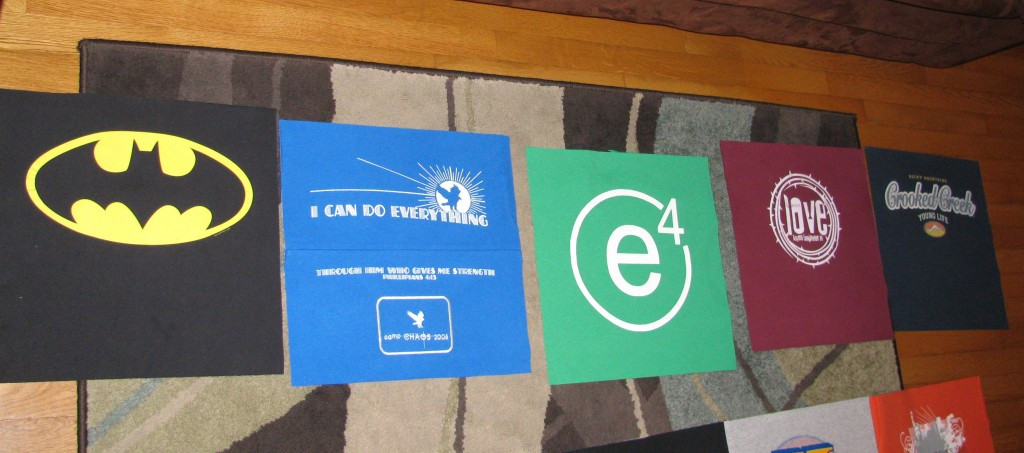
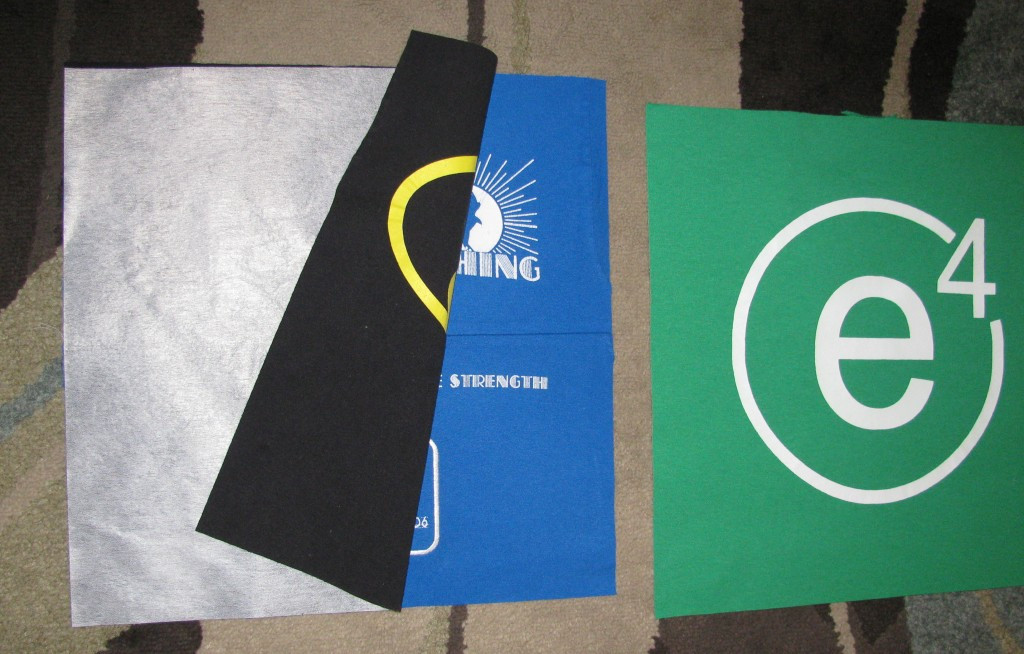
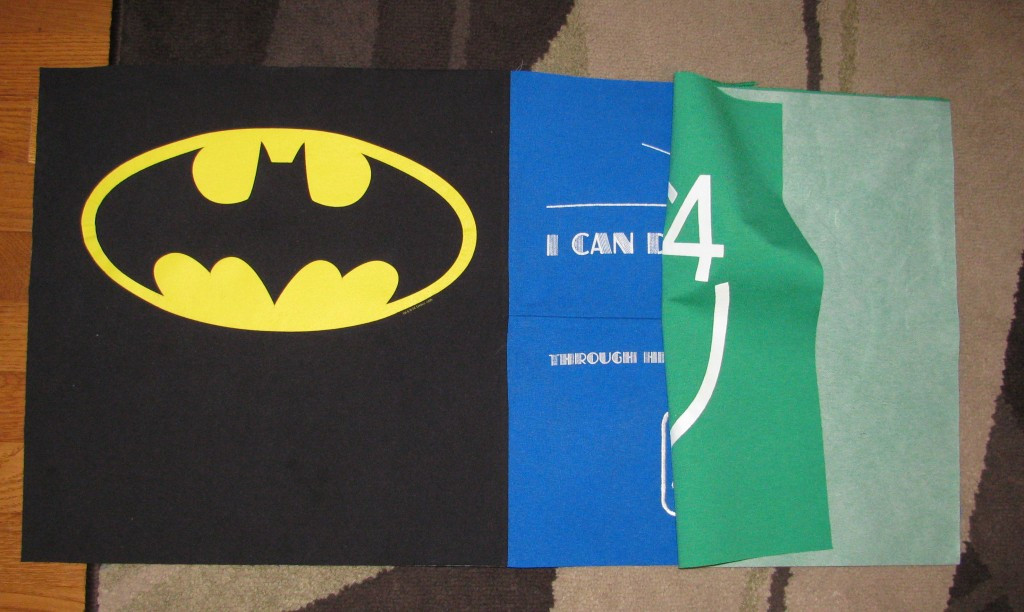
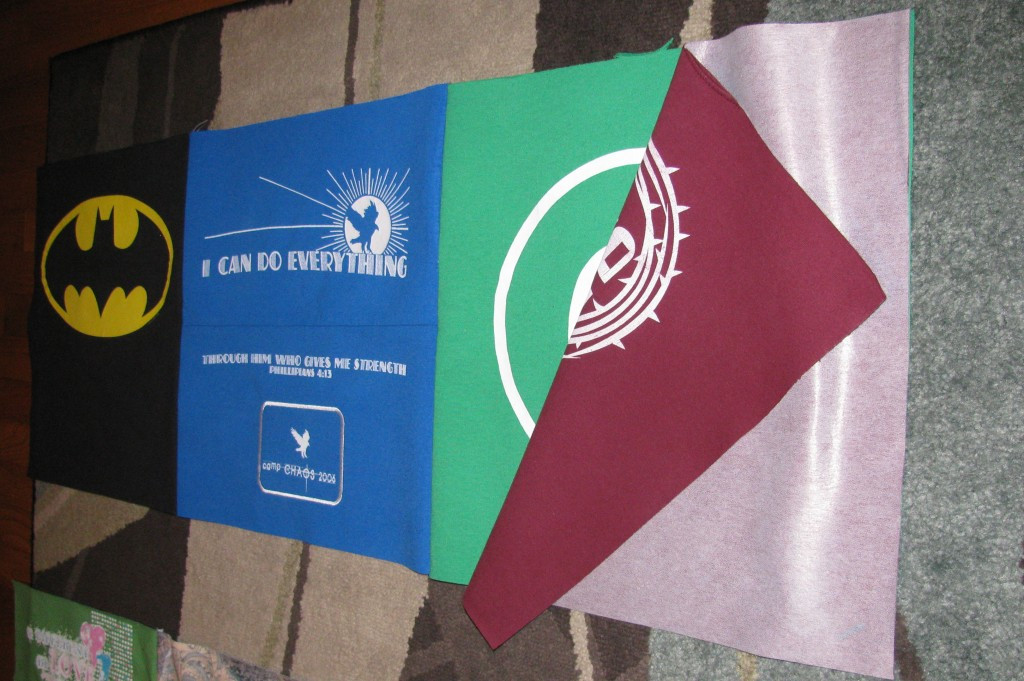
It doesn't matter which row you start with; I like to start with the top row and move down. For your first row lay #1 square on #2 square (pretty sides together) and sew the left side (each seam is sewn at a ½” or even with the edge of the foot with needle at far left; make sure you are sewing the correct seam for the correct order of your shirts...it's always a bummer to sew the incorrect side when you open up the shirts or something is upside down...double checking before sewing isn't a bad idea). Consistency is key to an even and accurate quilt. Sometimes the interfacing likes to drag on the foot…try to help it through a little lighten the presser foot pressure (see your machine manual) or try a walking foot as well. Next you’ll lay #3 on #2 and sew the right edge and so on (#4 on #3 sew right edge #5 on #4 sew right edge). Once you’ve sewn a row sew all remaining rows. Some people like to iron both seams one way to create a ridge to line up your seams when sewing your rows together (if you do this iron seam allowances all in one direction on one row and then in the opposite direction on the next row and so on); I like to iron my seam allowances open to create less bulk (I don’t seem have a problem lining my rows up this way but do be careful to use a cover cloth while ironing if part of a graphic is showing in the seam allowance…you don't want a messy iron)!
-
Number 1 on Number 2 Sew left seam (below)
-
Number 3 on Number 2 sew right seam
-
Number 4 on Number 3 sew right seam
-
All squares sewn to make all rows!
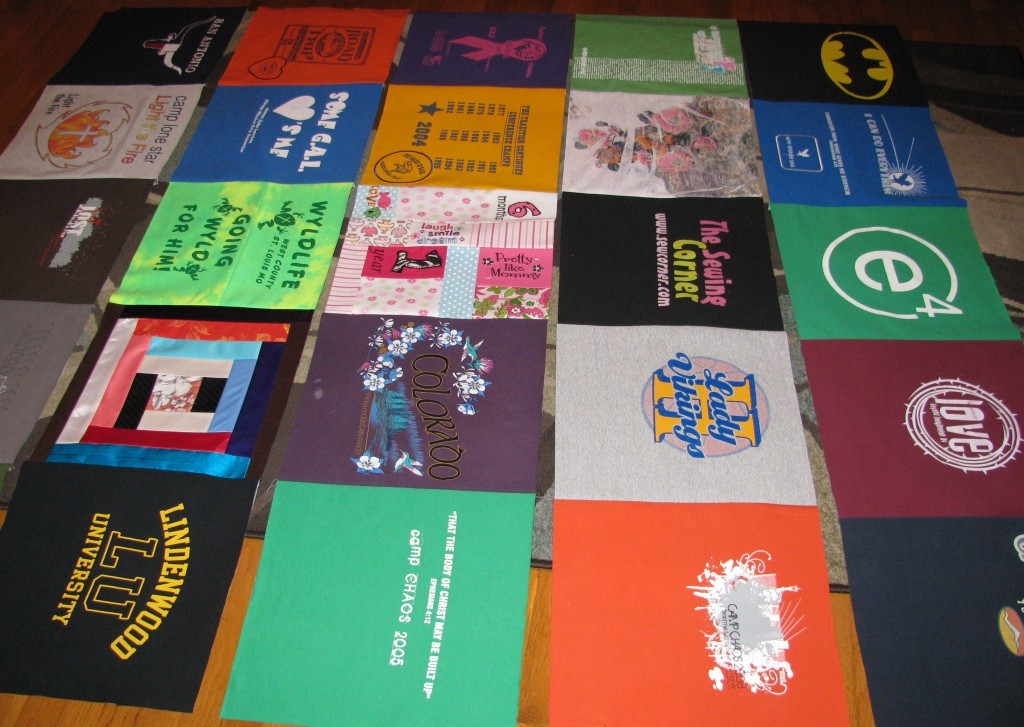
-
-
Ok let’s sew your rows together!
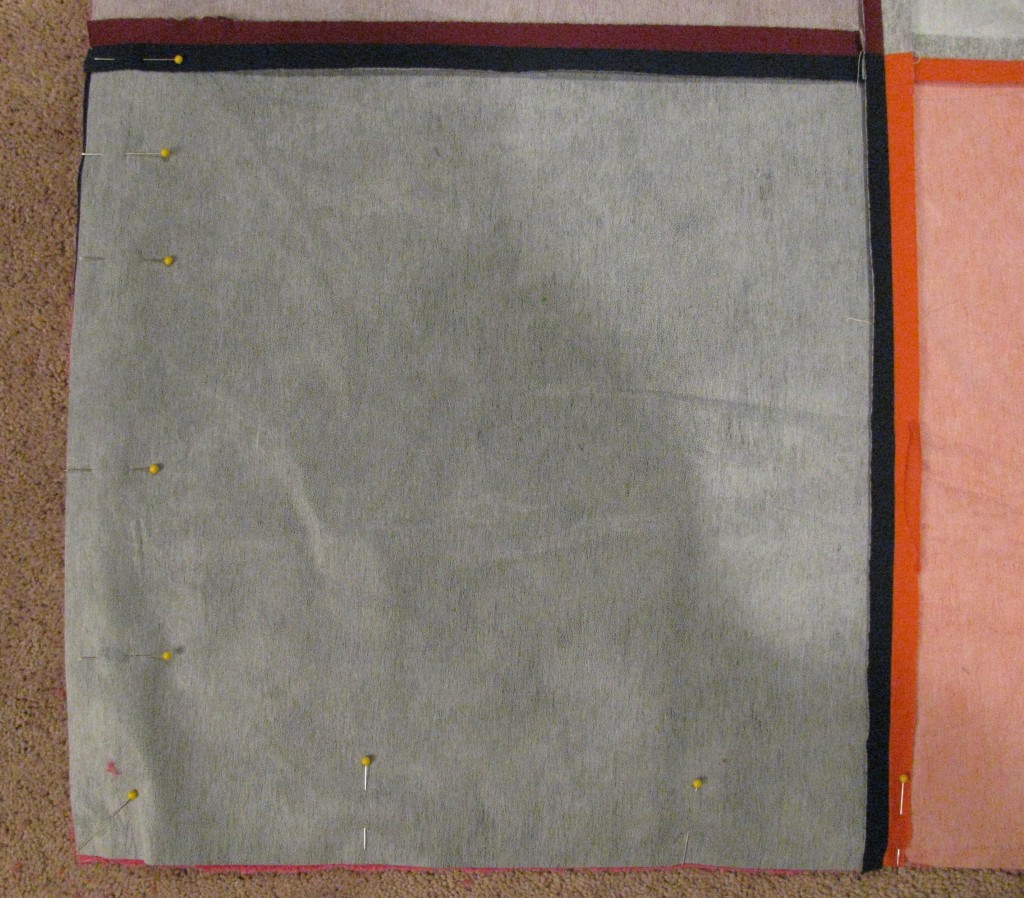
I like to pin my seams evenly first (to ensure even-ness) and then pin once or twice within the square. Normally I take my pins out before I get to them when I'm sewing but in some cases like this one I like to leave them in for efficiency and extra stability (I just sew slow as I reach a pin)…the jersey likes to move on you especially if you have a shirt seam in there somewhere). So you’ll fold row 1 down onto row 2 (pretty sides together picture below) pin and sew the upper seam (make sure you are sewing the correct area so that you don’t have to take out an entire row of stitches)! Press your long seam allowance open (using a cover cloth when necessary). Turn row 3 down onto row 4 pin and sew the upper edge and press seam open.
-
Below: Pinned my seams even (I like to pin both sides of my seam allowances so that they don't fold over while I am sewing them!
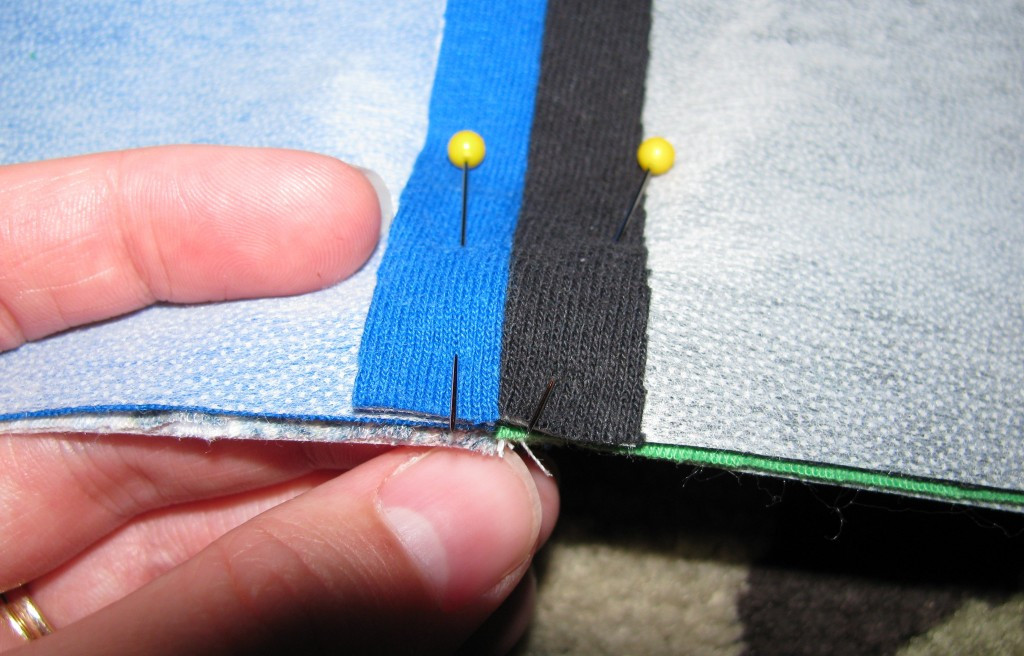
-
Row 1 on Row 2 sewing the top seam
Make sure that the shirts are facing the right way as you would open it so that you don't sew rows together in the wrong order or something upside down.
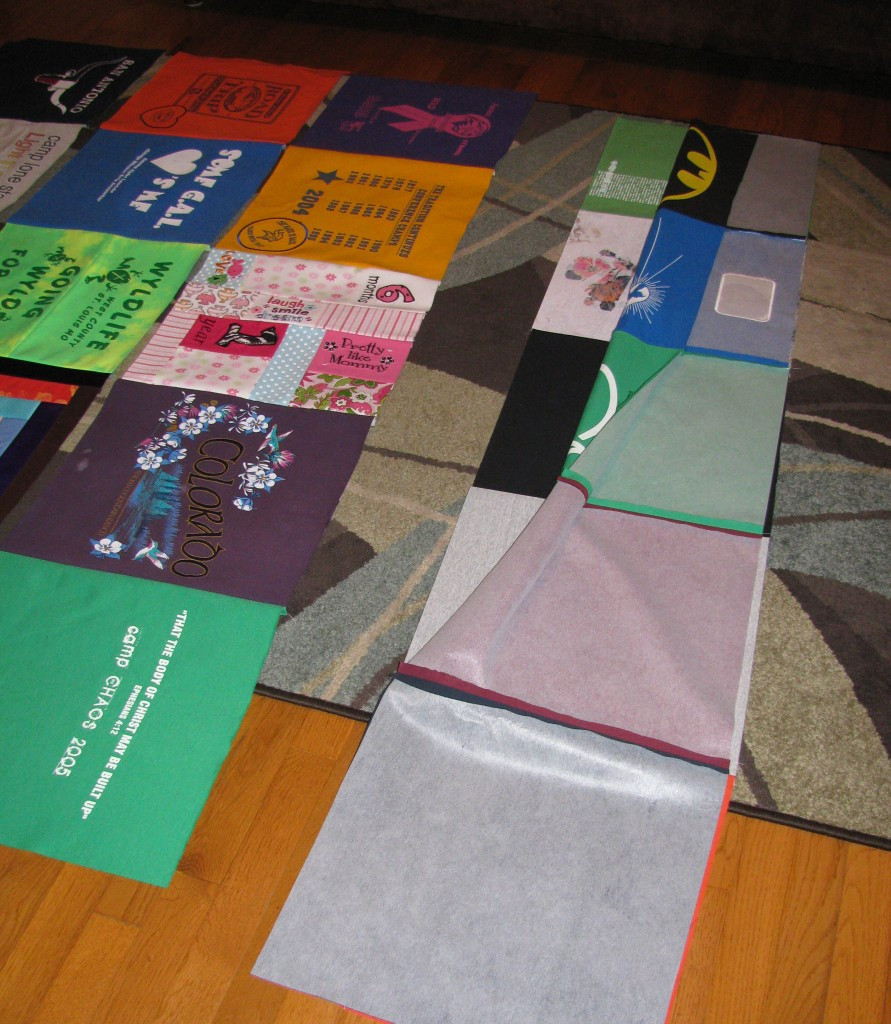
-
Rows 1 and 2 sewn together and rows 3 and 4 sewn together.
I break it up so that I'm not sewing 4 sewn rows to 1...it helps a little since the quilt starts to get heavy.
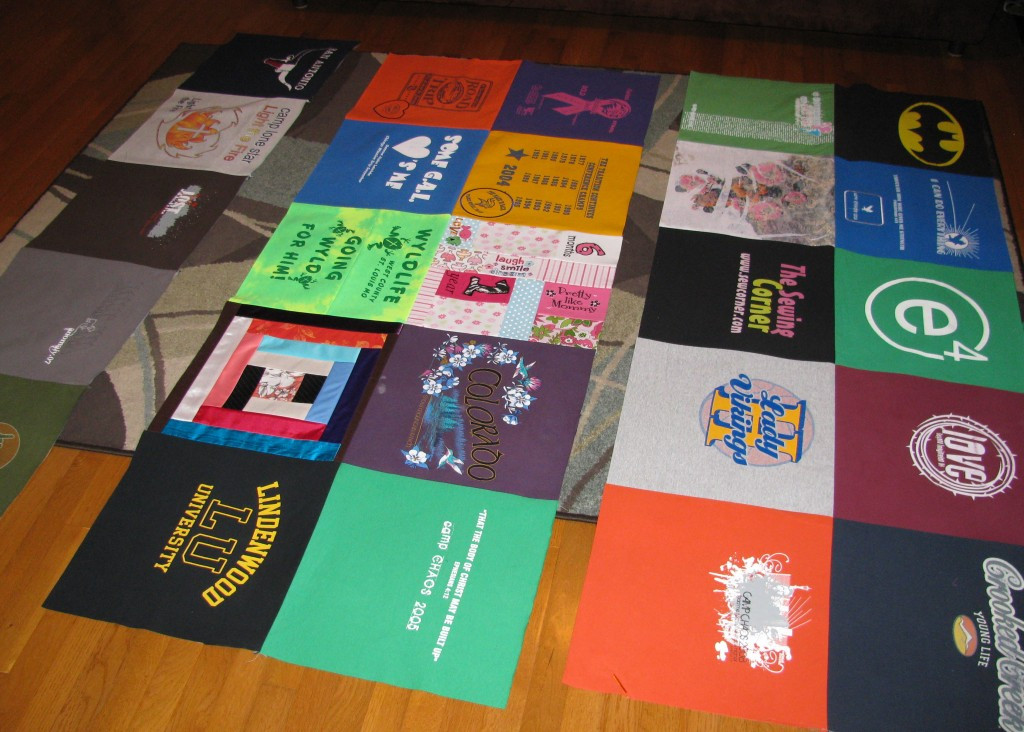
-
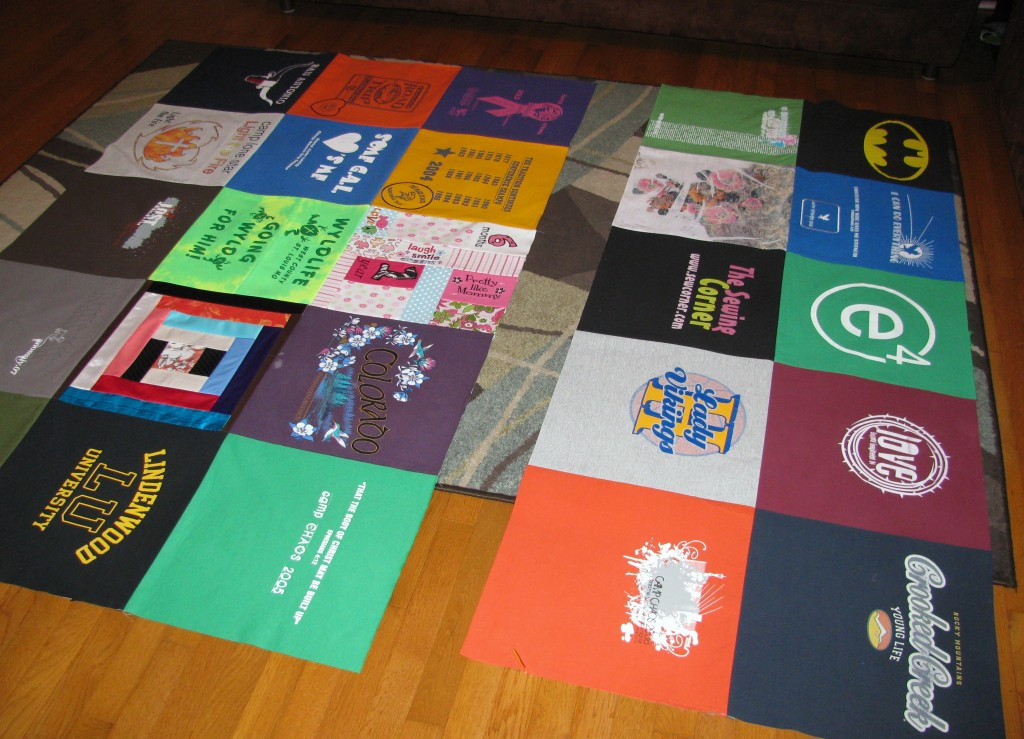
Rows 1 and 2 sewn and rows 3 4 and 5 sewn together.
-
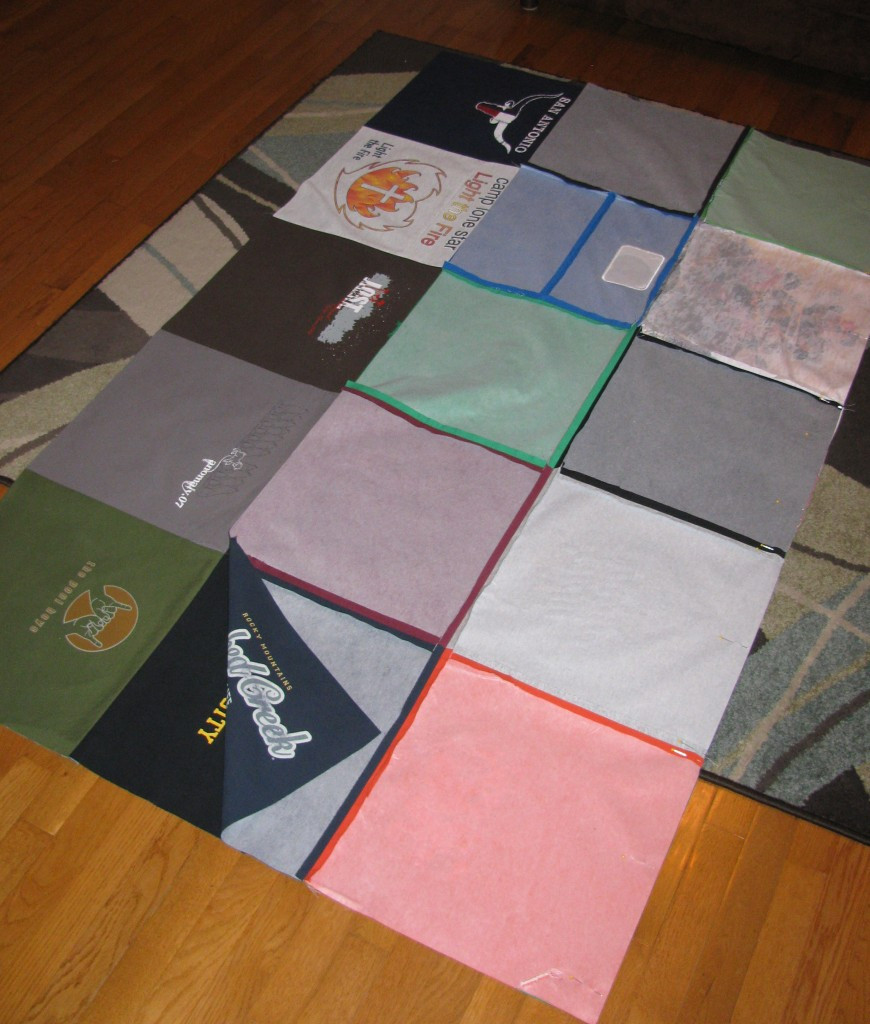
Sewing the top 2 rows to the bottom 3 rows (pinning seams and in between).
-
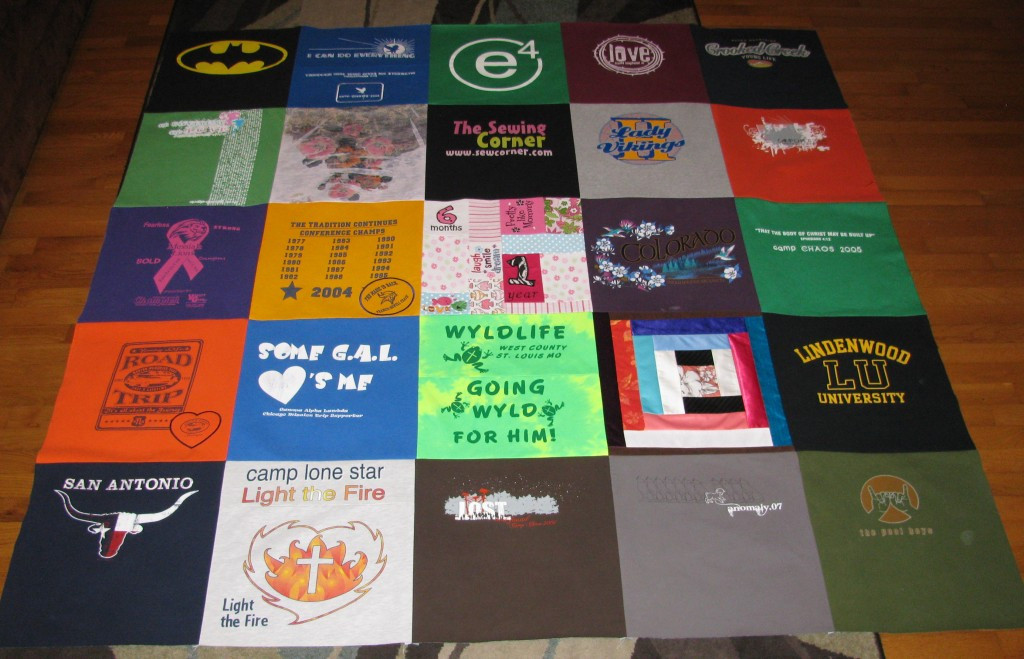
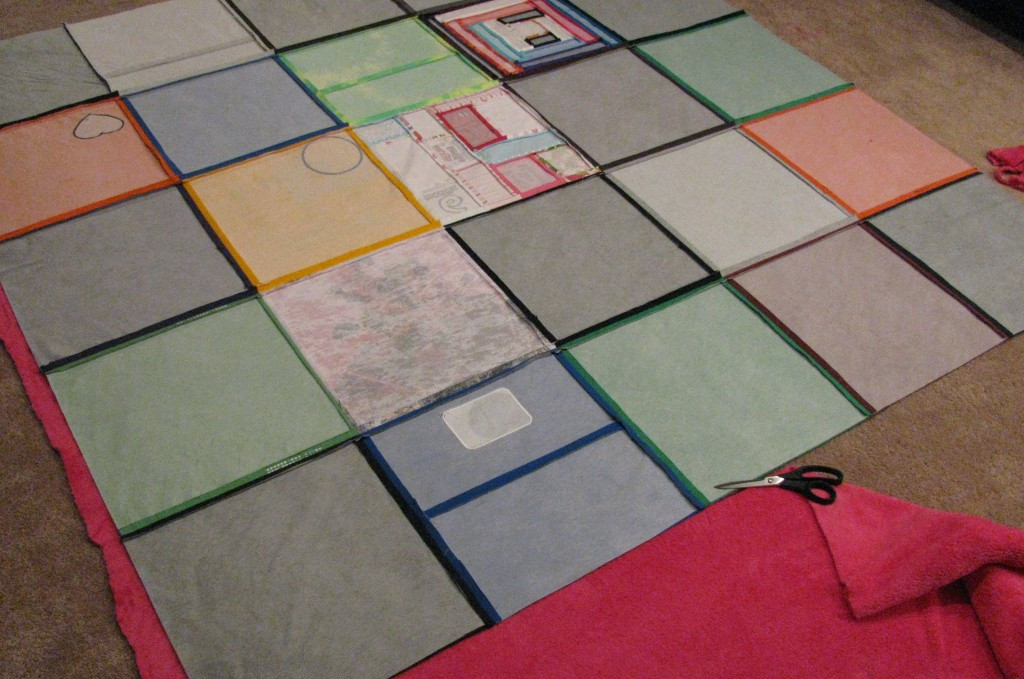
Quilt top finished: check!
-
-
See How We Sewed Our T-Shirt Quilt
Your t-shirt quilt top is finished! Yay! Now we’re going to cut the backing.
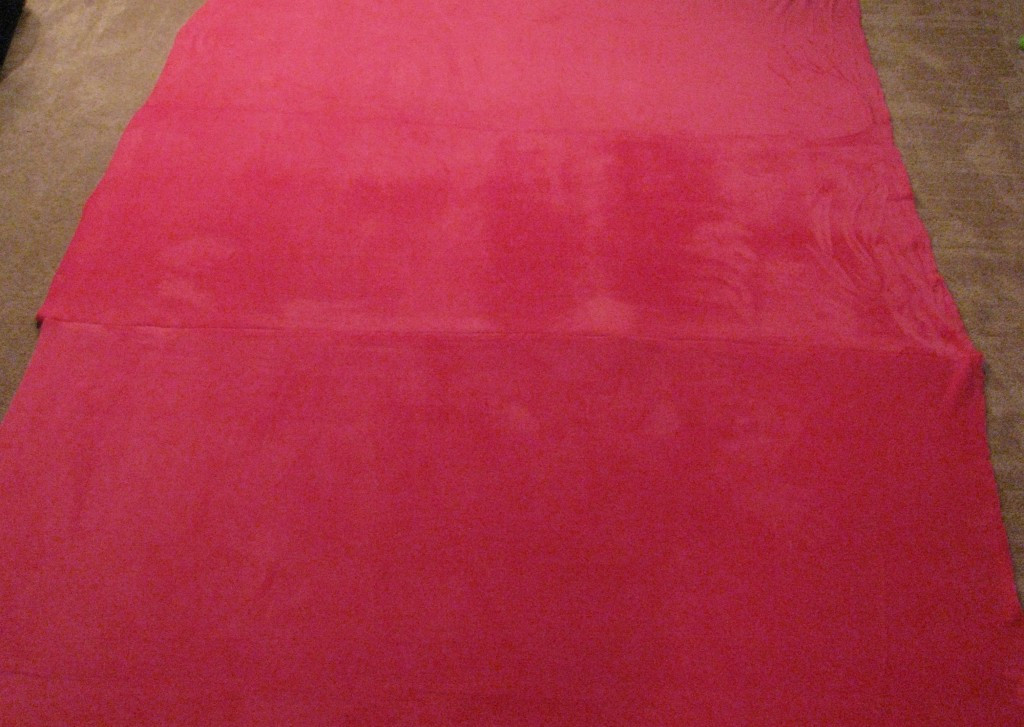
If your quilt top is longer than the width of the backing fabric (which normally would be 45” or 60” unless you get actual quilt backing fabric) you will have to sew a seam down the center (as shown in the picture). If you have to sew a seam measure the width of your quilt and multiply by 2 then divide by 36 to get your yardage (I like to put my seam halfway down the quilt back rather than down the middle of the quilt top to bottom…hopefully that makes sense (see picture below)). I used microfleece…it’s so cozy and warm but you can use anything soft…fleece flannel regular cotton…After you have sewn your seam lay the backing out seam down (pretty side up). Then lay the pretty side of your quilt top down (right sides together) on your backing. Now you’ll want to cut your back with your front (NOTE: THE PICTURE below SHOWS CUTTING EXACTLY EVEN BUT I WOULD CUT AN INCH or two BIGGER AROUND THE ENTIRE EDGE TO AVOID FABRIC SHRINKAGE). Next pin all the way around your quilt (I like to double pin an area marking where I start sewing and where I end to make sure that I remember to leave a big enough hole (the width of a t-shirt) to turn the quilt right side out). After pinning start at one double pin and sew around the entire quilt (leaving your hole open) and ending at your second double pin backstitching at the beginning and end. Clip your 4 corners and turn right side out through your opening.
-
Pic below: Seam across the middle of the backing.
If you are using microfleece (or anything with a nap) make sure the nap is going the same way when opened up after sewing!
-
Quilt top: right sides together centered on quilt backing!
-
Cut your backing an INCH or 2 bigger than your quilt top
This allows you to have a little extra just in case it shrinks in like mine did without (shown here) an inch extra.
-
Entire outer edge pinned.
-
-
Next lay your quilt out flat (you may want to press the outer edge a bit).
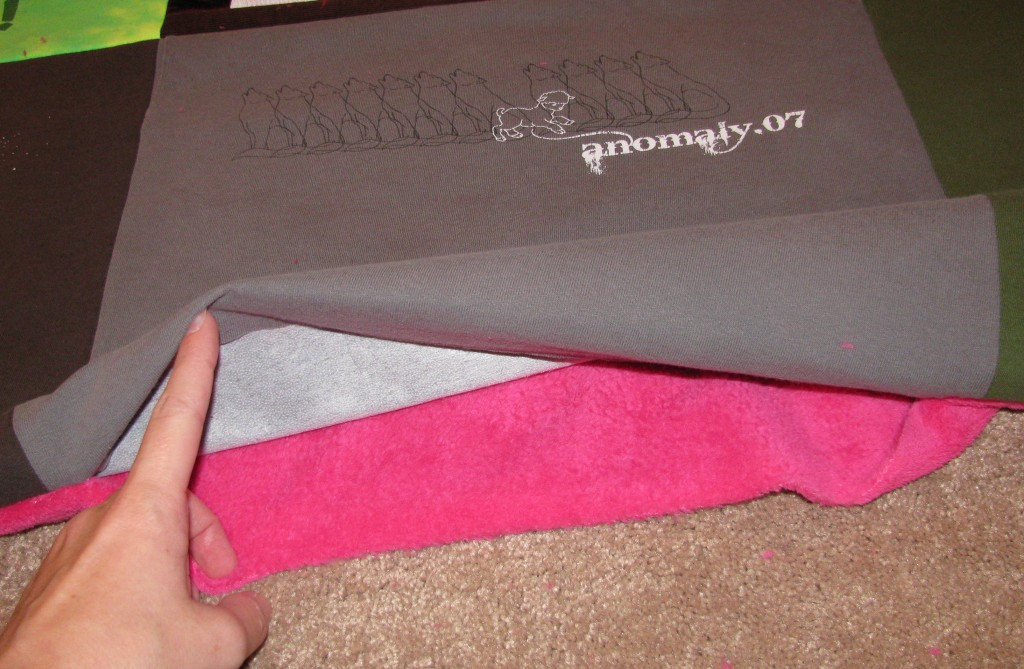
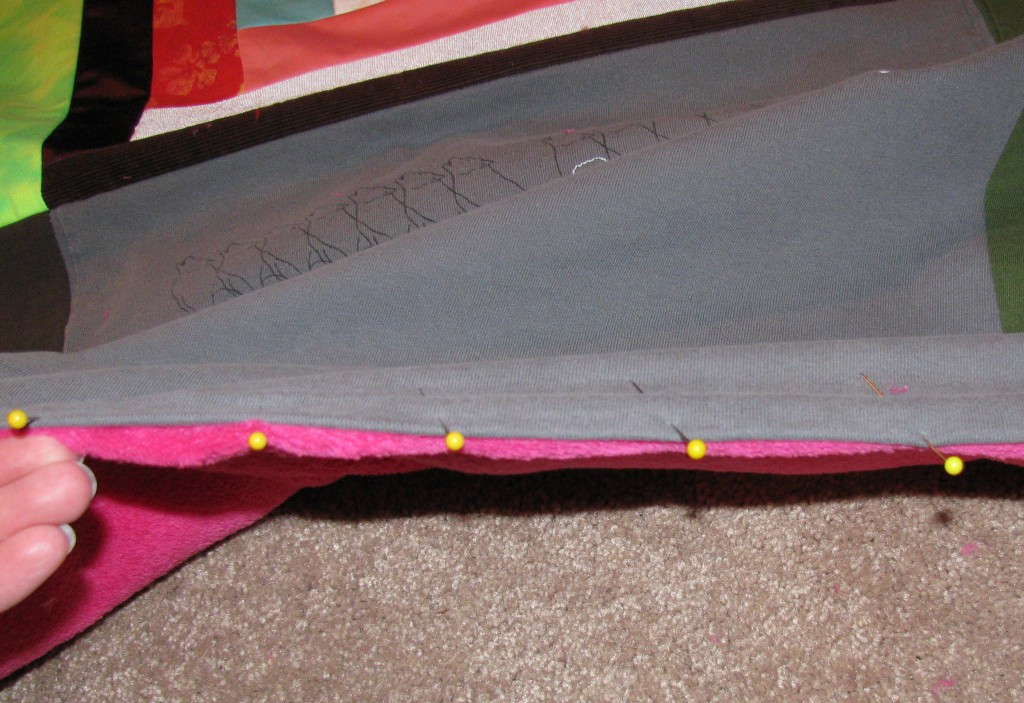
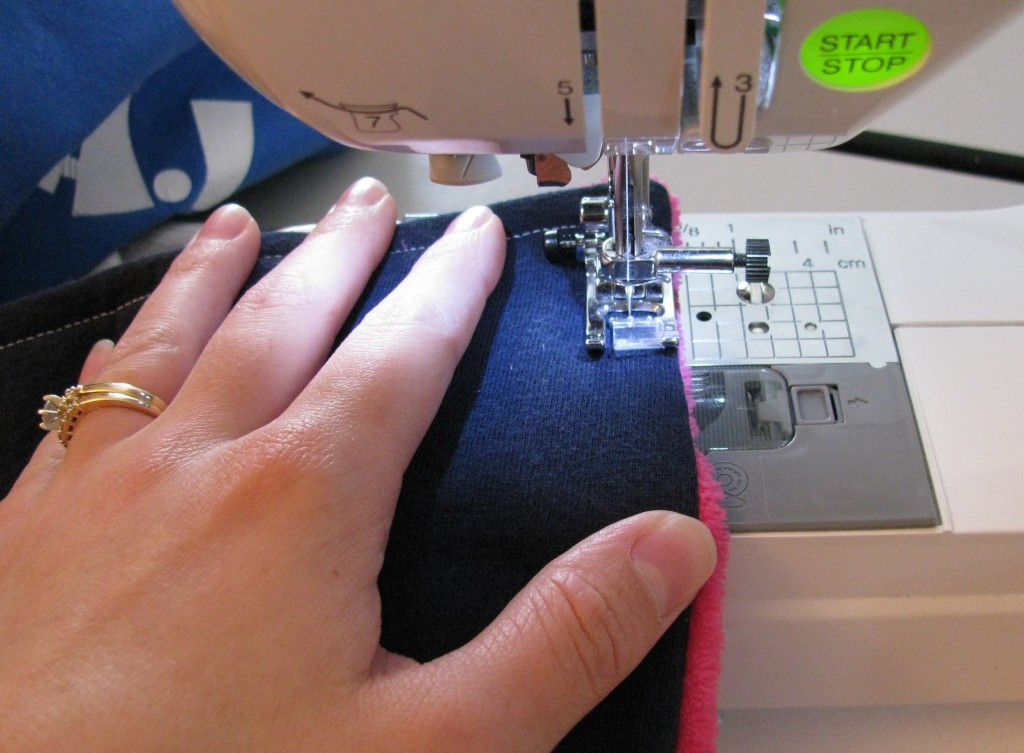
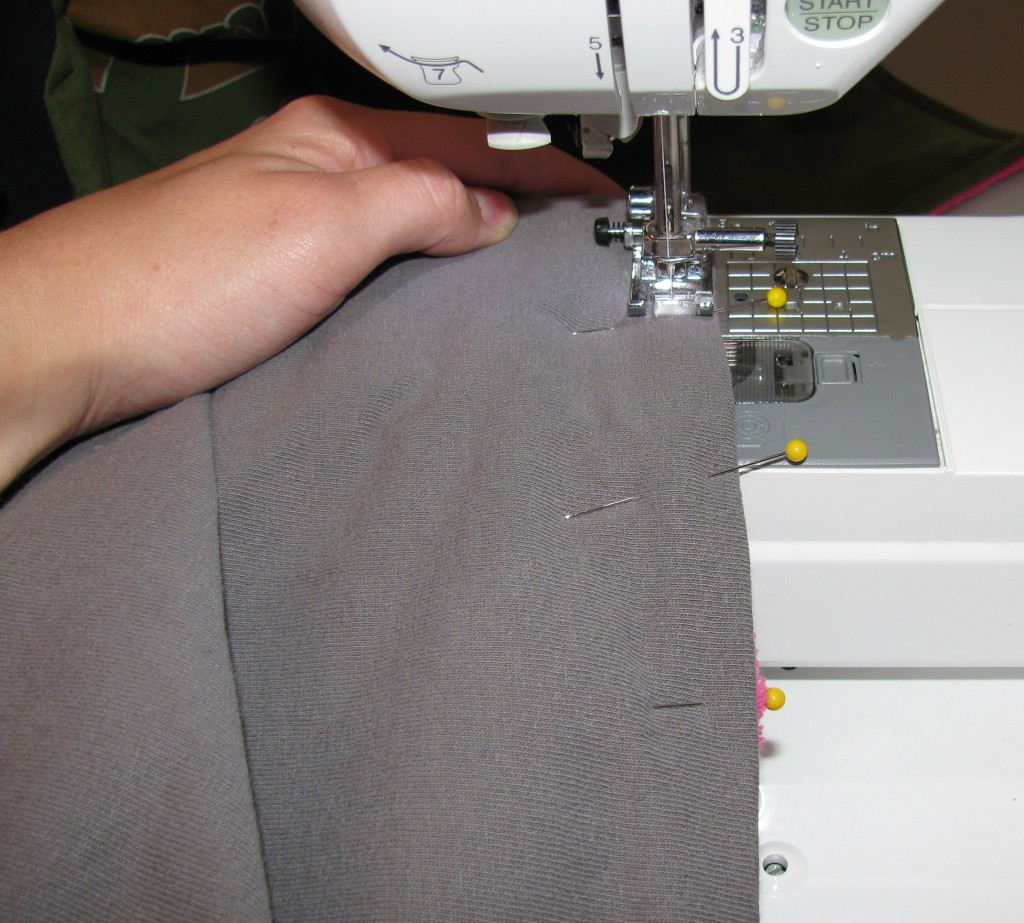
It may take a bit of adjustment to get it to lay flat and correctly (especially if you are using microfleece or something like it). Pin a bunch through both layers at corners and in between around the entire outer edge. Pin the hole closed as best you can (see picture below) and stitch around the entire outer edge even with the foot with your needle in the center (this should be about 3/8" from the edge). Try to keep the backing rolled to the back (you might pin more if you are having trouble; the backing may show a little bit if you are using microfleece or something like it). I used grey thread on top and a bobbin thread that matched my backing fabric. You might want to change to a bigger stitch too (3.0 stitch length as opposed to 2.5).
-
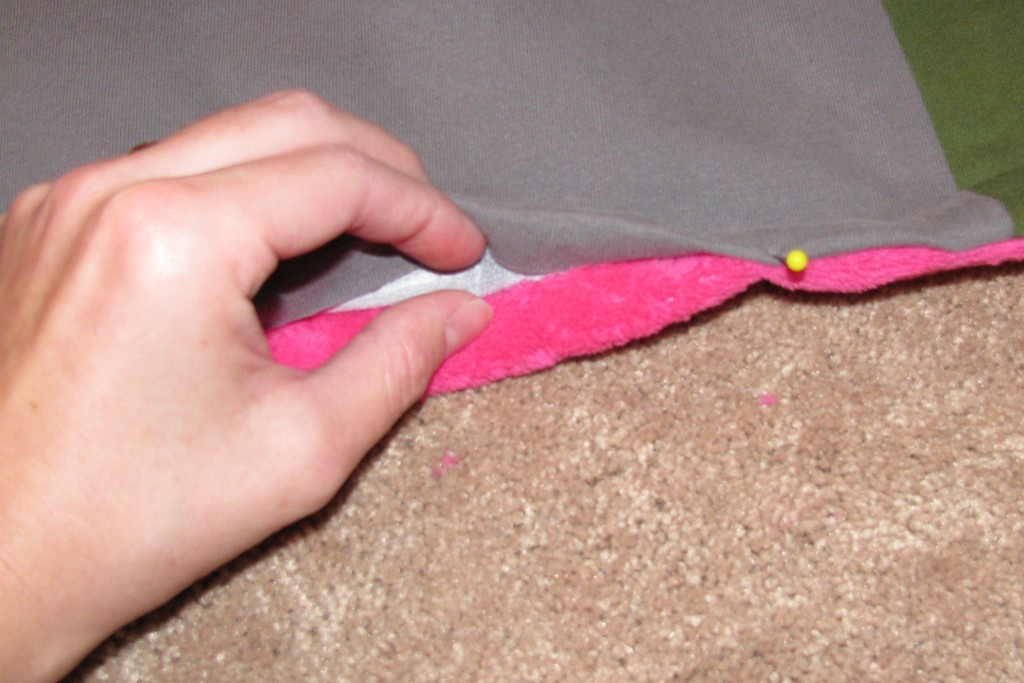
Below: Opening of which you turned your quilt right side out through.
-
Pinning the hole closed folding the edges in as evenly and straight as possible.
-
The hole completely pinned.
-
Stitching around the edge continually rolling the backing underneath so that it doesn't show like that by my thumb.
-
Sewing the hole closed.
-
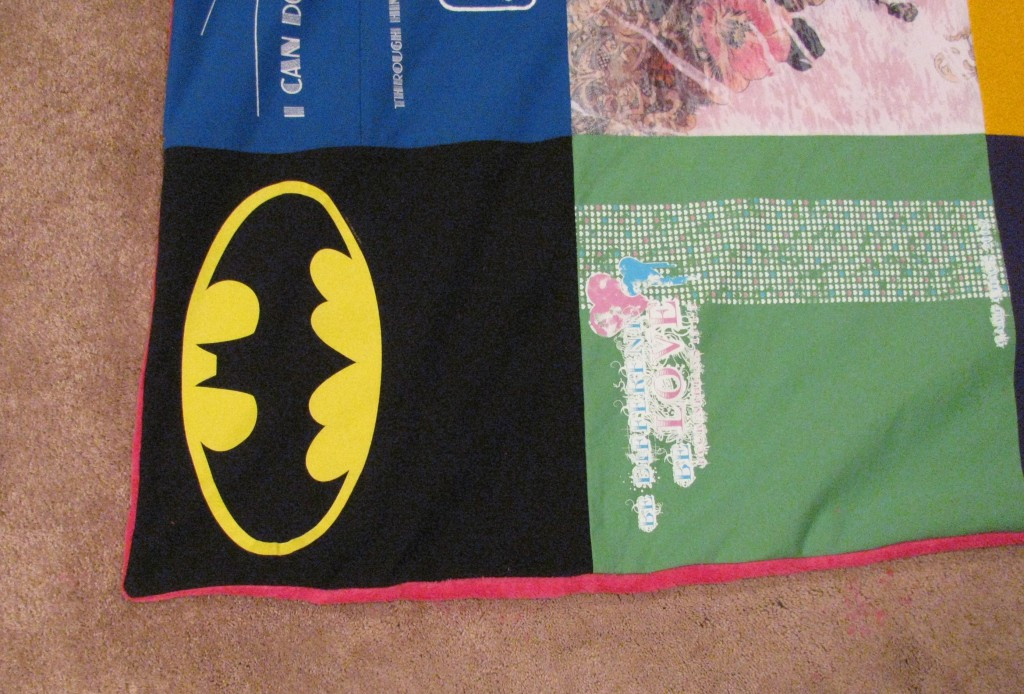
Don't let the edge roll like this; keep rolling it under as you sew! Pinning will help keep it under!
-
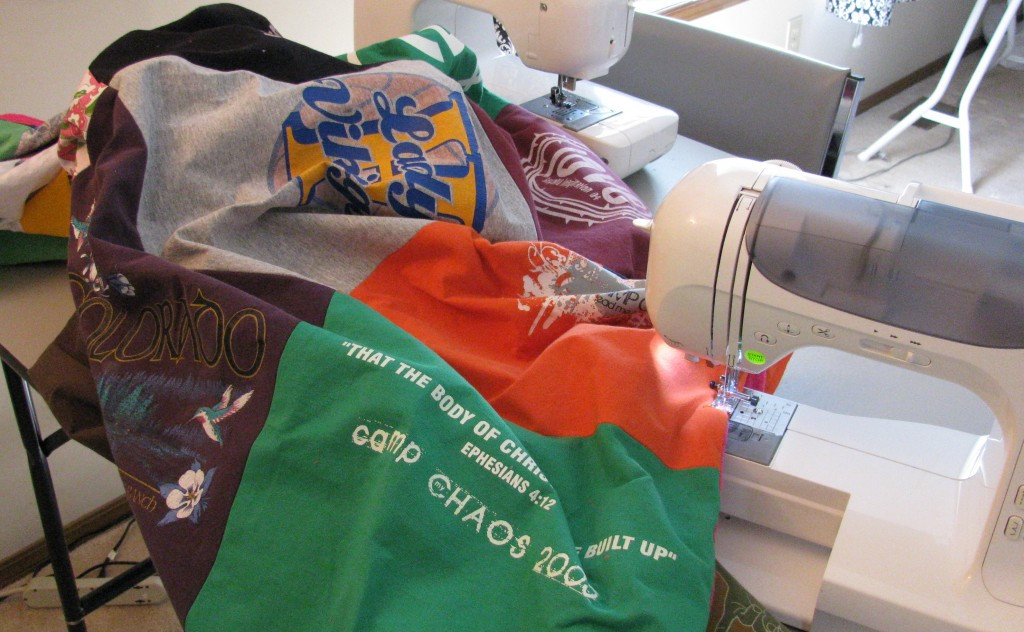
I propped the quilt to the side of the machine as I sewed the entire outer edge.
-
-
You've made it to the last step!
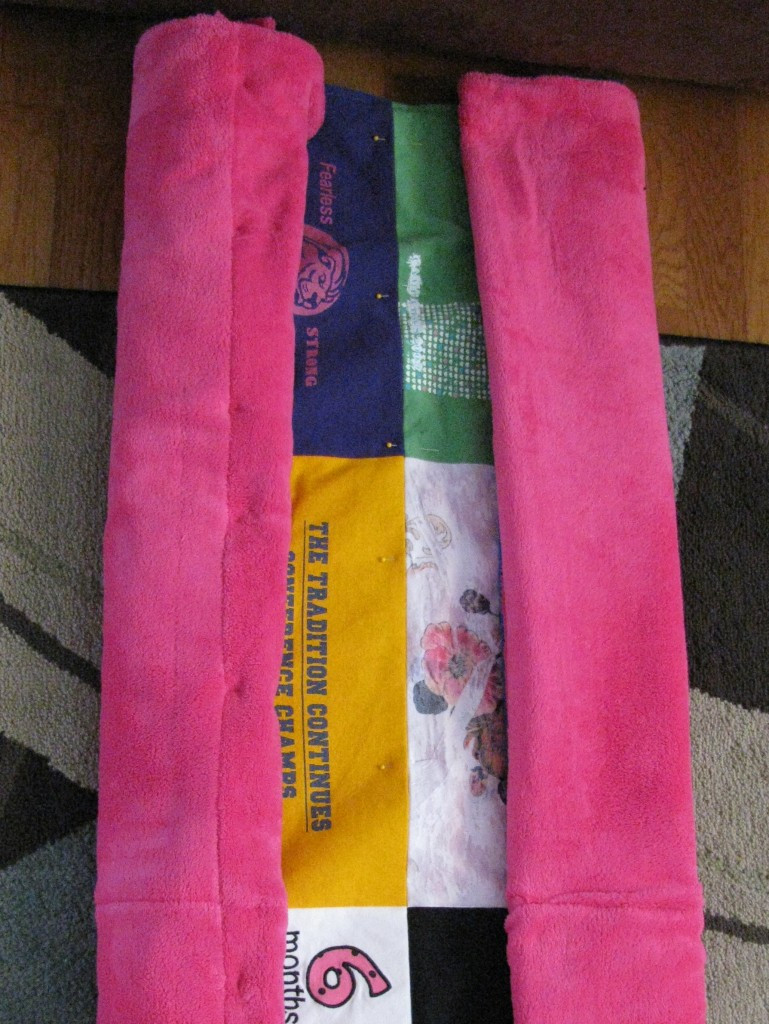
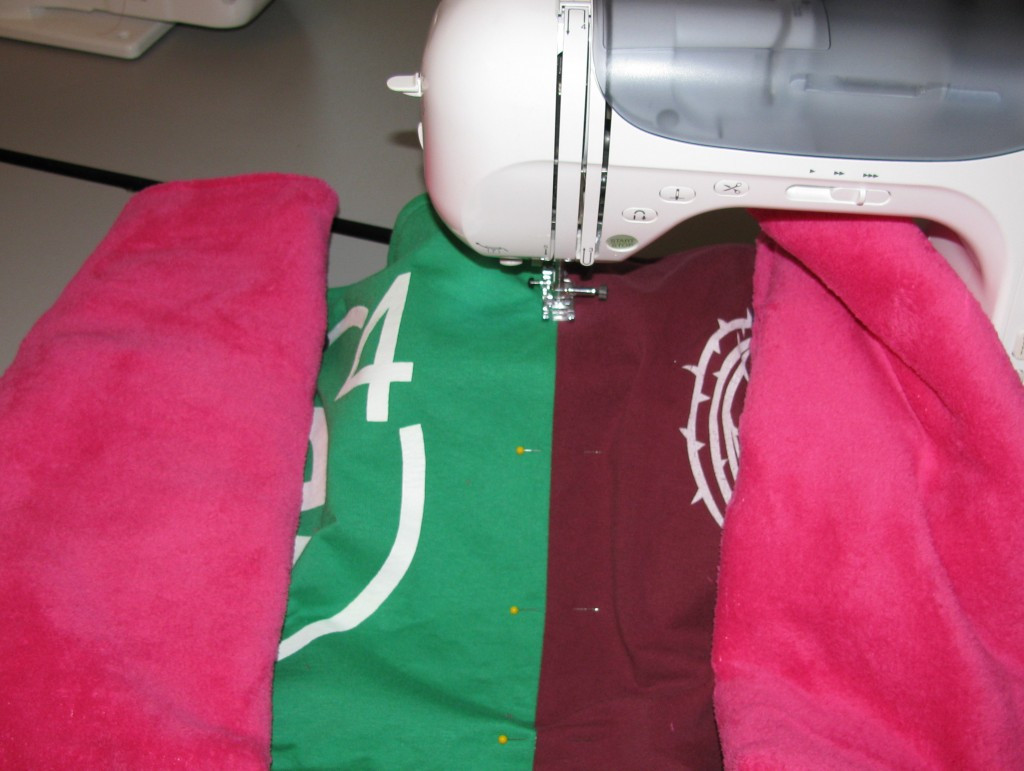
Lay the quilt out again spreading it flat and even. Pin the entire quilt throughout through both layers at corners and along seams of all shirts. This will keep your backing in place as you sew. Now you're going to stitch or quilt down your rows and columns right down the seams to keep your backing in place with your quilt top. You may want to start with center seams and work outward; roll edges of the blanket on either side of the seam to be sewn (see picture). Take your time it's thick and heavy and the backing may try to move on you (thus pinning a bunch to ensure the backing stays in place). Also perhaps use the 3.0 stitch length still and use less presser foot pressure and try a walking foot if you are having problems! You may still have to help it through by holding the front and back taught and using slight pull (not too much to where your needle and/or thread breaks; you also don't want overly long stitches). If your needle or thread does break remember to stay calm it's not the worst thing in the world! :D This step is probably the most difficult because typically the quilt is somewhat heavy and awkward to get through the machine thus taking your time but also take breaks if you get frustrated! Continually re-adjust your quilt for ease of sewing.
-
Below: Rolled sides around seam to be sewn!
-
Stitching down the seam!
-
You're finished!!! Thanks; enjoy your new cozy blanket!! Finished product!
Watch How We Finished Our T-Shirt Quilt
-


