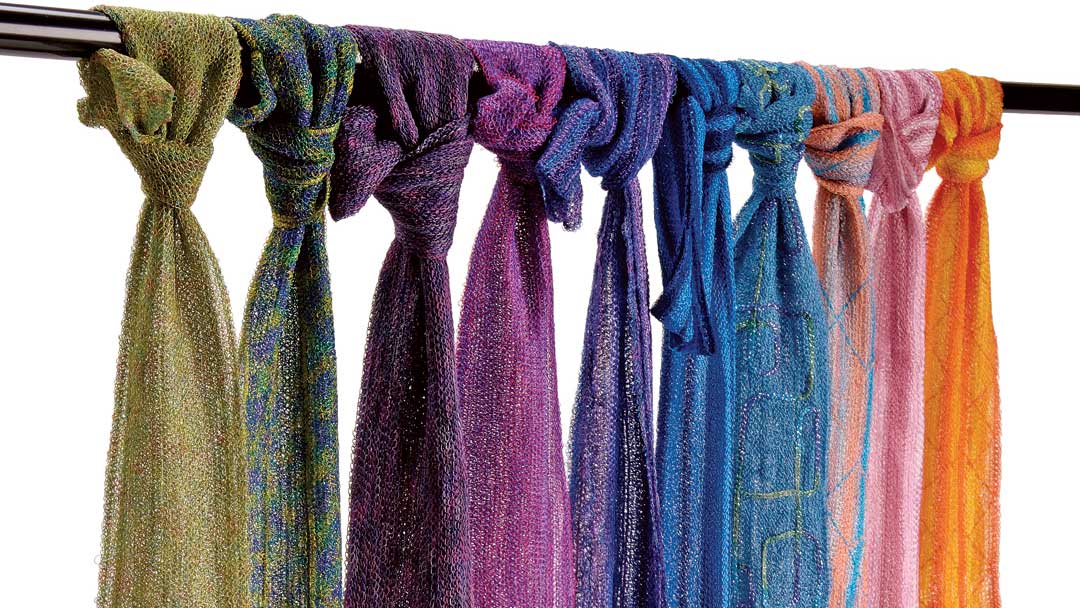
Always looking for new ways to use your serger? How about making fabric? With some thread and a bit of stabilizer you'll have a loose-woven fabric perfect for scarves jewelry or decorative edging! See the original post in Threads Magazine.
Here's how you do it.
You'll need thread water-soluble stabilizer a serger and optional trim and beads to create a scarf.
-
Thread your machine and set up a three-thread overlock stitch with the widest and longest stitch length and the needle positioned in the left side. I generally set the needle tension much lower than the looper tensions. Adjust tensions until they're to your liking. If the needle thread draws up too much when stitching reduce its tension.
-
Use water-soluble stabilizer. Cut water-soluble stabilizer into 1-inch-wide strips. Cut one strip as long as the desired scarf length. This is the first strip you stitch—the other strips can be cut to length or overlapped as you sew. By the time you finish stitching your scarf you’ll have a buildup of stabilizer but it will disappear in the wash.
-
Overlap your stitching.
-
Sew slowly especially if you're using thicker decorative threads in the loopers. Listen to your machine. This sewing is unusual because fabric isn’t involved. You can usually hear when a threading problem arises because your machine will make a different sound just before the threads break.
-
Hold the thread tails taut as you start to sew and sew a chain a few inches long for fringe. Slip a stabilizer strip under the foot and stitch along the length of the strip trimming off a sliver of the stabilizer. When the desired length is sewn stitch off the end of the stabilizer and sew a free chain at least twice the length of the first chain; these chains become the fringe. Cut the chain in half to free the strip.
-
Turn the stitched strip around and stitch down the other side catching the previous row of stitching with the serger needle as the knives trim off the excess stabilizer. Repeat as before making the fringe. Keep your fringe tails away from the knives so they don’t get cut off.
-
Center a second stabilizer strip under the previous strip and stitch again catching the stitching on the left and trimming the excess stabilizer on the right. Chain off for fringe as before and turn the strip around to sew the next row. At this point you’ve connected four rows of stitching and used two strips of stabilizer.
-
Keep the stabilizer to the right side of your sewn strip by adding a new strip of stabilizer stitching and trimming as before; then fold the stabilizer out to the right from under your stitching to stitch again. Each strip of stabilizer is sewn twice as you add stitching rows.
-
Repeat the above steps until you reach the desired width. At this point I like to raise my serger knife blade and sew a second row of stitching on top of the last row on each outer edge to strengthen and better stabilize the two edges. When the stabilizer is dissolved the scarf shrinks in length and width a variable amount depending on thread tension settings and other elements.
- Check your work before dissolving the stabilizer.
-
Look for gaps where the needle failed to connect the stitched rows by holding the scarf up to the light.
-
Mend the gaps with matching thread and a loose-tension zigzag stitch on your sewing machine. To mend invisibly knot the thread and bury the tails. After you’ve mended the holes you can add decorative stitching by hand or using your sewing machine.
-
Even up the fringe lengths (or not) tie knots in the ends or add beads to the fringe before knotting it.
- Rinse and dry.
-
Soak and rinse your scarf multiple times to remove all traces of the stabilizer. Wrap the scarf in a towel to absorb excess water then dry the scarf flat.
-
When your scarf is dry hold it up to the light one last time and pull the side edges outward looking for holes. Don’t be surprised if you missed finding a few holes. They can be loosely and invisibly whipstitched by hand to close—or become a design opportunity for adding beads or tying shut with ribbon.
And you're done!


