
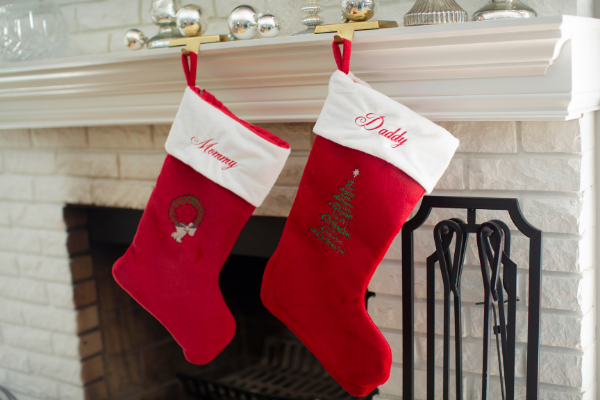
How to Embroider a Stocking By Patty Marty

Materials
To get started for embroidering a name or design to a stocking you will need a few supplies.
- Embroidery Machine
- Embroidery Buddy™ Stocking or Store-bought stocking of choosing
- Spools of Madeira Rayon or Polyester Embroidery Thread in Various Colors
- Baby Lock Tear-Away Stabilizer
- 5” x 7” Embroidery Hoop
- Baby Lock Hydro-Melt Topping
- Embroidery Design(s) of Choice (Holiday Lingo (ADC-218) from Amazing Designs was used)
- Font of Choice (built-in or purchased font)
- Adhesive Spray (to use with Tear-Away Stabilizer)
- Pins to secure the stabilizer (optional)
- Marking pen
Tutorial
Now that you have all of your supplies let’s walk you through how to embroider a stocking.
- Hoop the stabilizer of choice into the 5 X 7 hoop. Due to the nature of this item float the stocking vs. hooping the fabric.
- Mark the center of the stocking front.
- Unzip the stocking roll down or seam rip the side of the stocking so that it can lay flat. Position along the length of the hoop.
- In order to secure the stocking and keep it from moving during embroidery. You can use some pins to corner the area.
- Place the hoop onto the machine.
- Transfer the designs onto a USB stick.
- In the machine retrieve the design from the USB stick.
- Position the design to align with the placement marked on the stocking.
- If your machine has an option to add a basting stitch add this around the design.
- Place the hydro-melt topping over the stitching area. The basting stitch will help hold this into place.
- When ready to stitch touch Embroidery and Start/Stop.
- Once finished sewing remove hoop from your machine.
- Gently remove the basting stitches and topping. Follow the topping instructions for how to remove the excess hydro-melt.
- Remove the stocking from the stabilizer.
- Add a name to the cuff by following the same floating and marking technique.
- When completed simply zip the stocking front and back together. If you removed some of the side stitches flip the stocking inside out and stitch the side closed using a matching color thread to the fabric.
Printable Version Available Here
Includes step-by-step photos and the tutorial.
Download Here


