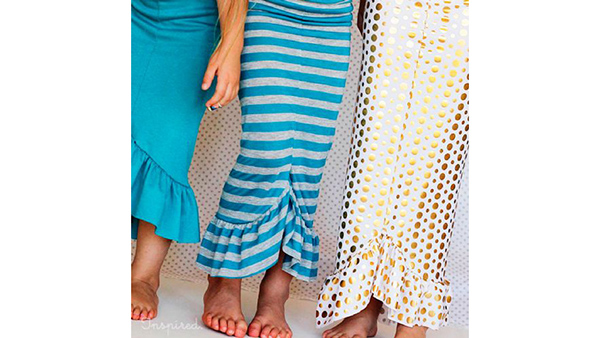
If your little girls are obsessed with all things mermaid this is THE tutorial for you. Whether your daughter likes dress-up or she's searching for the perfect Halloween costume this 30-minute mermaid skirt tutorial is sure to please. Download printable instructions.
Materials:
- Less than a yard of stretchy knit fabric (For most children’s sizes)
Tools:
- Baby Lock® Sewing Machine
- Baby Lock® Serger (optional)
- Ball point needles for sewing machine
- Baby Lock Ruffling Foot (SA122 - optional)
Steps:
-
Tip: For the quickest construction use a ruffling foot to gather the fabric for the bottom skirt ruffle and a serger to sew the three seams.
-
Of course you can gather the skirt ruffle without a ruffling foot and you can sew the seams with your regular machine and still finish in less than 30 minutes.
-
Be sure to use ball-point needles on your machines and a zig-zag stitch if you use a regular sewing machine.
-
-
You will need two measurements to make the skirt – you child’s hip measurement and the length from her waist to her ankle.
-
Cut one piece of fabric into a rectangle for the main skirt portion. The width (the direction of the most stretch) should be the hip measurement minus 2 inches.
-
The length of the rectangle should be the waist to ankle measurement minus 4 inches.
-
The length of the rectangle should be the waist to ankle measurement minus 4 inches.
-
-
Cut a strip for ruffling that is 4” by 2 times the width of the skirt rectangle (or 2 times the hip measurement minus 2” and a waistband piece that is 4” by the width of the skirt.
-
Begin by cutting a curve along the ruffling strip and the skirt piece. Fold the skirt in half lengthwise. Fold the ruffling strip in half bringing the short ends together.
-
Now cut a curve along the bottom (non-folded) corner of both of these pieces.
-
Just eyeball it so that you have a smooth curve rounding off the corners (about 4-5 inches up the side of the skirt piece).
-
-
Now ruffle the long strip. Feed it through your ruffling foot for super speediness.
-
Be sure to leave the threads long on each end of the ruffle to redistribute the gathers to fit the skirt if needed.
-
If you do not have a ruffling foot stitch a long basting stitch down the length of the ruffle and pull the bobbin threads to gather the strip.
-
Either way the gathered strip should be the same length now as the bottom of the skirt piece.
-
Match the gathered side of the ruffle strip to the bottom edge of the skirt right sides together.
-
Pin in place (or don’t just check to make sure the length is the same).
-
Stitch or serge the ruffle to the bottom of the skirt. No need to hem!
-
-
Turn down the attached ruffle.
-
Fold the skirt in half with right sides in and match the two sides.
-
Stitch or serge from the top of the skirt down to where the ruffle seam is – do not stitch the two ends of the ruffle strips together.
-
-
Set the skirt aside for a moment and grab the waistband piece. Match the two short ends right sides together and stitch (or serge!!!) to form a tube.
-
Fold the tube in half along its length to form the waistband.
-
With the skirt right side out and the waistband on the outside of the skirt match the seamline in the waistband to the center back of the skirt.
-
Pin the waistband to the skirt matching raw edges (the folded edge of the waistband will be facing down toward the hem).
-
The waistband should be the same circumference as the skirt but be sure that the two are pinned evenly around the whole waistband.
-
-
Serge together (or stitch – be sure you’re using a zigzag stitch)
And that is it!! Wasn’t it quick and easy? Mermaid Perfect in no time!


