
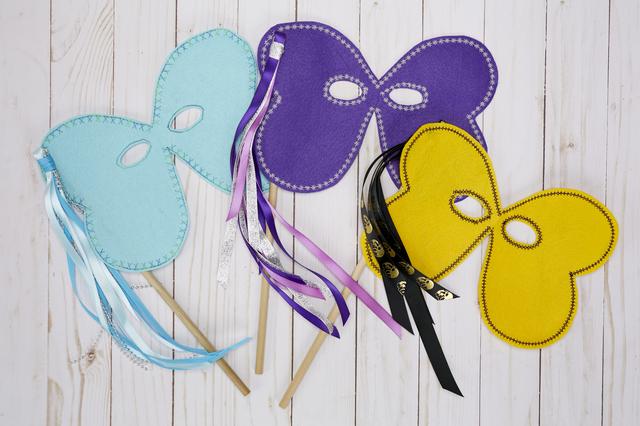
Play with the decorative stitches on your machine to make a butterfly mask! A beginner-friendly project these masks are simple to make in under an hour. A great project for teaching children how to sew. Download project instructions here.
Supplies:
- 12” x 12” square of stiff felt
- Chalk or fabric marker
- Decorative thread
- 12” dowel
- Assorted Ribbon
- Hot Glue
- Mask template (included on last page of instructions)
Instructions:
- Cut out the template on the following page using crafting or paper scissors.
- Trace the template onto the felt with chalk or a fabric marking pen.
- Cut out the felt on the lines.
- Thread your machine with decorative thread—this can be a contrasting color metallic thread variegated thread or other fun thread.
- Select a decorative stitch on your machine.
- You may want to test the stitch on a scrap piece of felt before stitching on your mask.
- Using the decorative stitch stitch on your mask. You can use the edge of your presser foot to guide you around the edge of the butterfly shape and eye holes.
- If you would like a hand-held mask you can glue a 12” dowel on one side if you’d like a hands-free mask you can cut two 24” lengths of ribbon. If you choose the ribbon option hand-stitch one end of each ribbon to the back of the mask 1” in from the indent on each side of the mask.
- To add a decorative tassel you can cut 6-10 pieces of ribbon between 16=26” in length. Fold in half-ish then tie a 5” piece of ribbon at the top to secure the ribbons together. Glue or handstitch in place.


