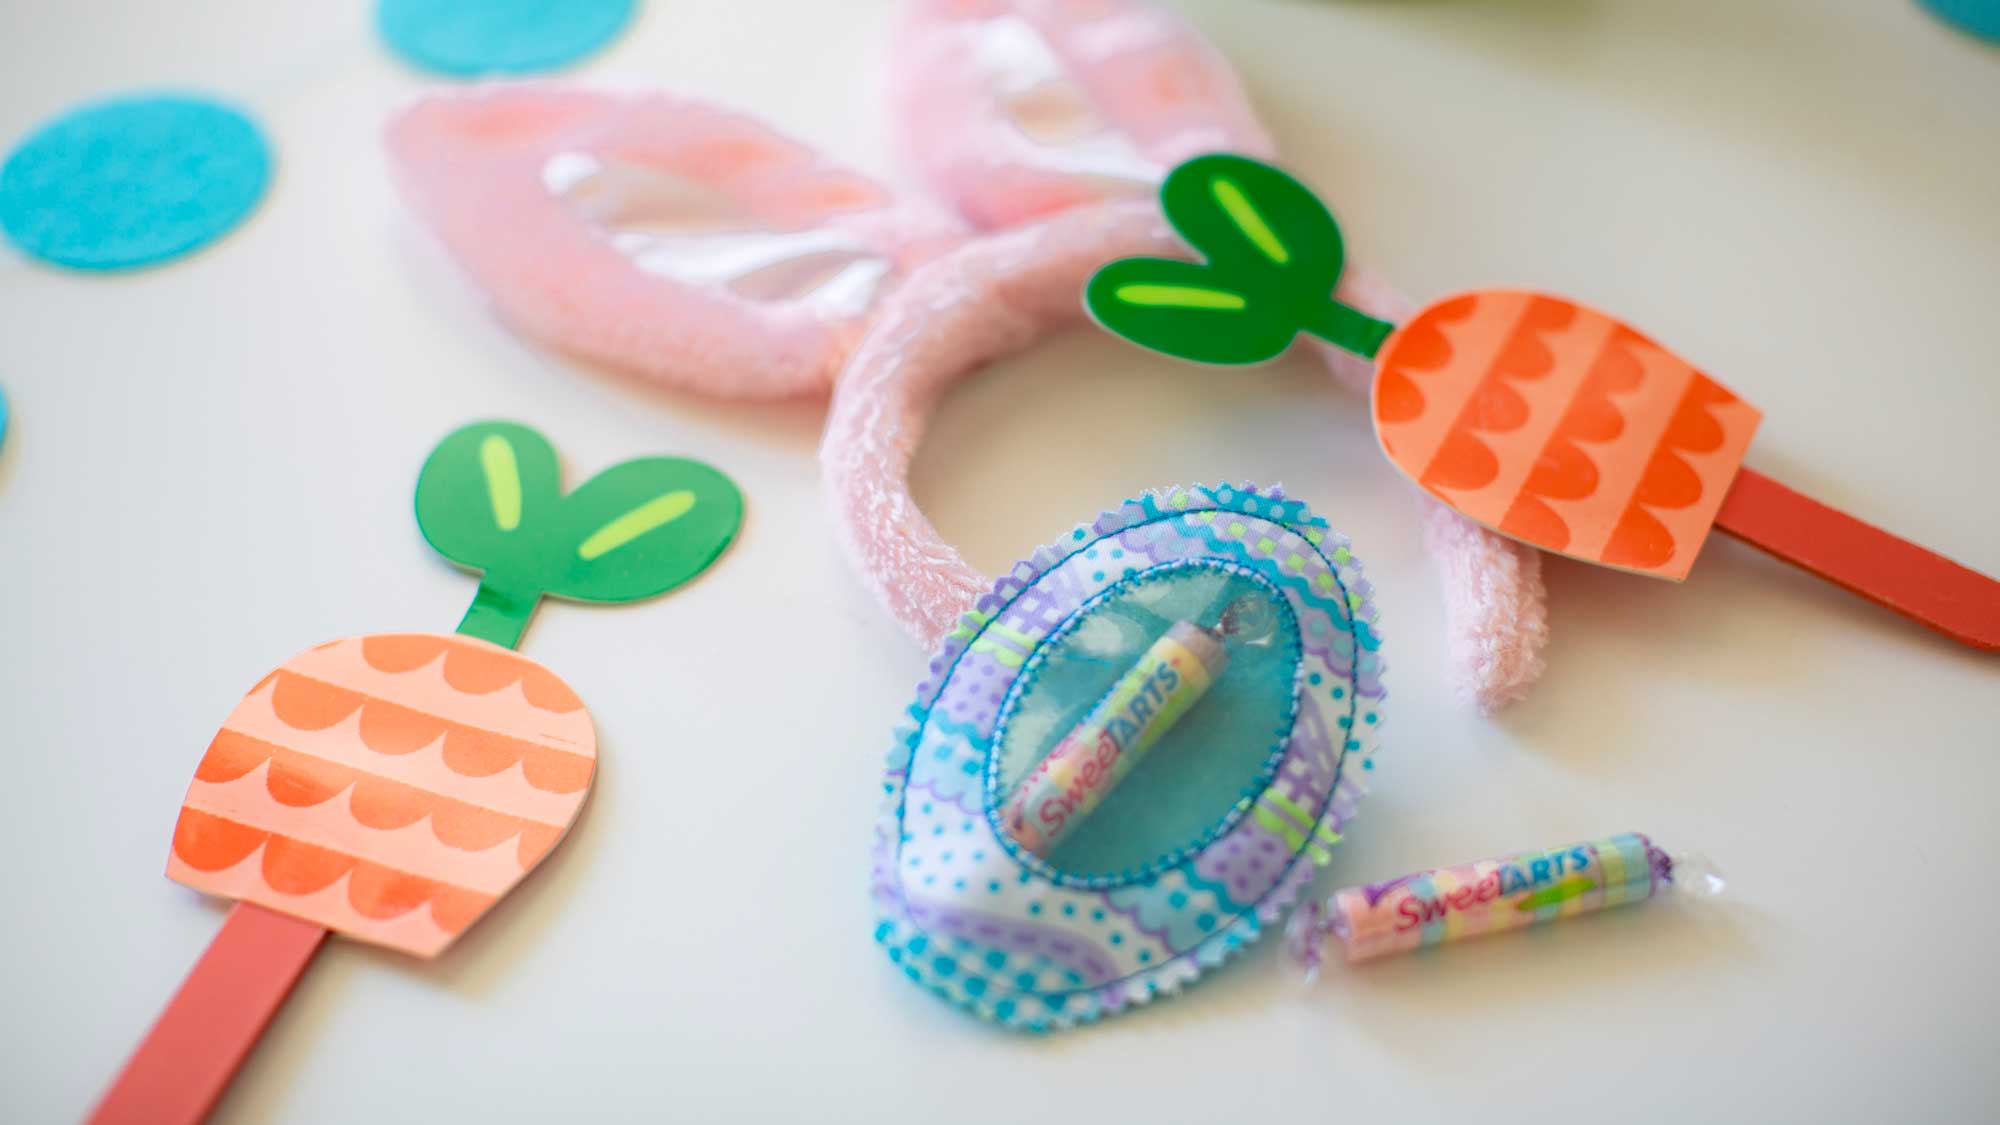
Need something fun for the Easter bunny to leave? Make this quick and easy embroidered treat! With a clear vinyl window you can stuff it with your children's or grandchildren's favorite goodies. They're made in the hoop so whether you're making one or a dozen it'll go fast! Download printable instructions.
Materials:
- Spool of Madeira embroidery thread to match fabrics
- Empty bobbin
- Fat quarter of egg fabric with a small print
- 1/4" of yard of clear vinyl (found in the upholstery fabric section)
- Felt Square
- Pinking shears
- Clover Wonder Clips
- Curved or applique scissors
- Seam ripper
- Small Candy
Tools:
Steps:
-
Set up and thread your Baby Lock machine for embroidery mode.
-
Wind a bobbin with the same embroidery thread you plan to use for the top thread.
-
Make the finished egg shape approximately 4”. Exact measurement settings are not critical for this project if the steps are assembled in the correct order.
-
You can increase or decrease the size of the oval or egg shape to your liking as long as it fits within your embroidery machine’s maximum embroidery field size.
-
-
Select the built-in framing patterns. Select the oval shape then select a running stitch.
-
Size this to be the smaller center oval so it will be approximately 2”.
-
Add another framing pattern oval. This time chose the applique E stitch outline.
-
Note: a satin stitch or tight stitching will create too many needle holes and perforate the vinyl.
-
-
Size this oval to be the same size as the previous running stitch.
-
If needed use the center button in the move keys to center the oval and stack the two ovals.
-
Add another framing pattern Oval. Select a running stitch outline.
-
Size this oval to be approximately 4” (3.95” if you are using a machine with a 4”x4” hoop).
-
Duplicate the oval you just made.
-
Center all the ovals on the screen so you have two small ovals stacked in the middle of two larger ovals. This will be your egg design.
-
Layer a piece of the cotton print fabric over a piece of clear vinyl and place them together in the hoop.
-
Place the hoop on the machine. Embroider the small running stitch oval only.
-
Remove the hoop from the machine. Do NOT remove the fabric from the hoop.
-
Using the seam ripper very carefully make a small slit in the cotton layer only inside the oval for the middle of the egg shape.
-
This slit is just to allow you to get the scissors in the cotton layer only and trim away the center of the oval leaving the vinyl layer intact.
-
-
Trim the cotton fabric to but not through the stitching line to expose the clear vinyl.
-
Place the hoop back on the machine and stitch the small oval with the applique outline stitching. This will cover the trimmed edge.
-
Next stitch one large oval shape. This is your placement line.
-
Layer a second piece of vinyl and a felt square. Slide these under the hoop with the vinyl layer up so it is next to the other vinyl layer.
-
You may choose to use wonder clips to hold the fabric corners to the corners of the top layers of fabric.
-
Using the needle advancement keys to skip stitches stitch the last oval skipping 12-15 stitches at the top of the oval. This will leave an opening for candy.
-
For additional reinforcement you can choose to repeat the last step so you have another layer of stitching holding the egg together.
-
Once the stitching is complete remove all layers from the machine and the hoop.
-
Trim any loose threads then using pinking shears cut the egg shape from the fabric trimming outside the final row of stitching.
-
Fill the egg by placing the candies between the two clear vinyl layers.
-
Gift share and enjoy!


