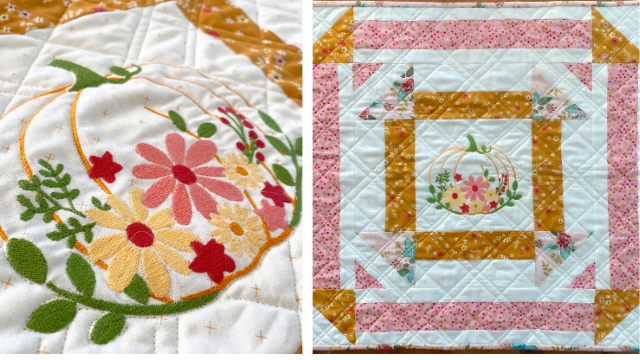
This darling mini quilt is the perfect addition to your Fall décor! It makes a great table topper wall decoration or you can turn it into a pillow!
CLICK HERE TO DOWNLOAD PRINTABLE INSTRUCTIONS WITH ADDITIONAL PHOTOS.
Supplies
- Baby Lock sewing or quilting machine
- Baby Lock embroidery machine
- Floral Pumpkin Embroidery File – Click HERE to download.
- Background fabric – ¾ yard
- ¼ yard of gold fabric
- ¼ yard dark pink fabric
- ½ yard light pink fabric (for block and binding)
- ¾ yard backing fabric
- Batting – 27” x 27” piece
- Thread for embroidery – Gold Yellow Dark Pink Light Pink
- Embroidery hoop – at least 8” x 12”
- Stick on stabilizer
Cutting:
- From gold fabric cut:
- A - 4 pieces – 2 ½” x 8 ½”
- B - 2 pieces 5” x 5”
- From light pink fabric cut:
- C - 2 pieces 5” x 5”
- D - 3 strips 2 ½” x WOF for binding
- From dark pink fabric cut:
- E - 4 pieces 2 ½” x 16 ½”
- F - 4 pieces 2 ½” x 2 ½”
- From background fabric cut:
- G - 1 piece 10” x 18” for hoop
- H - 4 pieces 2 ½” x 8 ½”
- I - 4 pieces 5” x 5”
- J - 8 pieces 1 ½” x 16 ½”
Instructions:
- Place your stabilizer on the wrong side of the G Background piece. Stitch your cute floral pumpkin using the embroidery file and your coordinating thread.
- Remove the fabric from the hoop and remove the stabilizer carefully from the back. Press well. Trim to 8 ½” x 8 ½” making sure the design is centered in the square.
- Draw a diagonal line on the wrong side of 2 of the I background pieces. Place these two right sides together with two B print pieces. Sew a ¼” seam on the left and right sides of the marked line. Cut down the marked line and press towards the darker fabric. Trim the four half square triangles to 4 ½’ x 4 ½”.
- Repeat with two more I background pieces and two C print pieces to make four half square triangles. Trim the four half square triangles to 4 ½” x 4 ½”.
- Place an H background piece right sides together with an A print piece. Sew along the long side. Repeat to make three more sets for a total of four.
- Assemble the center of the block as shown.
- Draw a diagonal line on the wrong side of the F print pieces. Place the F pieces right sides together on each corner of the block with the lines aligned as shown in Fig E. Sew on the marked line trim ¼” away from the seam and press open.
- Sew a J background piece on either side of an E print piece along the long sides.
- Assemble the remainder of the top as shown.
- Layer together your quilt top batting and backing. Quilt as desired. I used diagonal quilting with different widths for the spaces between lines.
- Sew your binding strips together end to end. Press binding in half long-ways. Bind mini quilt as desired.


