If you’re a fan of log cabin quilts you’re sure to love the simplistic nature of these placemats. Using a Baby Lock sewing machine makes sewing fun and easy when decorating for the holidays. Download printable instructions.
Materials:
- 1 Jelly Roll Holiday print fabric or 2 ½” strips of coordinating fabrics
- 1/2 Yard of print for backing and binding
- Baby Lock Ultra Soft Stabilizer (BLC204)
- Madeira® Cotona thread to match fabric
- Rotary cutter mat and ruler
- Temporary adhesive spray (optional)
Tools:
- Baby Lock® sewing and quilting machine
- ¼” piecing foot (some options that work with most Baby Lock machines include BLSO-QF (shown) BLSO-QGF ESG-QGF ESG-QF)
Steps:
-
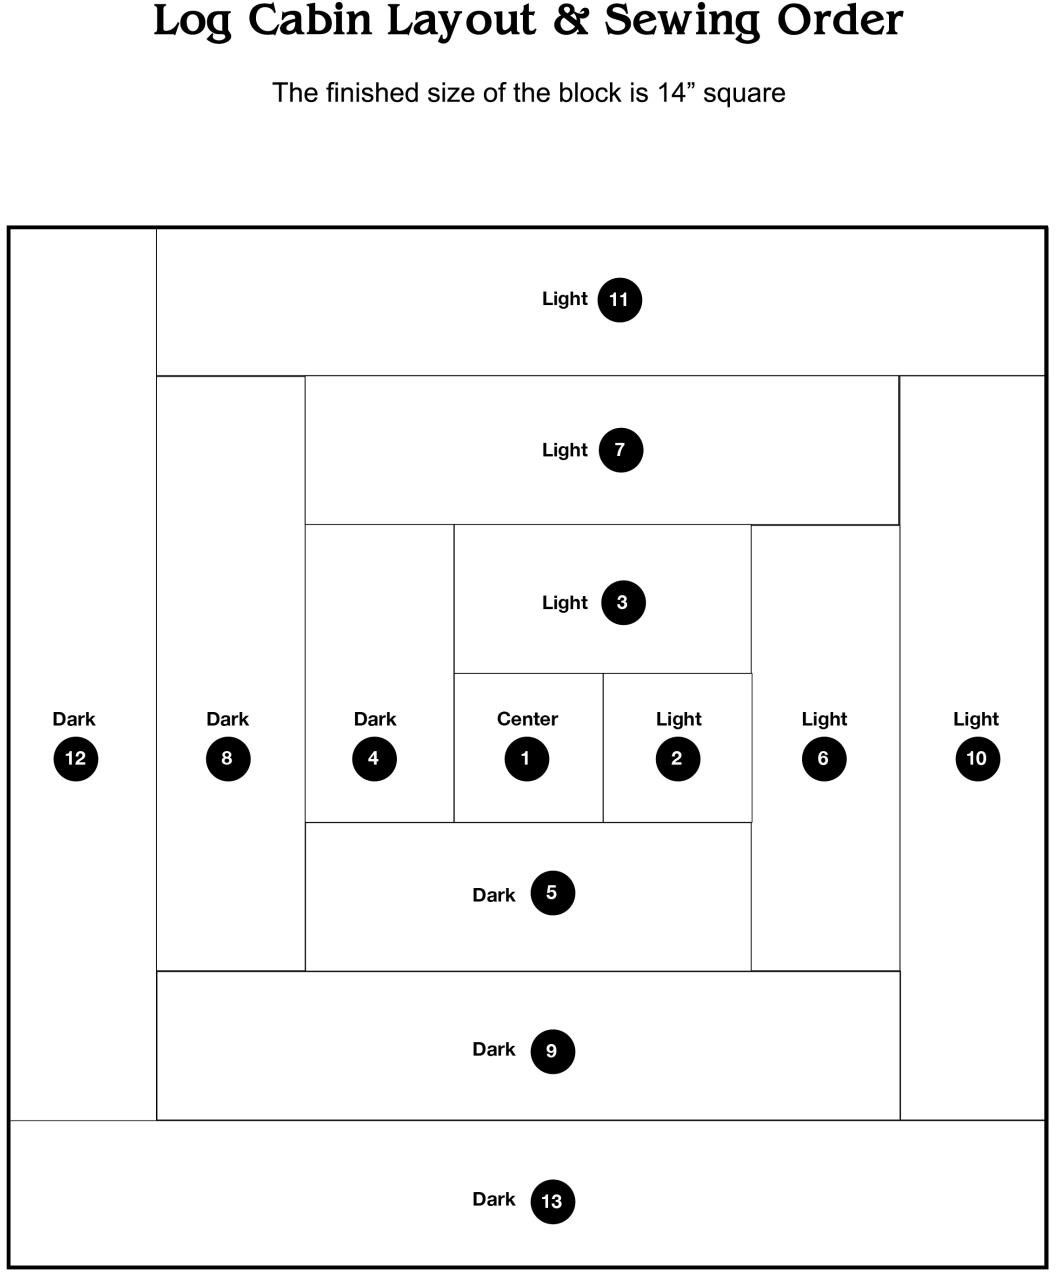
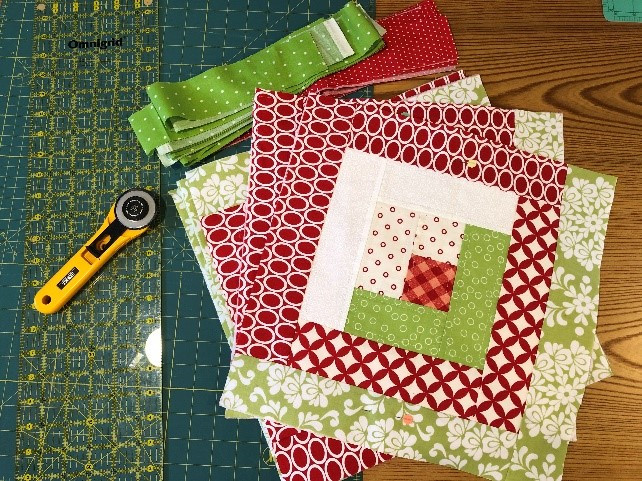
The supply list will make two placemats. Use the layout in the printable instructions with the piecing order for the log cabin top.
-
To create a single log cabin cut the following sections from the jelly roll or 2 ½” strips:
-
From the darkest jelly roll fabric length cut a 2 ½” square for the center.
-
For the 2nd and 3rd sections cut a 2 ½” square and a 2 ½” x 4 ½” from a light section.
-
For the 4th and 5th sections cut a piece 2 ½” x 4 ½” and a section 2 ½” x 6 ½” from a dark section.
-
For the 6th and 7th sections cut a piece 2 ½ x 6 ½” and a 2 ½” x 8 ½” from another different light section.
-
For the 8th and 9th sections cut a piece 2 ½” x 8 ½” and another 2 ½” x 10 ½” from a different dark print.
-
For the 10th and 11th sections cut a piece 2 ½” x 10 ½” and another 2 ½” x 12 ½” from another light fabric.
-
For the 12th and 13th sections cut a piece 2 ½” x 12 ½” and another 2 ½” x 14 ½” from another dark print.
-
-
Cut a 15” square from the print fabric for the backing.
-
Cut a 15” square of the Ultra Soft Fusible stabilizer. Set aside.
-
If making multiple placemats you will want to cut additional pieces for the quantity of placemats.
-
Set up the machine for sewing:
-
Thread the machine.
-
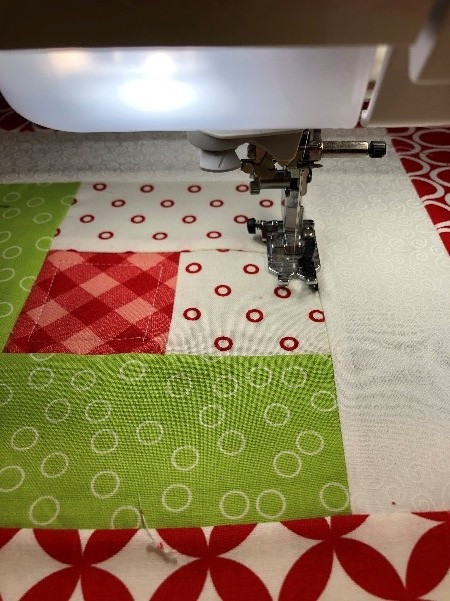
Attach a ¼” piecing foot to the machine.
-
Wind the bobbin with the same thread as used for the upper thread.
-
Set machine to a center needle stitch to create a ¼” seam. (Q-01)
-
-
Sew the first square to the second square as shown in the layout below
-
Press the seam toward the darker fabric.
-
Note: pressing is very important and should always be performed after each seam has been stitched. The quilt top will have a neater and more professional look.
-
-
Press the seam toward the darker fabric.
-
Note: pressing is very important and should always be performed after each seam has been stitched. The quilt top will have a neater and more professional look.
-
-
Sew the third section to the 1st and 2nd section.
-
Be sure that the raw edges are even.
-
Pin the sections together to keep the fabric from shifting.
-
-
Continue to sew the sections together in the order shown on the layout below.
-
Watch the Sew Easy Sew Fun Video to see a quick tutorial on how these are put together. https://www.youtube.com/watch?v=7FPTZZtWouo
-
Fuse a 15” square piece of the Ultra Soft stabilizer to the backside of the quilted placemat top.
-
Layer with the placemat backing.
-
Pin or spray baste the layers together.
-
-
To quilt the placemat top top stitch ¼” away from each of the seam lines. This will give the placemat some depth.
-
Square up the placemat top to measure approximately14 ½” x 14 ½”.
-
Sew the binding strips together with mitered seams. Using the Guideline marker helps to keep your stitching lined up when sewing mitered seams.

-
Trim off excess fabric. Fold and press in half.
-
Attach the binding to the back of the placemat using a ¼” seam allowance and your favorite binding method.
-
Press and fold to the front and use a decorative stitch such as a serpentine stitch to attach the binding to the front of the placemat.
-
Now you can add some holiday pizzazz to your mealtime!
-
Log Cabin Layout