
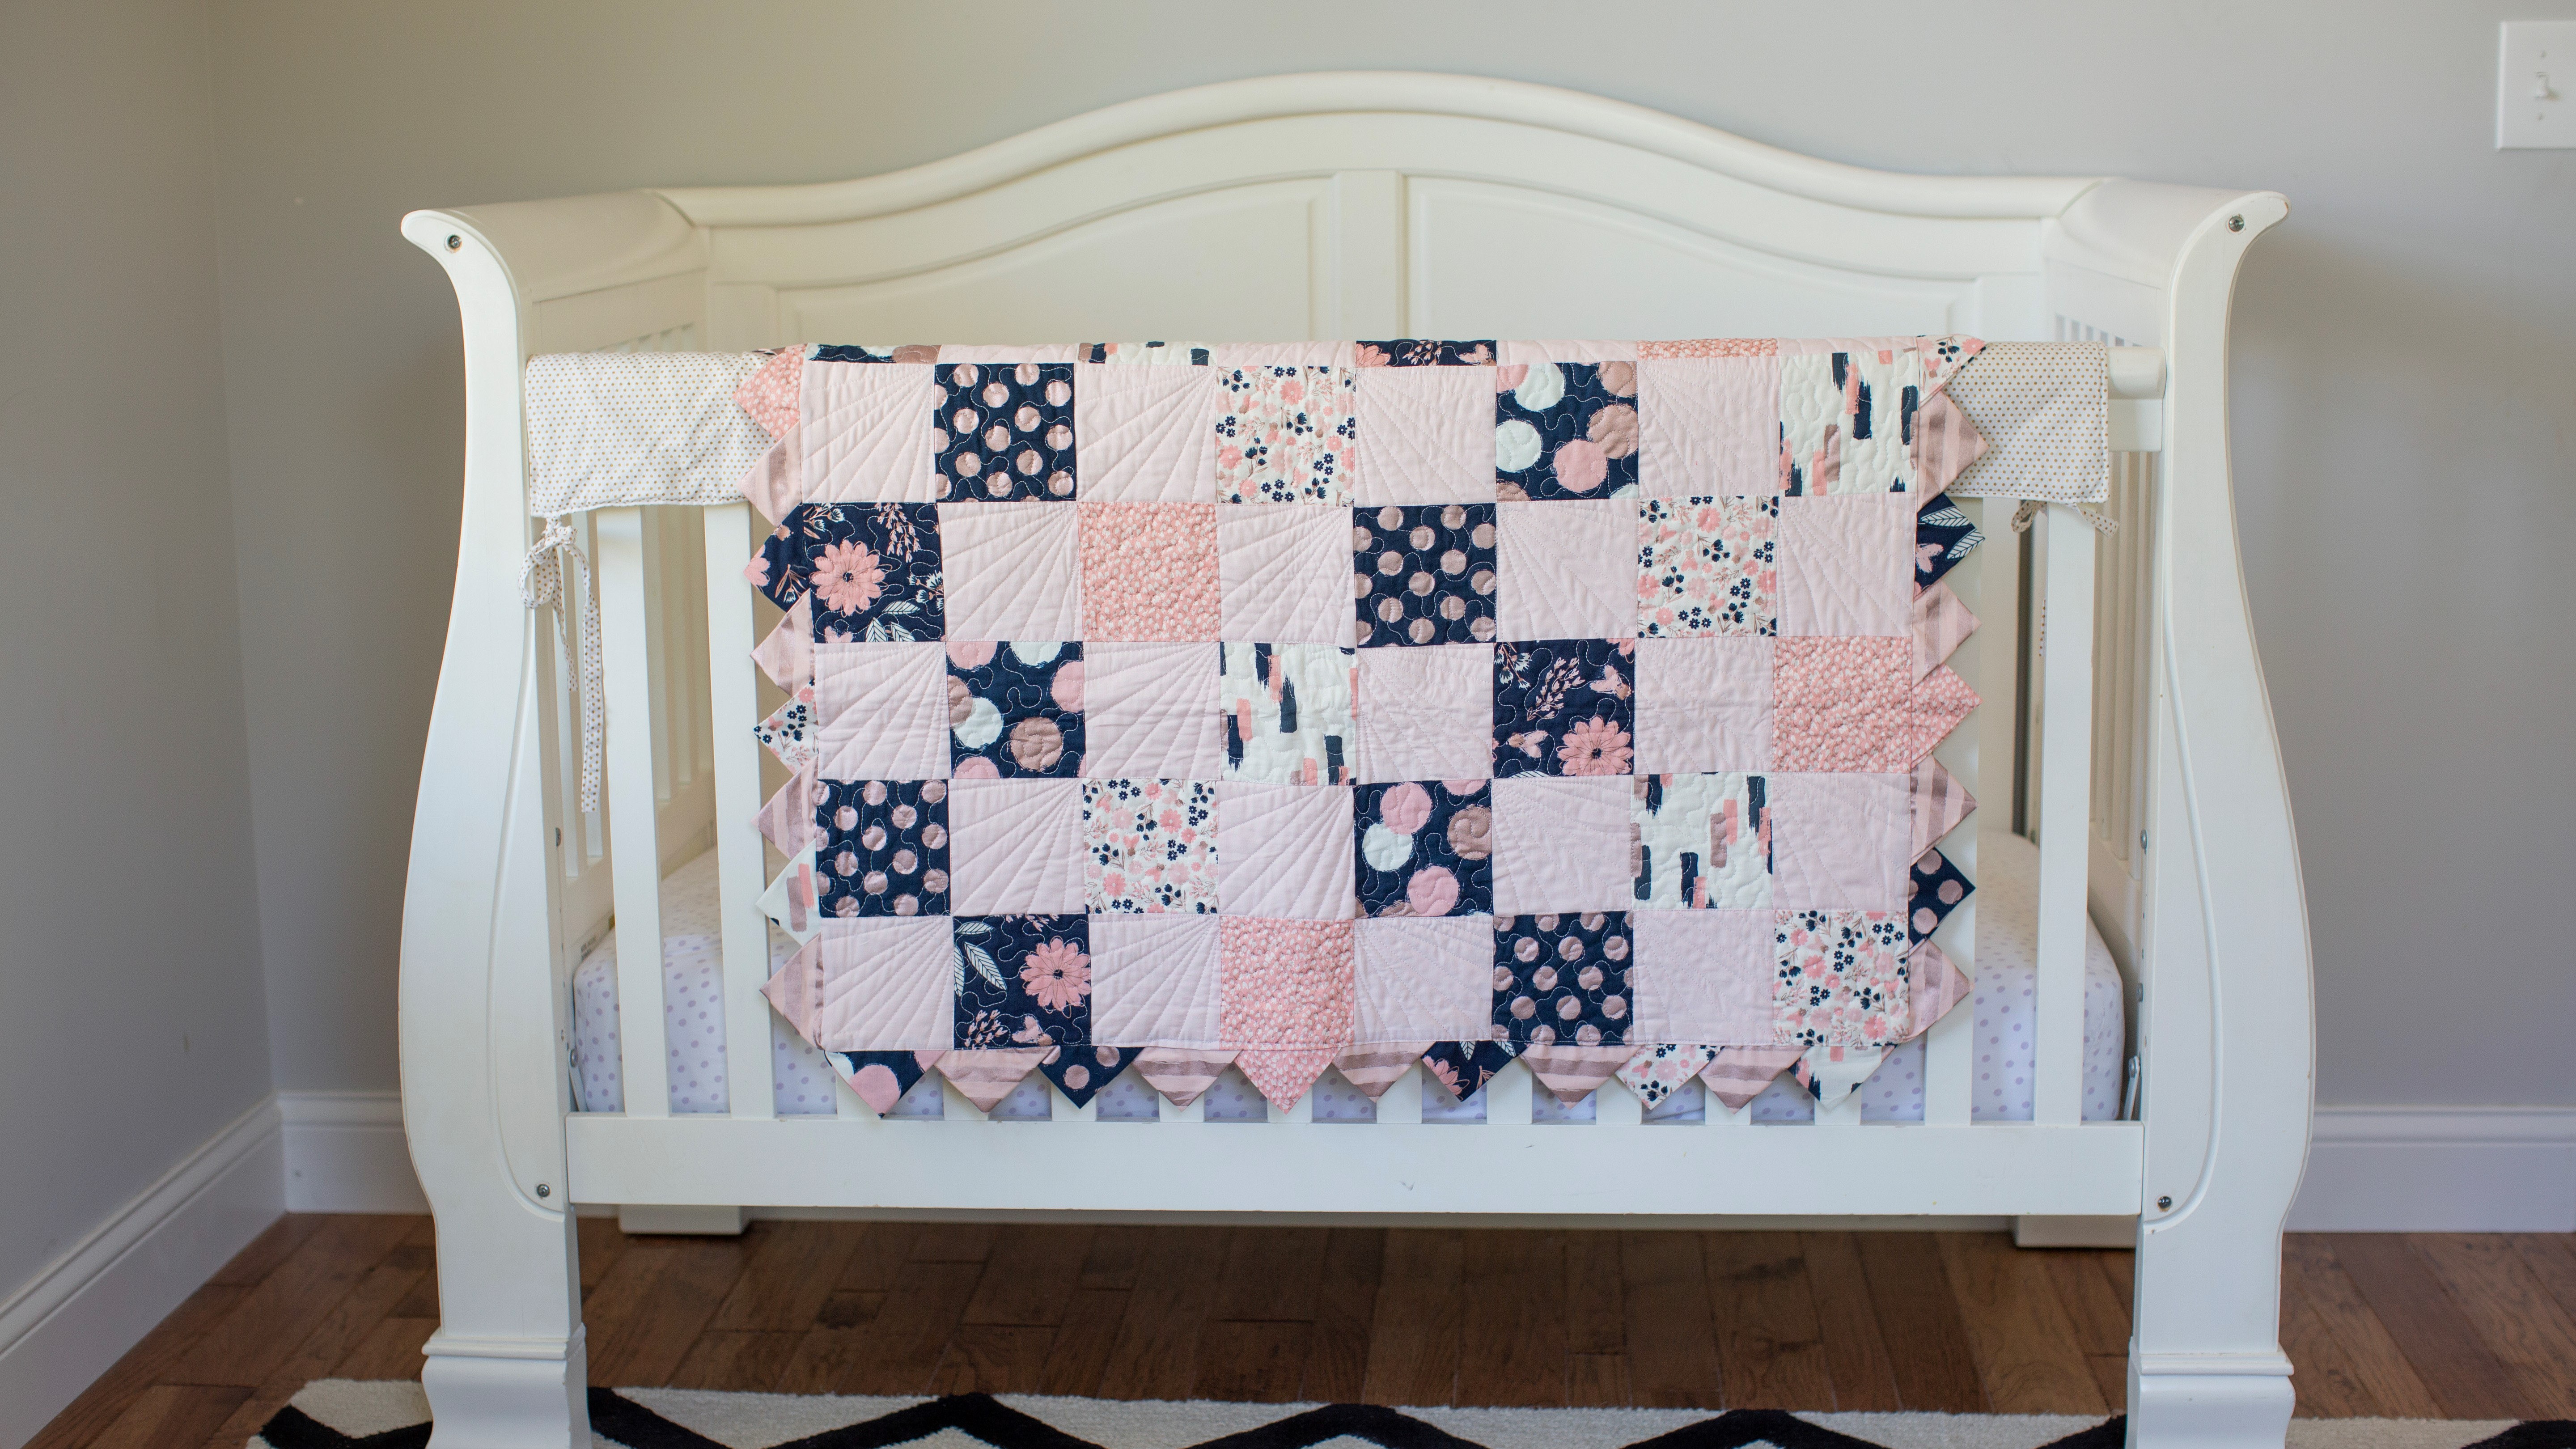
Make this adorable baby quilt while using your favorite quilting techniques! This quilt can be made in any favorite color or fabric. Download Instructions Here.
Materials:
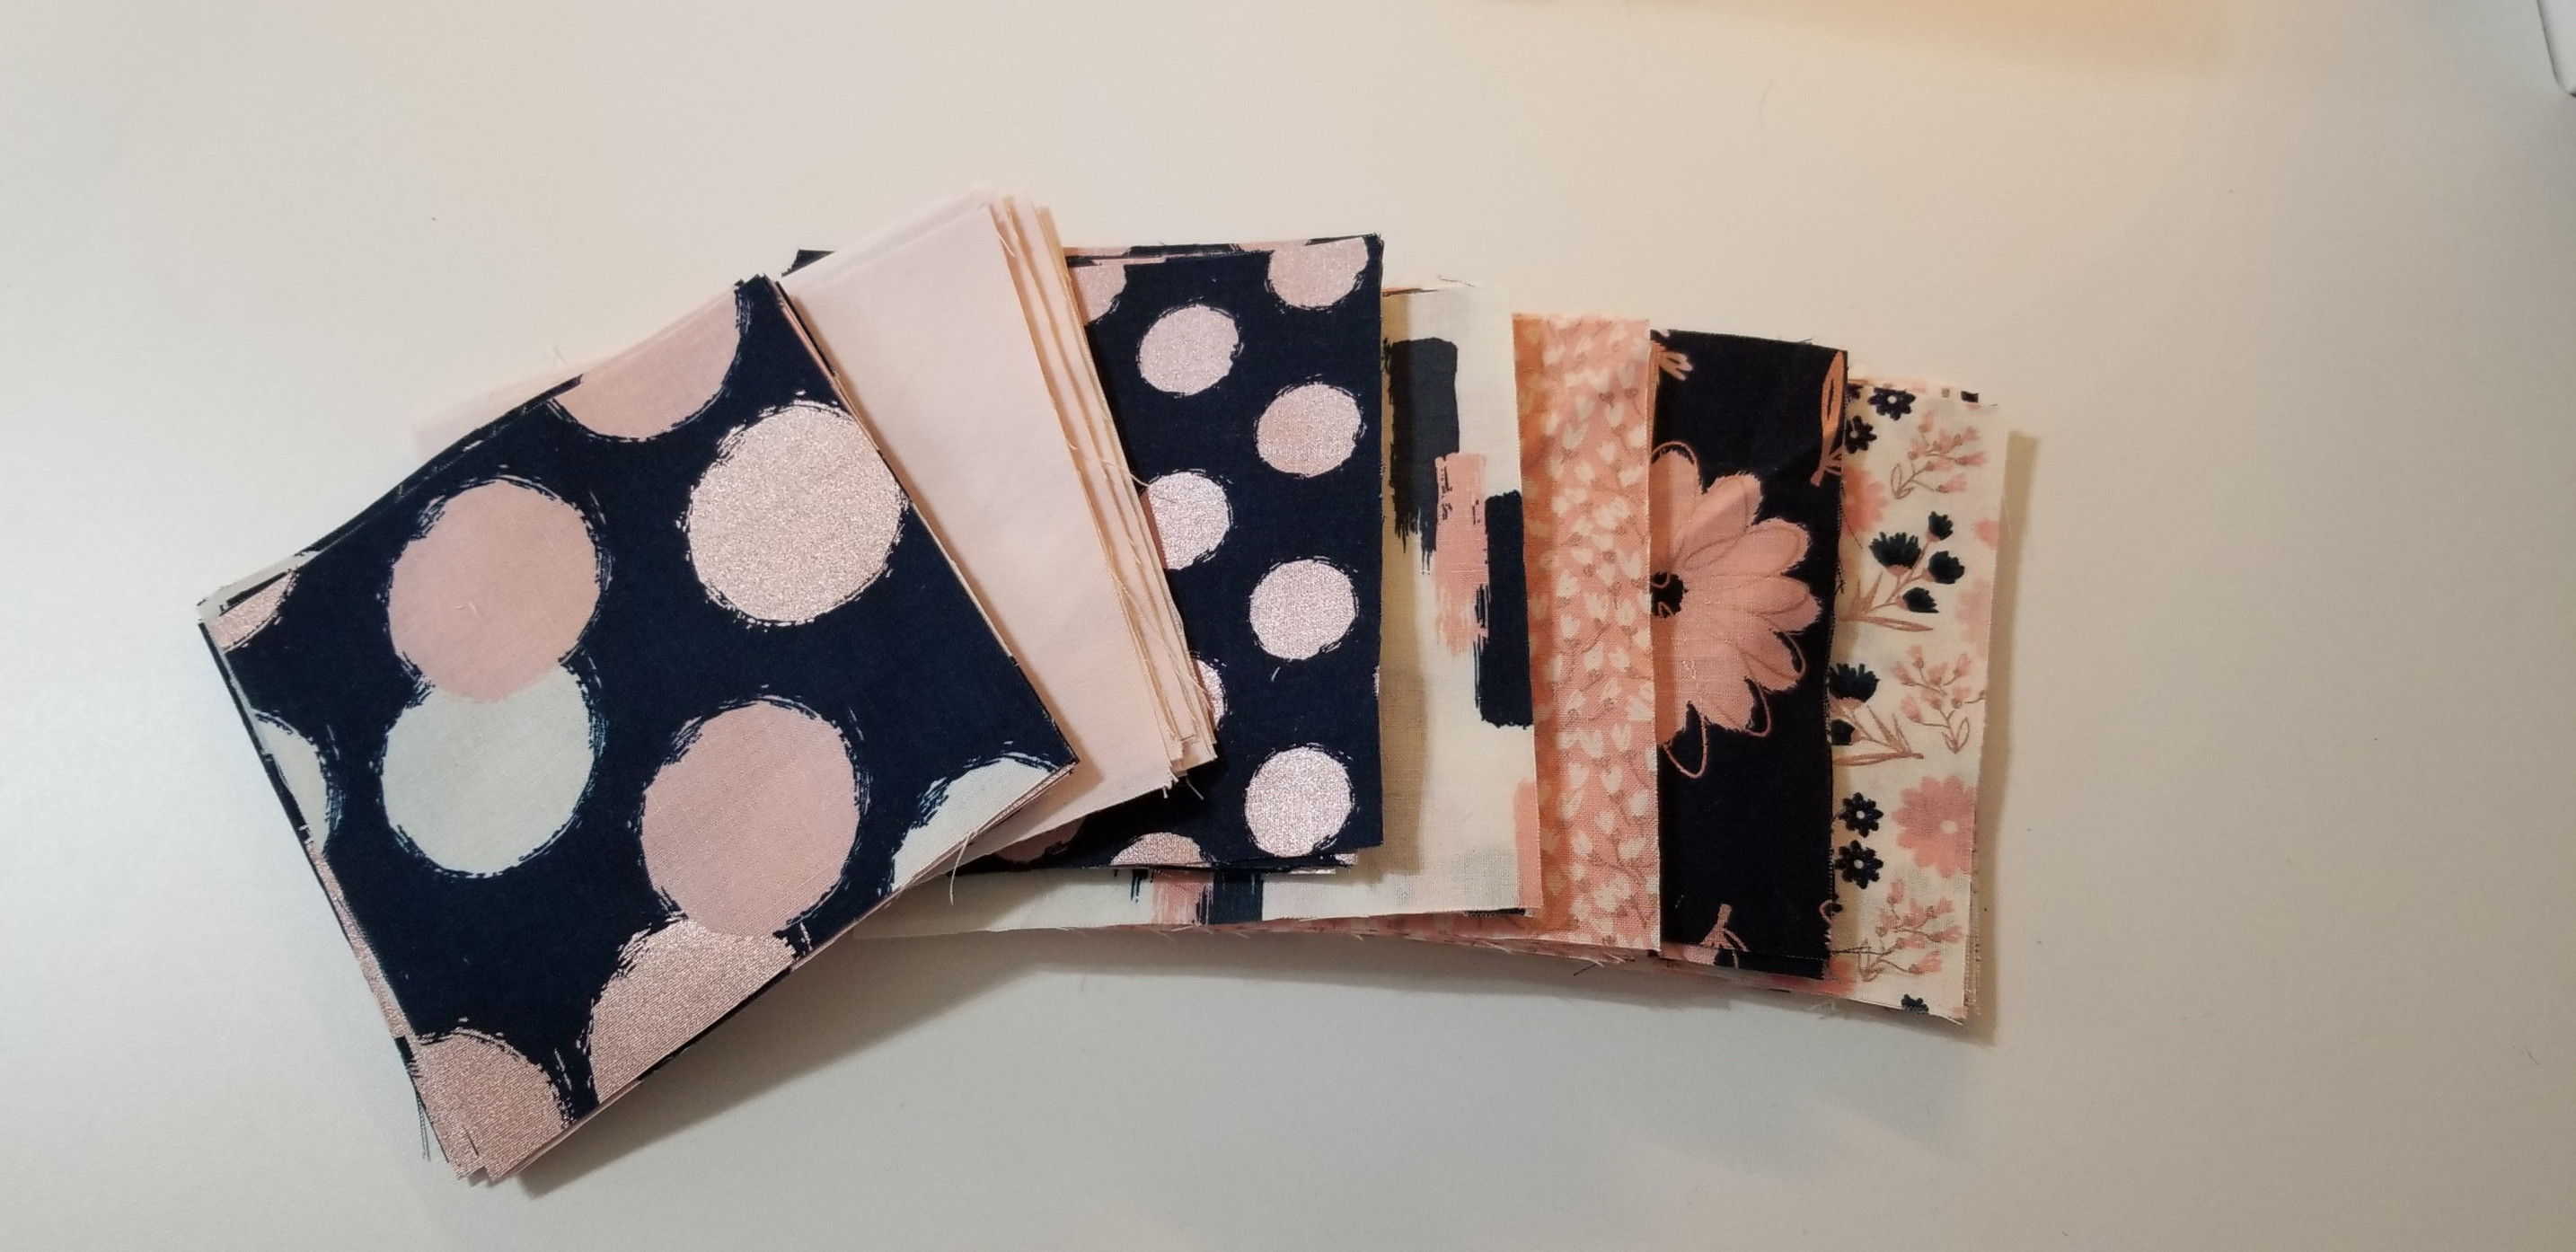
- For the main quilt 96 inch squares
- an additional 58 for the prairie points or 1 1/12 yards total of 9 different types of fabrics
- 1 1/2 yards of fabric for Backing
- 1 1/2 yard of batting
Tools:
Steps:
-
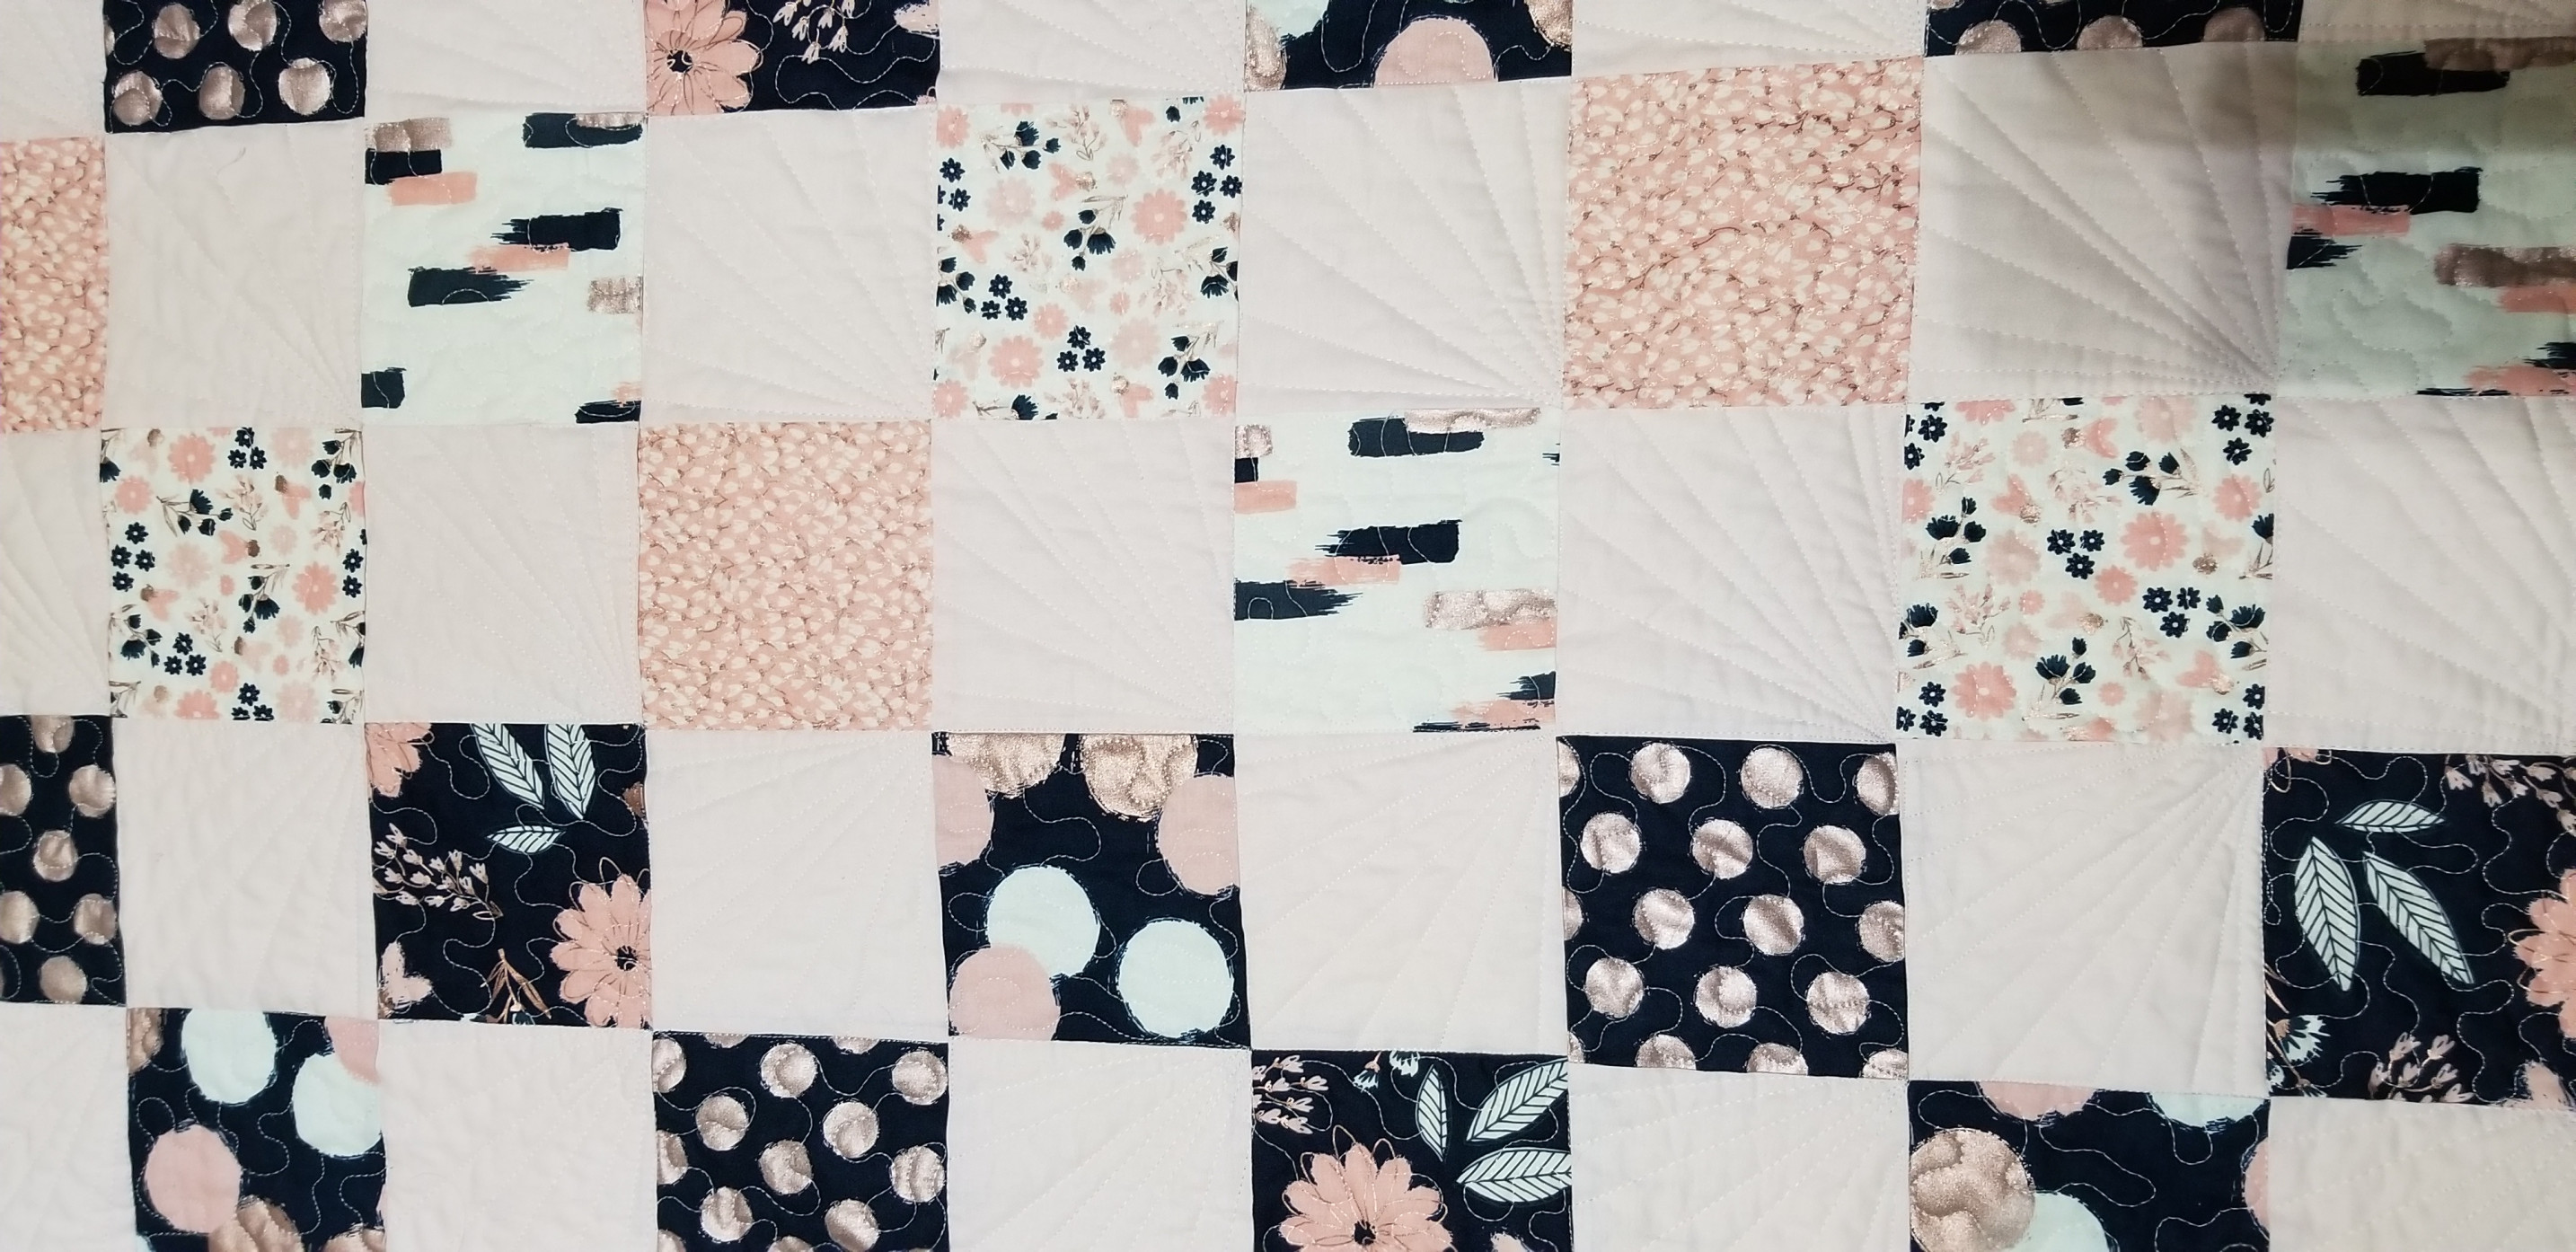
Each row going width ways is going to be eight 5” squares and length ways is going to be twelve 5” squares
-
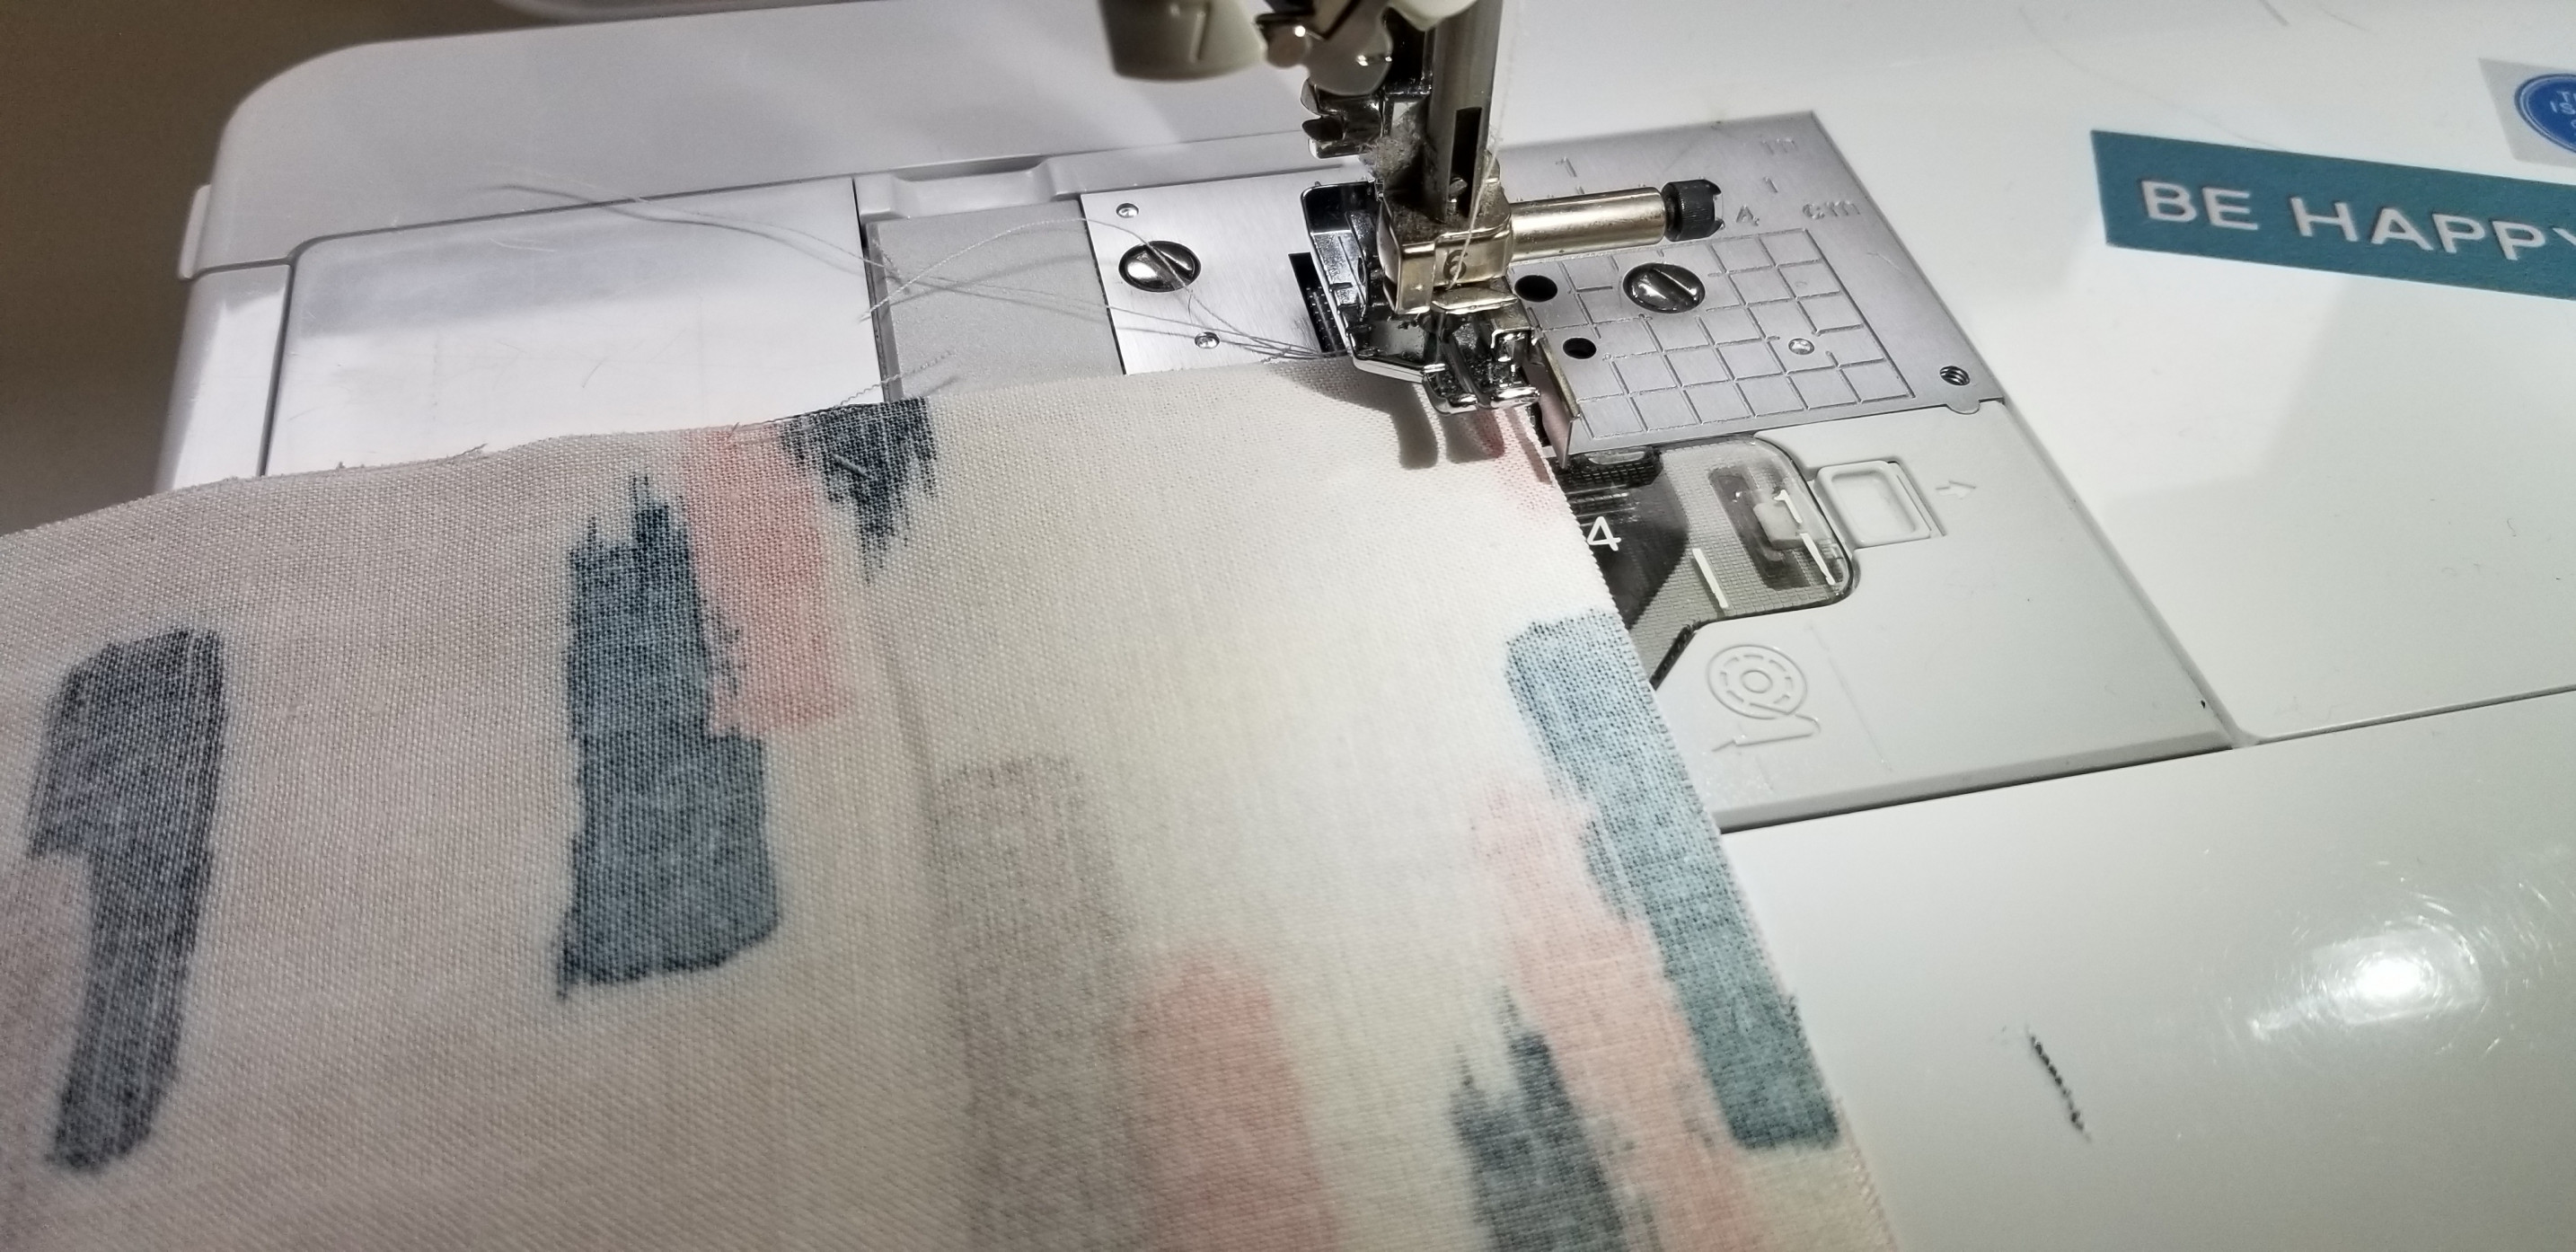
Place two squares right sides together and sew using your ¼ “ foot with guide.
-
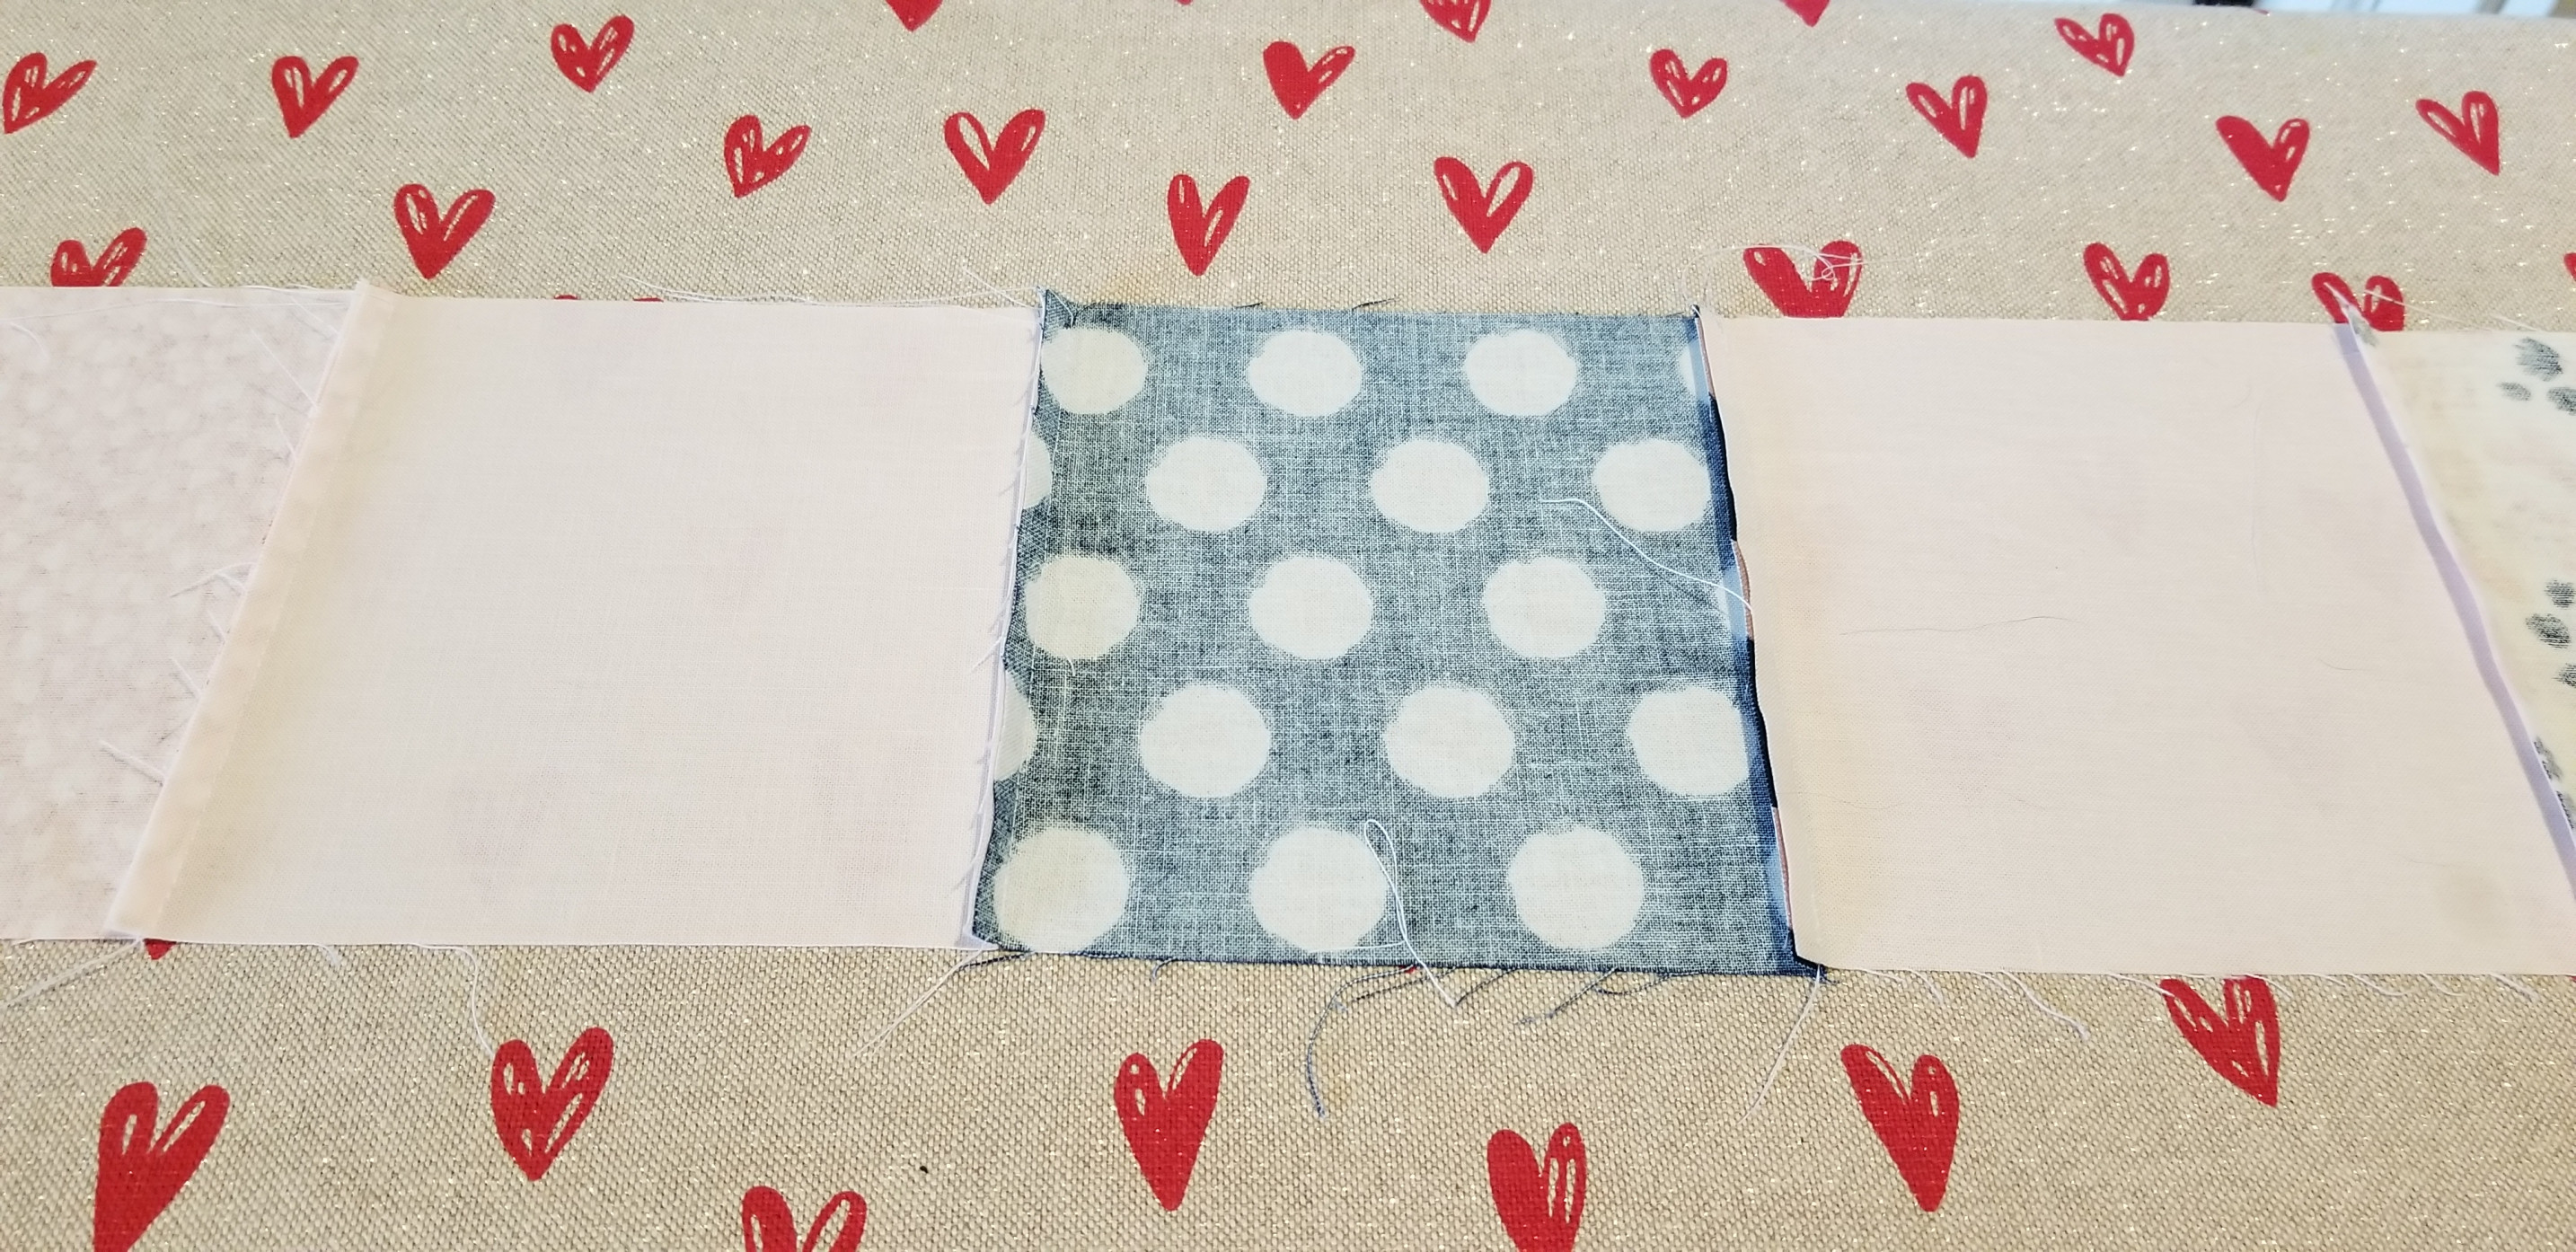
Start to sew each row you will end up with twelve rows
-
Once you’ve sewed all twelve take to your iron and press your seams.
-
Now with right sides together nest your seams and pin in place so they don’t move on you.
Sew with a ¼ inch seam once again. Sew all of your twelve sections creating your crib quit top.

-
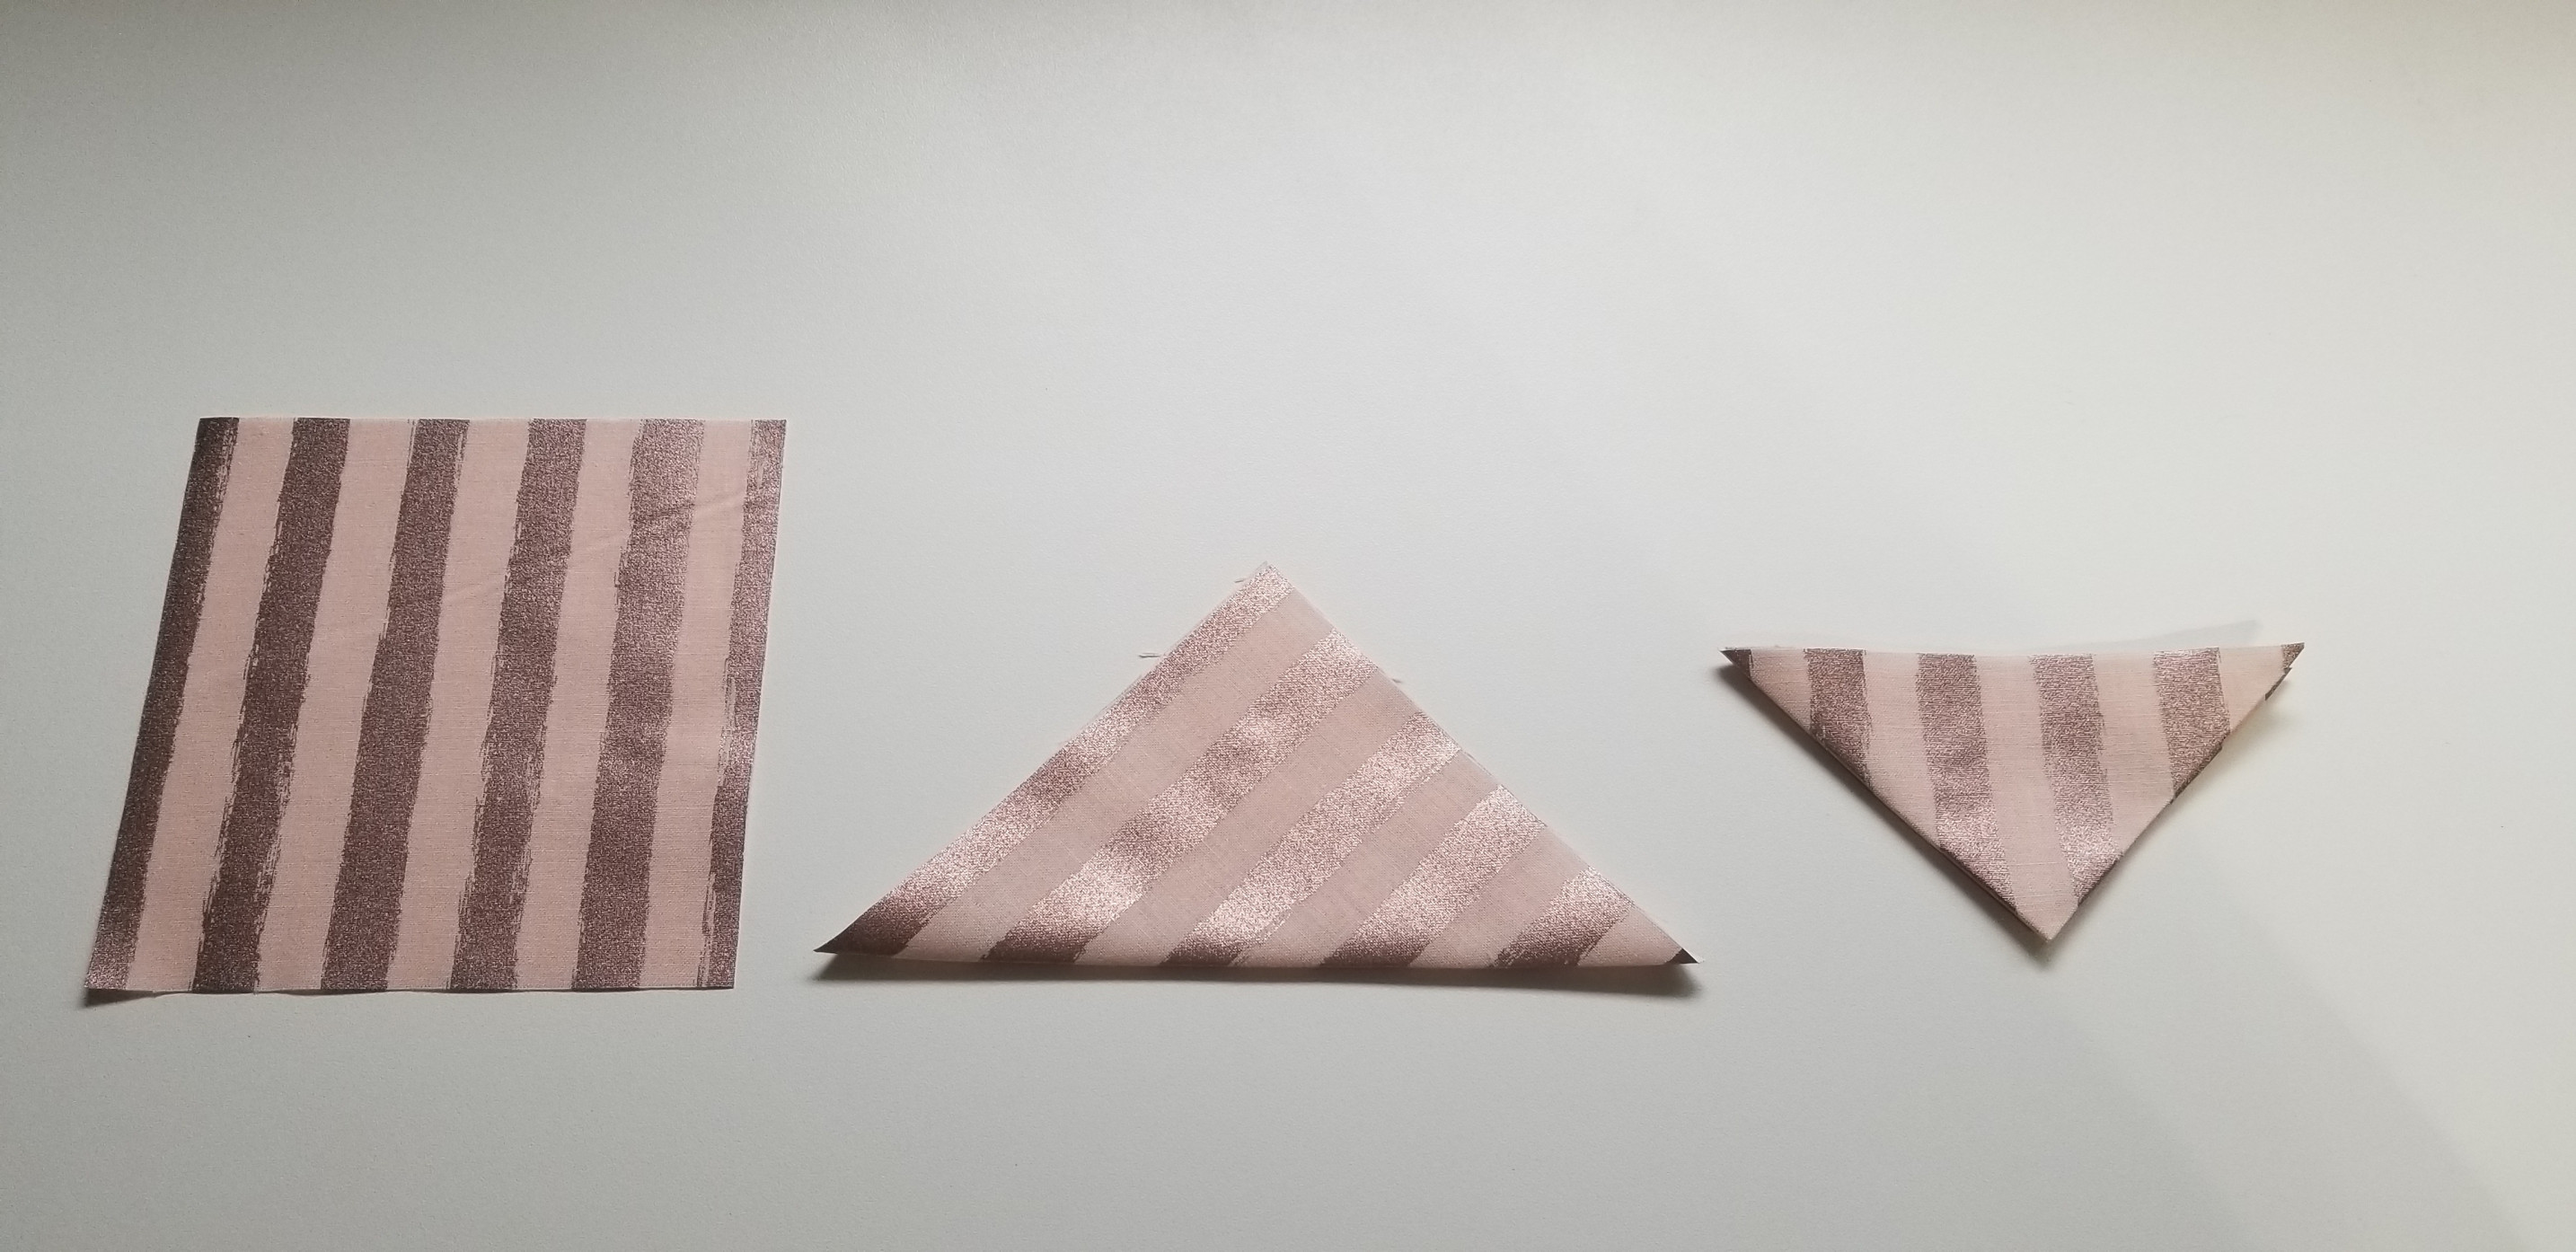
To create a Prairie Point take a 5” square fold in half to create a triangle then press.
Fold that in half and create a smaller triangle then press you now have all raw seams enclosed. In total I used 58 five inch squares for the prairie points.
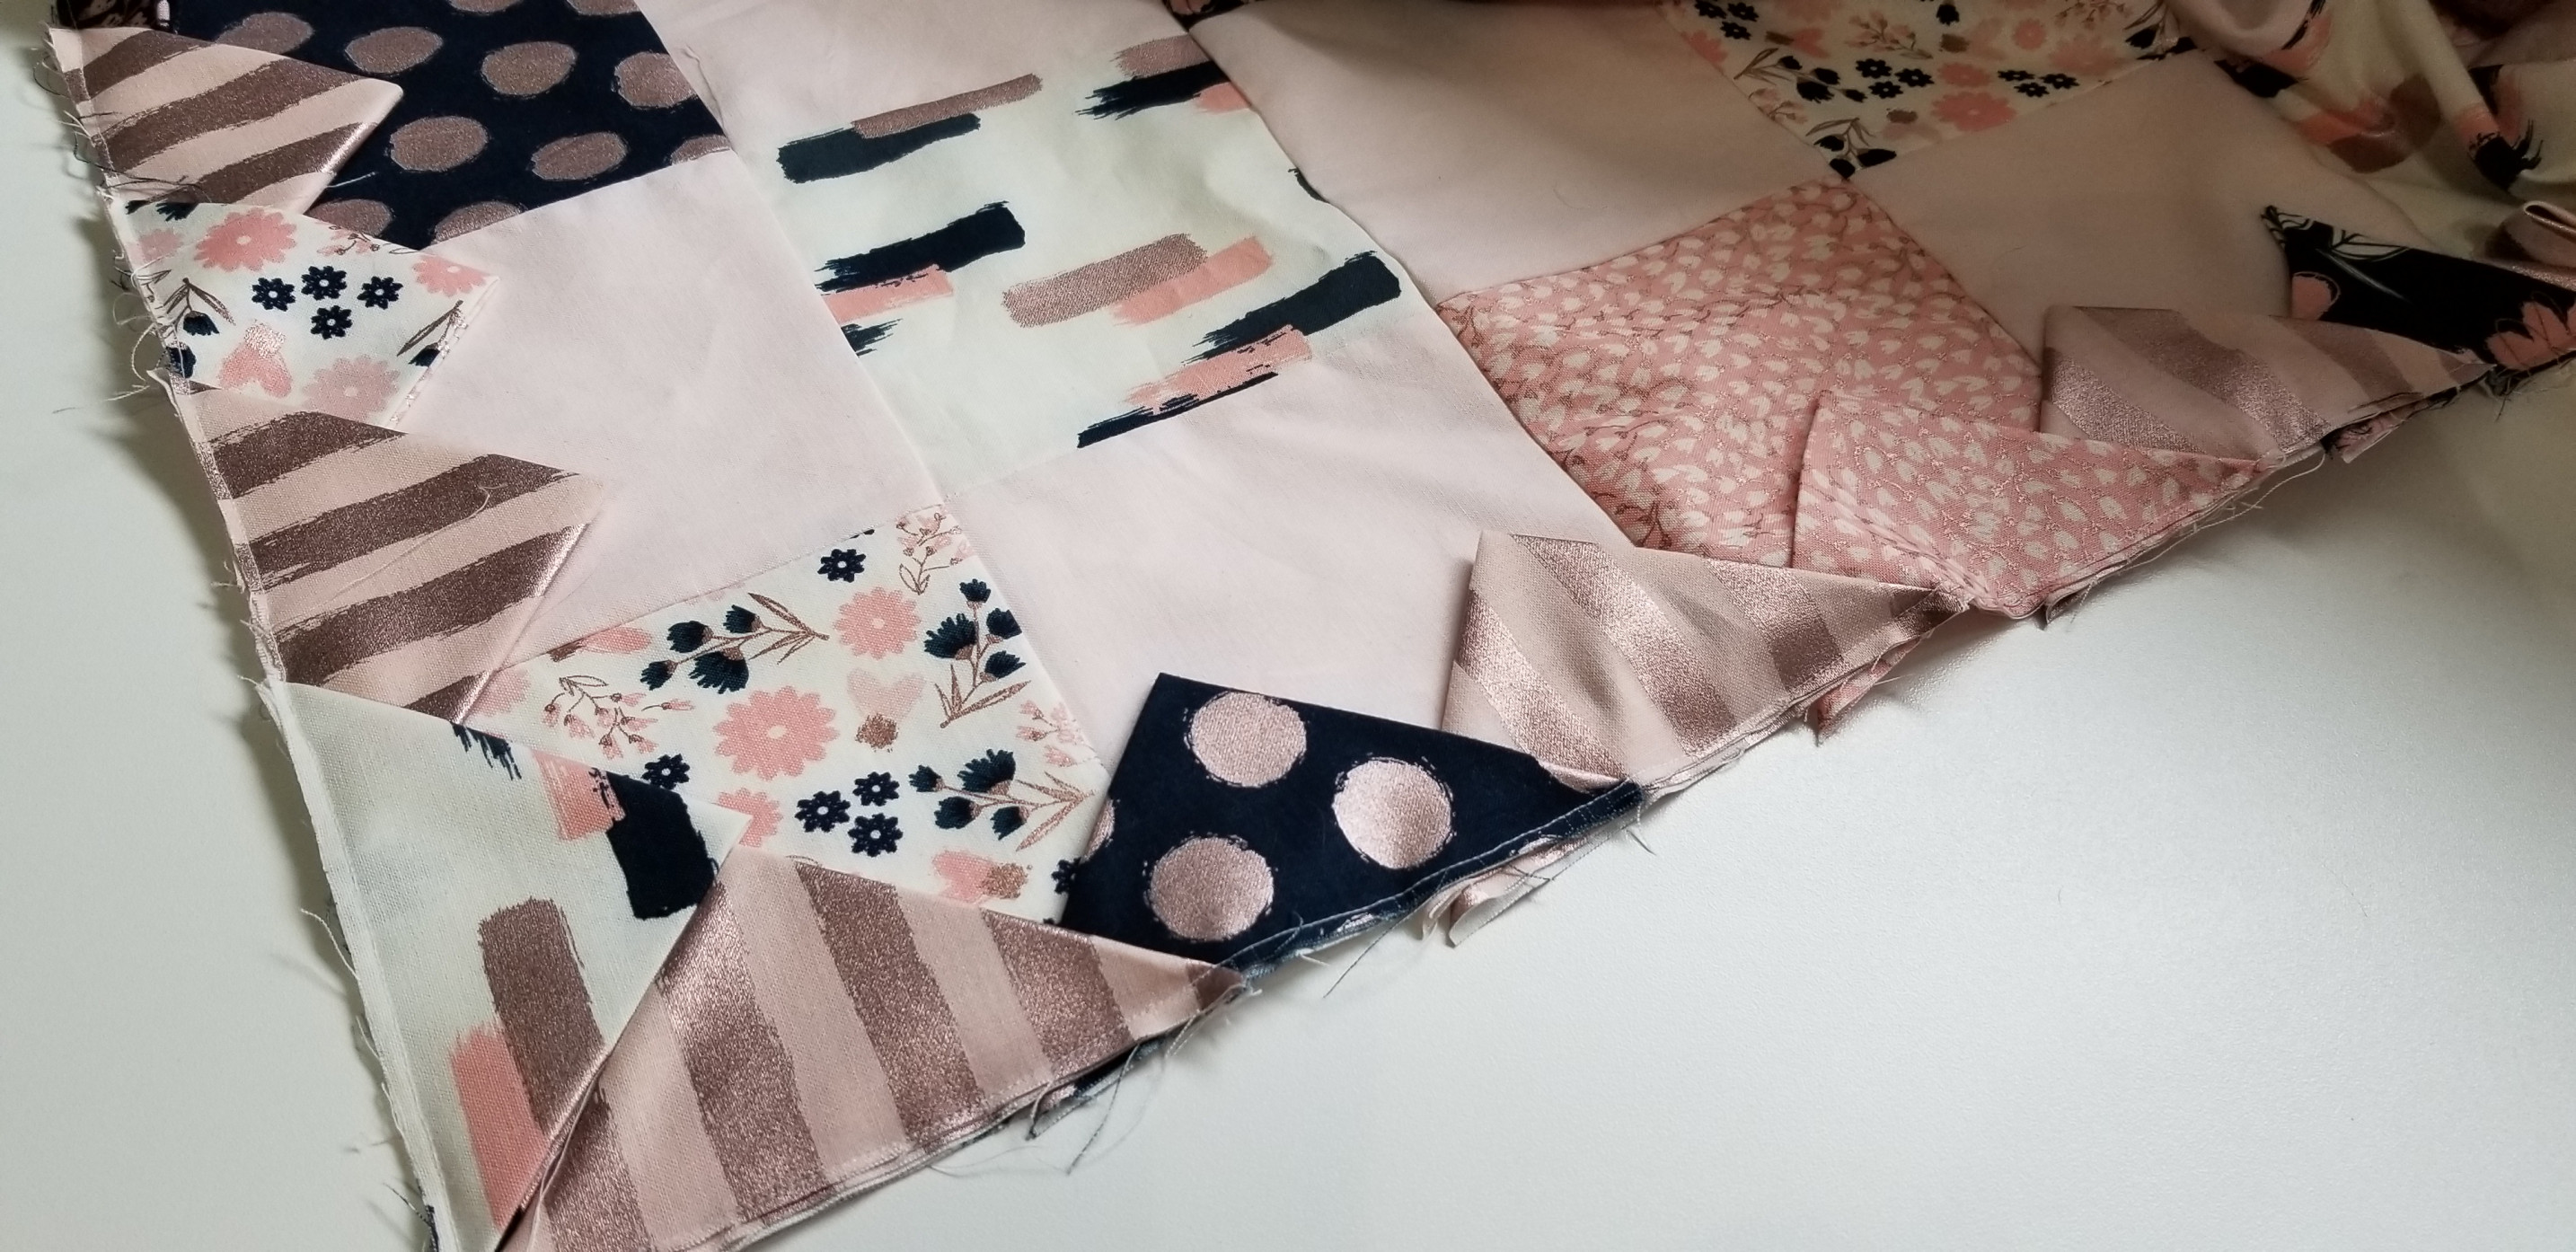
-
To finish the quilt. Place your batting on the floor and then place your fabrics right sides of the fabric together enclosing the prairie points.
Stitch all the way around the quilt leaving space to flip the whole thing right sides out.
-
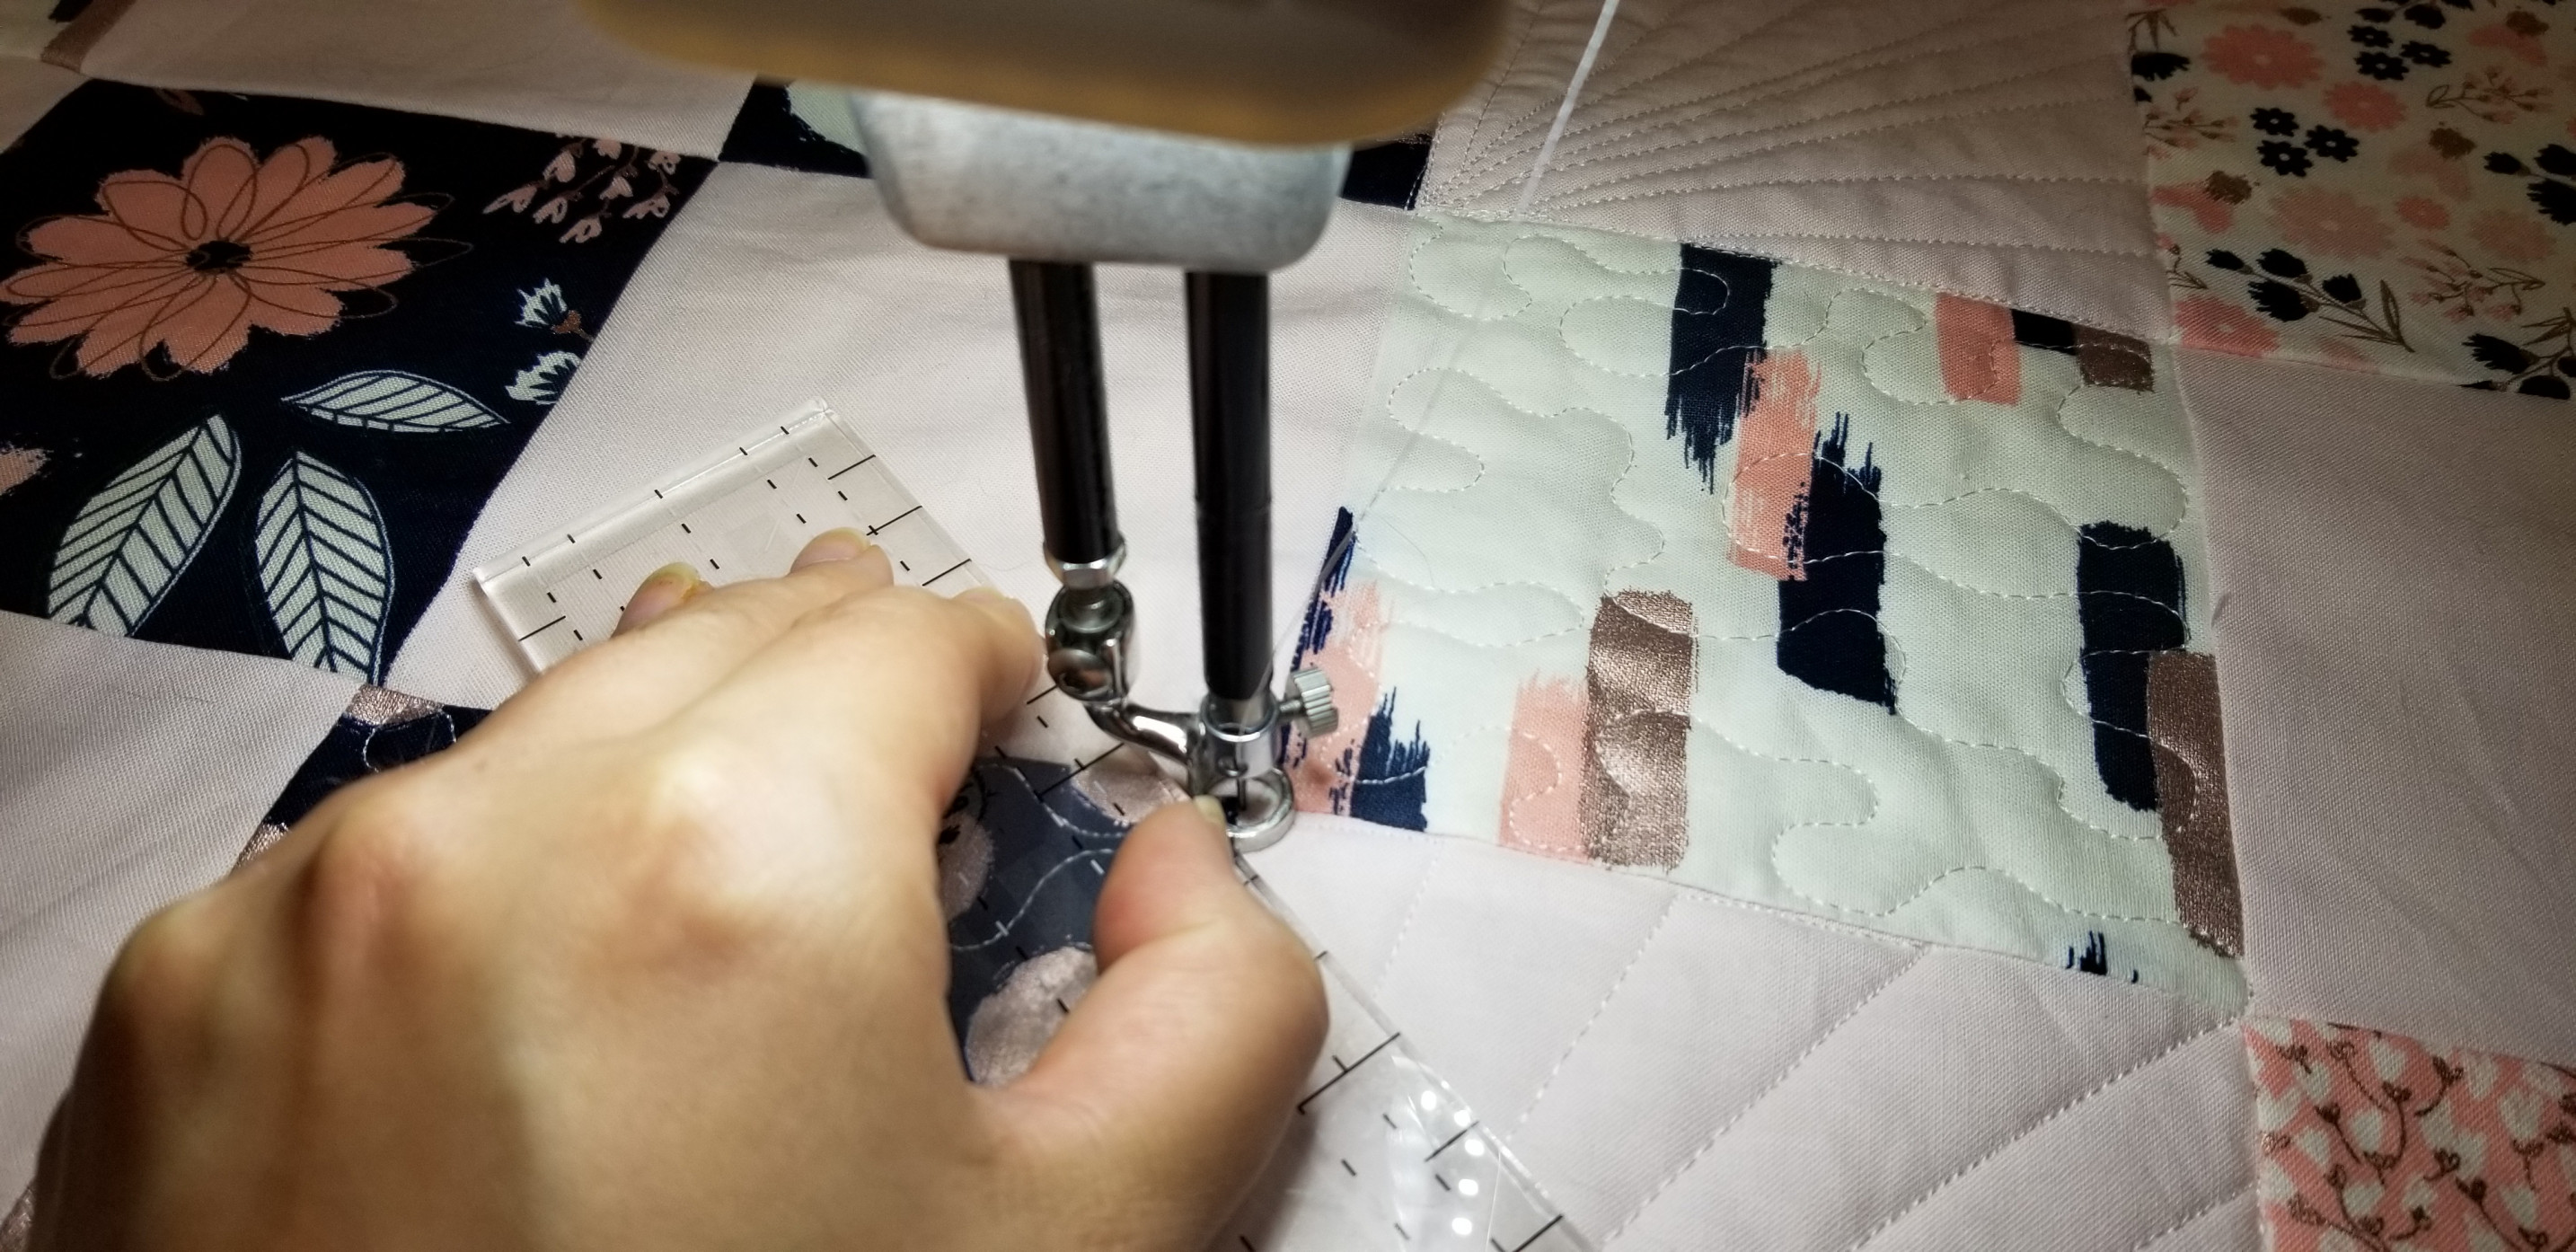
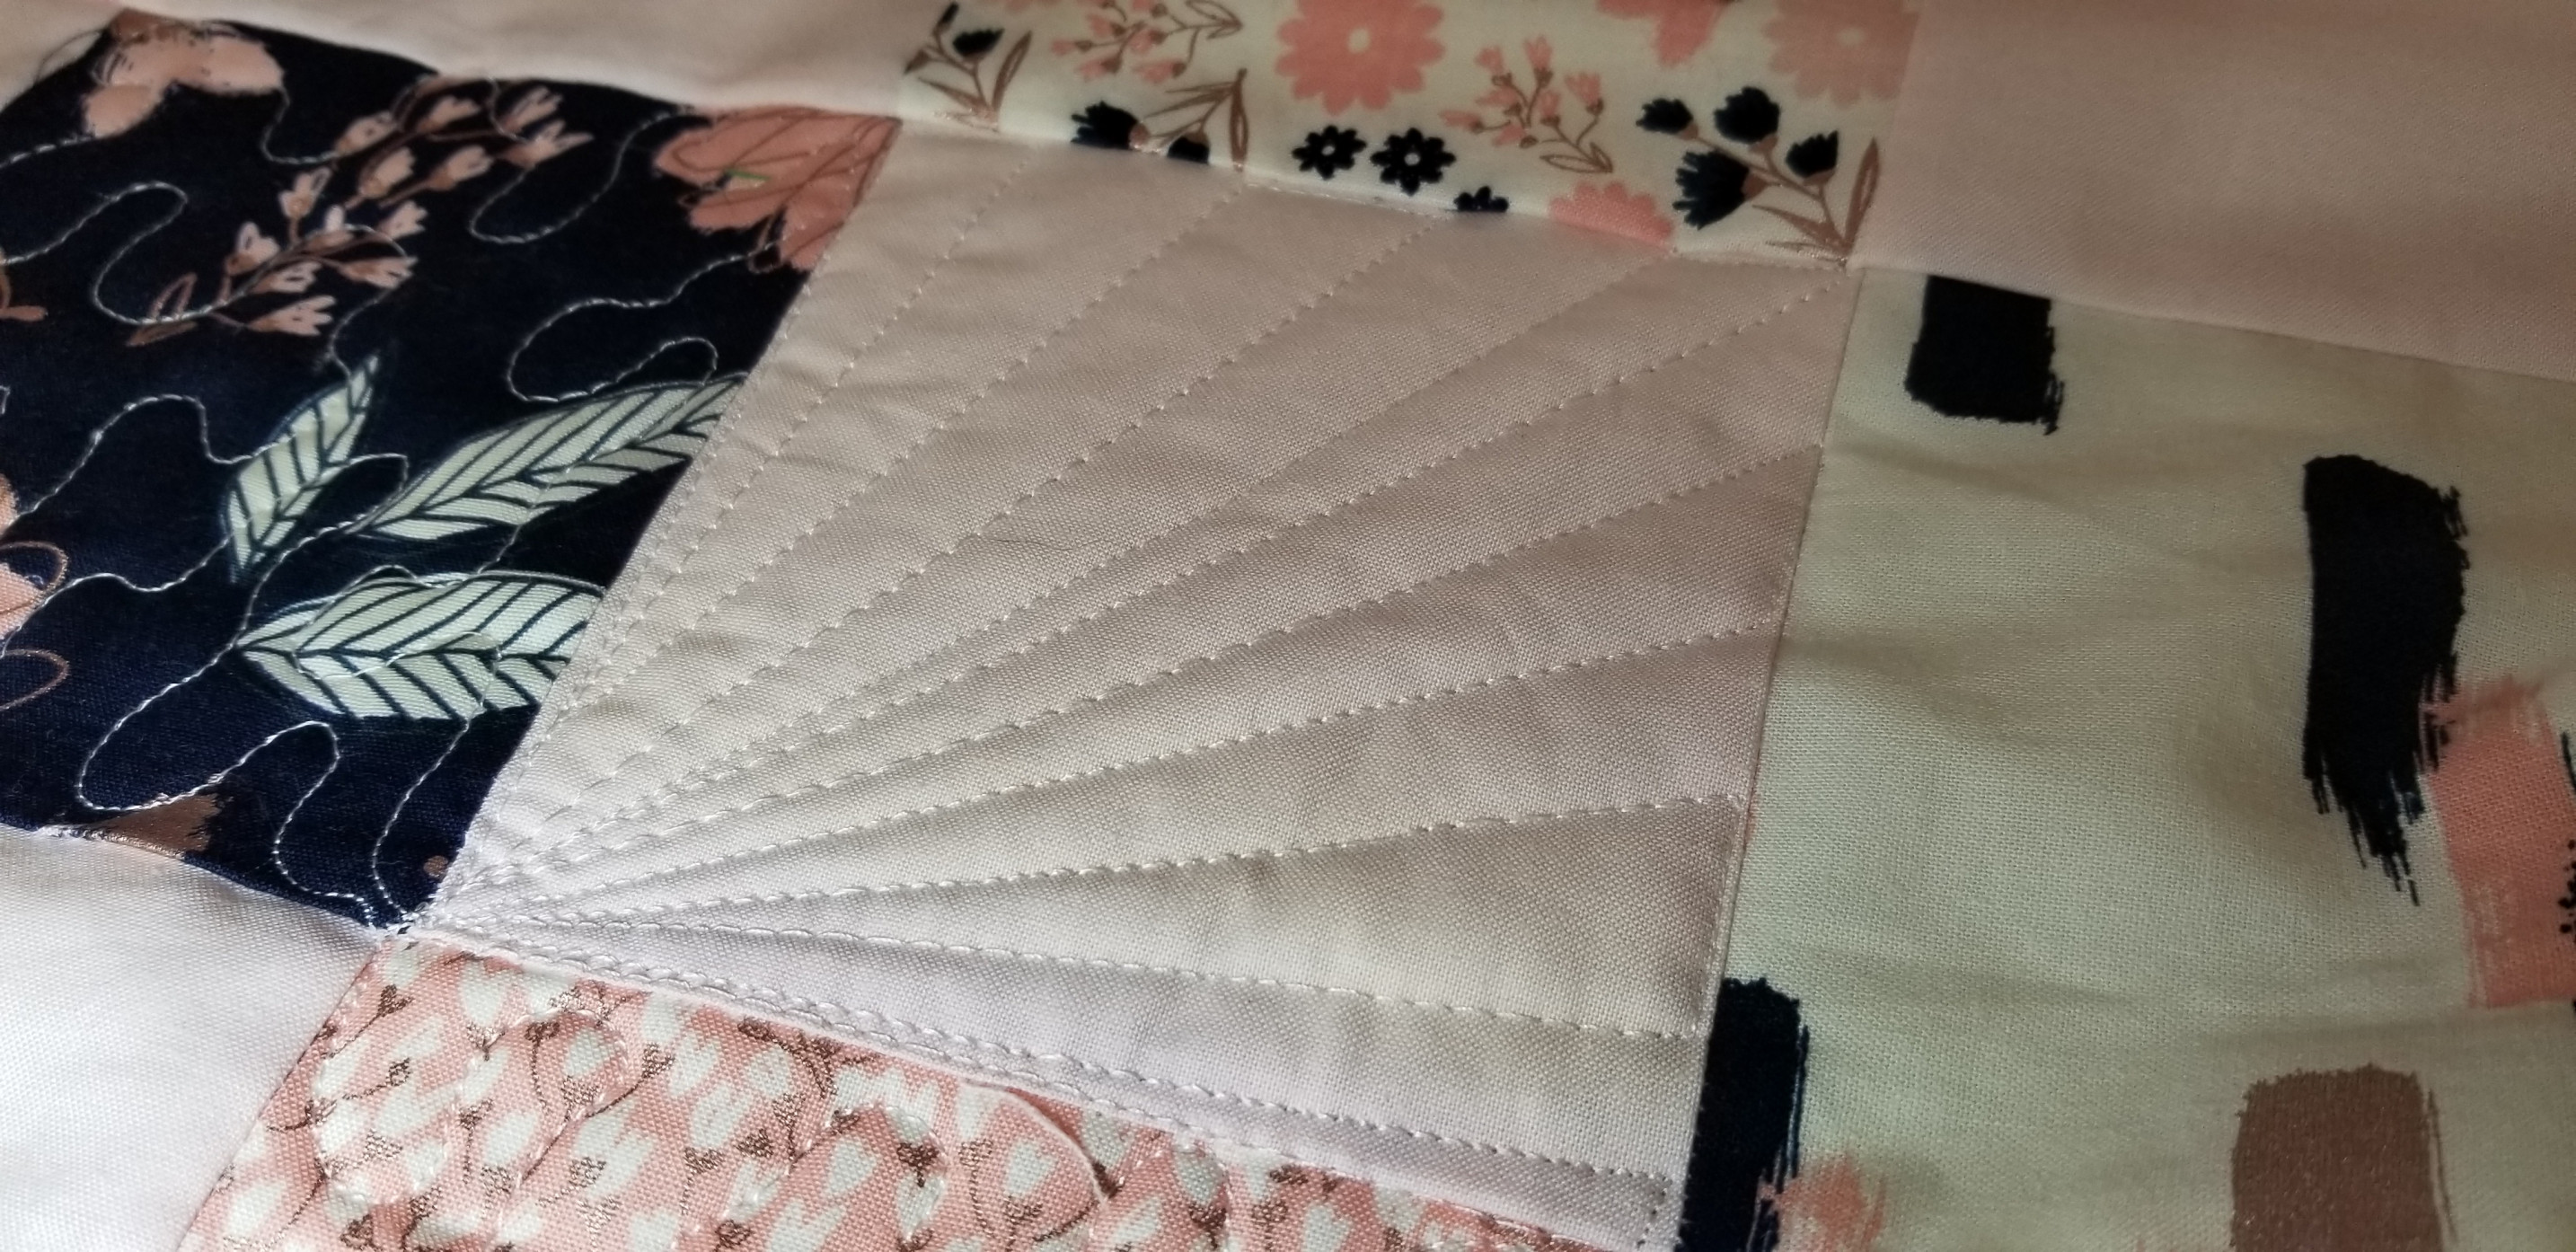
This quilt is small enough to put under your regular sewing machine to free motion.
I created a steeple in one block and used a ruler in another both designs are extremely easy. I would highly recommend using rulers if the free motion scares you.
-
Congratulations you now have a beautiful crib quilt.


