
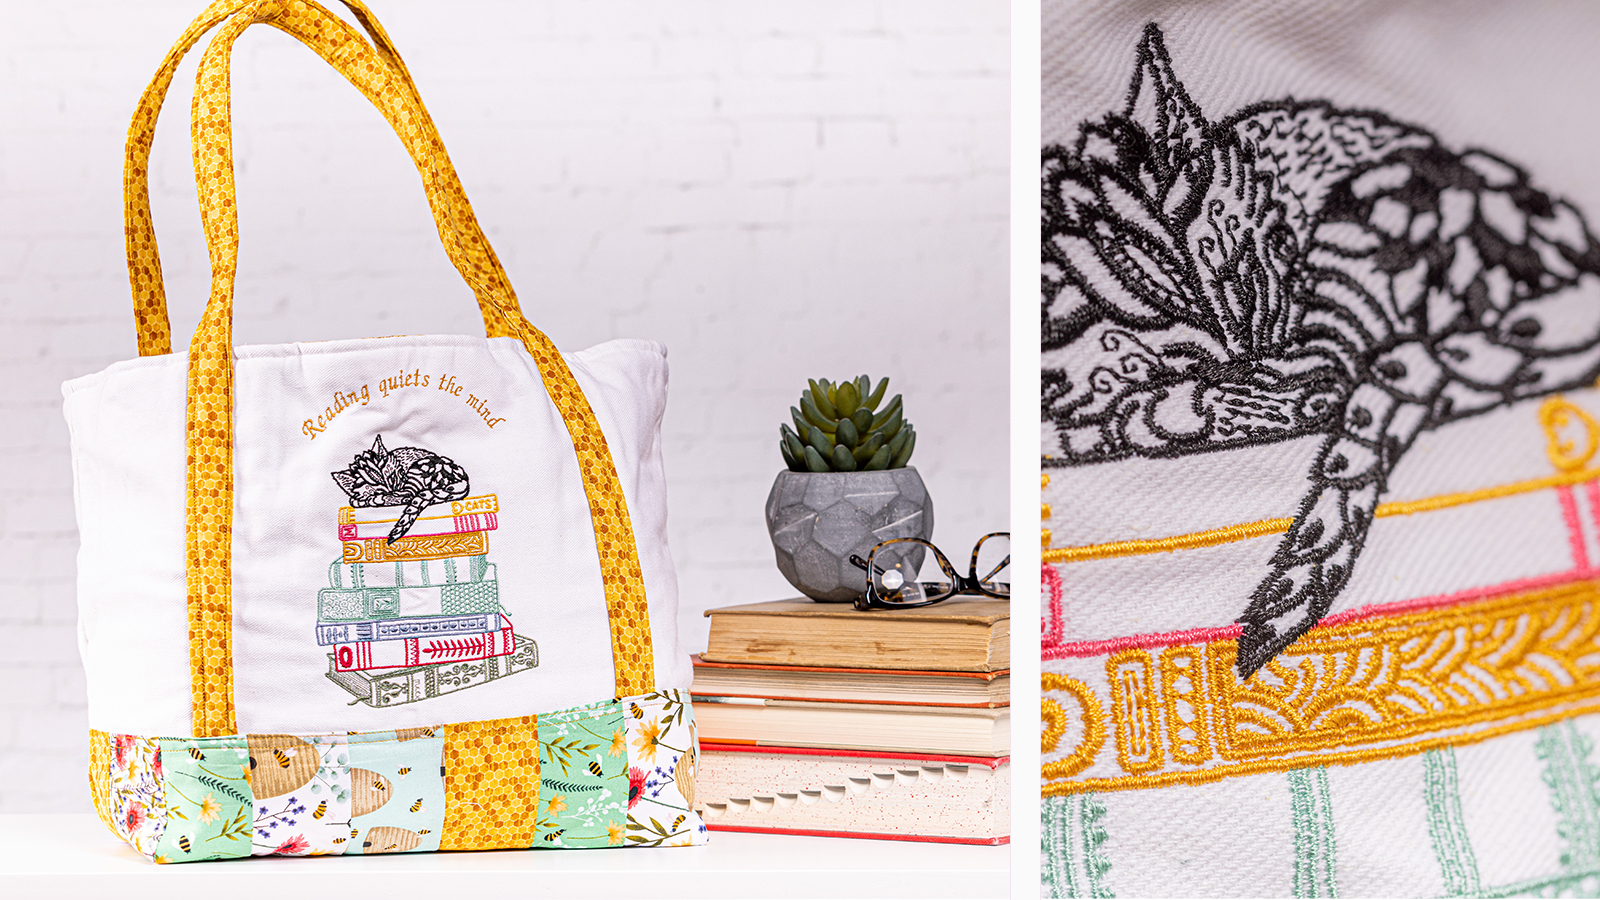
This little tote you can take from the store to the library. This project can be a done with a jelly roll or it can be a scrap buster.
CLICK HERE TO DOWNLOAD PRINTABLE INSTRUCTIONS WITH ADDITIONAL PHOTOS.
Supplies
- Bloom Embroidery and Sewing machine
- 5” X 7” Frame
- ½ yard white denim
- Jelly Roll pre-cut fabric of your choice
- 40 Weight embroidery thread
- Sewing thread white
- 1 yard batting warm and natural type
- Medium weight no show mesh stabilizer
- Bobbin wound with bobbin thread & one with sewing thread
- Bosal or a fusible batting for the tote bag handles
Fabric Cutting
- Mark the placement of the design on what will be the front of the bag.
- Hoop in a traditional hoop or in the Baby Lock magnetic hoop as shown in the printable instructions.
- Go to Exclusives and Freehhand. Select Design 002.
- Touch Set.
- Make any edits to the design needed and touch Edit End and Embroidery.
- Once finished stitching re-hoop your fabric just slightly to allow for the addition of lettering. This is optional.
- To add text to your design select the Font Category.
- Choose the font of your choice size SMALL and type the phrase you would like then click Set. Note: You will most likely be asked to rotate the lettering if outside the 5” x 7” Hoop.
- Select Font Edit and then Array and the type of arch and choose the bend of the arch. Touch OK. And OK again to exit the Font Edit option. 10.Touch Edit End. Use the Move Keys to Position the lettering where your would like on your design. Use the Trace Feature to ensure the placement of your lettering.
- Touch Embroidery and stitch out the lettering.
- Remove from the hoop once embroidery is completed.
Bag Construction
- Take 8 different strips from the Jelly roll of your choice.
- Cut each strip to 15” you will need 2 of each color. Sew the strips alternating colors.
- This will give you 20” wide by 15” trim this up by ½” so that it totals 14” This will create the base of your bag.
- Take 12 strips 2 of each color from your Jelly Roll strips cut the strips to to 31”. Pieced together alternating colors. This will create the lining of your bag.
- Trim ½” from each side so that your lining is 20” wide and 30”.
Create the Tote Handles
- For the handles I took 2 strips stitched them together and repeat with another 2 strips.
- Press seams to one side.
- Place your batting or bosal in the center of your tote handles then press the side in 1” on each side as shown in photo in the printable instructions.
- Fold each tote handle in half and edge stitch the full length of each side. You can use the zipper foot or a ¼” foot.
- Placement of the straps on the bag: Place 4’ from the center on either side place one side of the strap as shown in photo stitch the strap down on either side of strap stop stitching an inch from the top on each side.
Contrast Base of the Bag
- Press under the top edge of contrast piece bag base fabric ¼”.
- Lay this fabric on bag in the center of the denim bag covering the bottoms of the strap edge stitch in place. This will be the same on the front and back of the bag.
- Add the batting to the bag fuse. Match up the sides of the bag and stitch closed.
- Bagging the corners. Measure up 4” in from the corner point on both sides and then stitch straight across to create the bagged bottom. Cut corner off.
Lining
- Create the tote lining in the same way as the bag. When stitching up the sides you need to leave a 3” opening on one side of the lining to be able to turn you bag right sides out. Bag the bottom of the lining.
- Stitching bag and lining together. Place tote bag inside the lining bag with right sides together make sure to tuck the handles down when doing this. Stitch completely around the top of the tote. Turn the bag opening left in the lining. Stitch opening closed I used a ladder stitch or you can use the machine here. Top stitch the top of the tote bag with matching or contrasting thread.
- Your tote is now complete.


