

Welcome the winter vibes with this beautiful home décor sewing project! Learn how to create reverse appliqué embellish with cording/piping as well as insert a zipper to stitch up this modern pillow! Download printable instructions. Download snowflake pattern.
Watch the video tutorial here!
Materials:
- For a 16” pillow:
- -½ yard of 44” wide or greater fabric that won’t fray (i.e. faux suede suede pleather cork interfaced fabric that doesn’t fray) for outer pillow front and back
- -16” square of woven fabric for reverse appliqué fabric
- -2 yards Cording/Piping – choose desired size (smaller sizes recommended for beginners)
- -18” or greater invisible zipper
- -16” pillow form or stuffing
- For an 18” pillow:
- -20” of 44” wide or greater fabric that won’t fray (i.e. faux suede suede pleather cork interfaced fabric that doesn’t fray) for outer pillow front and back
- -16” square of woven fabric for reverse appliqué fabric
- -1 ⅓ yards Cording/Piping – choose desired size (smaller sizes recommended for beginners)
- -20” or greater invisible zipper
- -18” pillow form or stuffing
- Thread for Reverse Appliqué Topstitching (i.e. Madeira Aerofil Standard Sewing Thread Embroidery Thread or Madeira Glamour Thread (use a Madeira Glamour Needle))
- Appliqué Scissors
- Leather Needle (if stitching on fabrics like cork or suede)
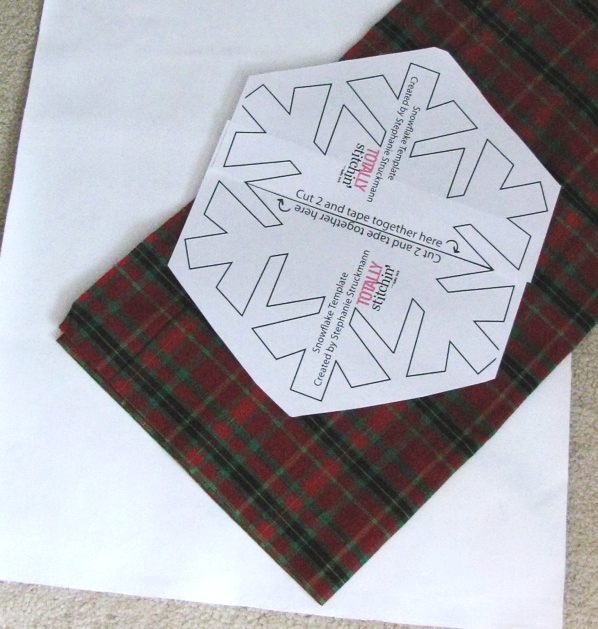
- Free Snowflake Template included with project
- Baby Lock Tear Away Firm Stabilizer (see step 1)
Tools:
- Baby Lock Sewing Machine
- Standard Sewing Foot or Open Toe Foot (or Teflon foot if stitching on fabrics with texture like cork or suede)
- Narrow Zipper Foot or Adjustable Zipper Foot
Steps:
-
Three ways to utilize the Free Snowflake Template:
-
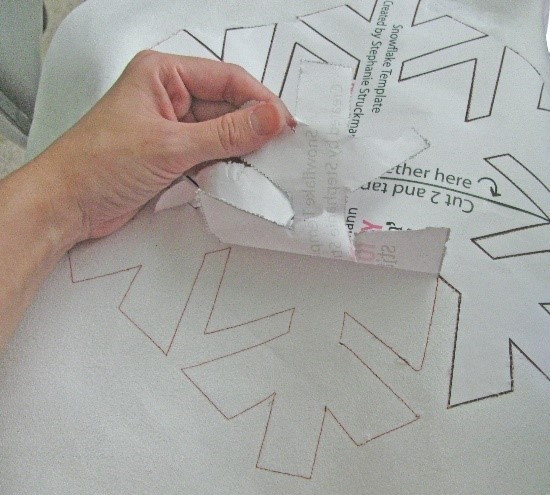
Print two of the Free Snowflake Templates on printer paper. Lay a 12” x 12” square of stabilizer over the top of your template and trace the template like tracing paper!
-
Or if comfortable print directly onto your Baby Lock firm tear-away stabilizer.
Cut two pieces of stabilizer at 8.5” x 11” and flatten with an iron (make sure it’s completely cool before printing). Print template onto your stabilizer pieces and tape them together to make a complete snowflake. TIP: Place one sheet in your printer at a time!
-
Or print two templates on printer paper and tape together.
Cut the snowflake out along the printed line and trace around it directly onto fabric (with a removable fabric marking pen/marker) or trace it onto stabilizer if you don’t want to mark on your fabric.
-
-
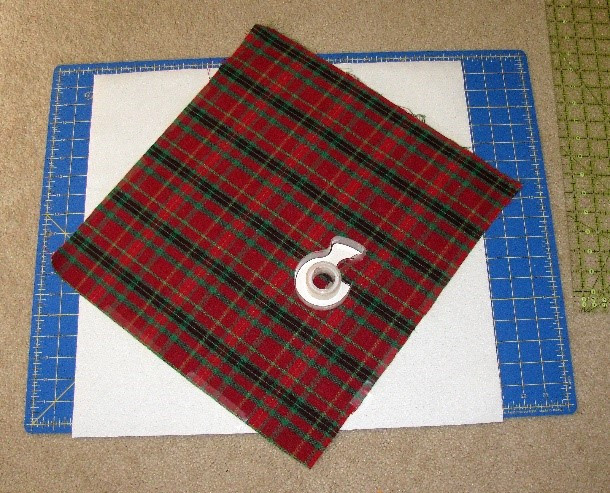
For a 16” pillow cut two 17” squares of fabric for the front and back. For an 18” pillow cut two 19” squares for the front and back.
-
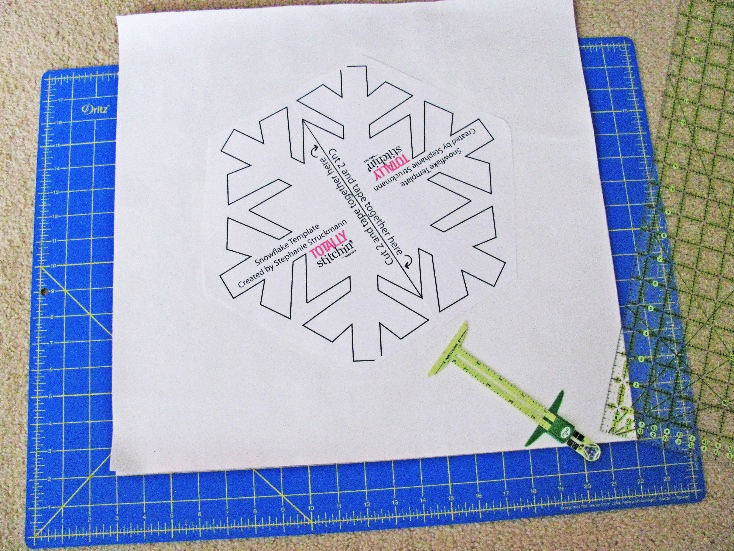
Pin or tape (if using fabric that will gain holes with pins) the 16” square of reverse appliqué fabric to the backside of the pillow front.
-
I offset my fabric so that the lines would run diagonally.
-
Flip it over center and pin or tape your snowflake template (if you didn’t trace directly onto your fabric) to the front side.
-
-
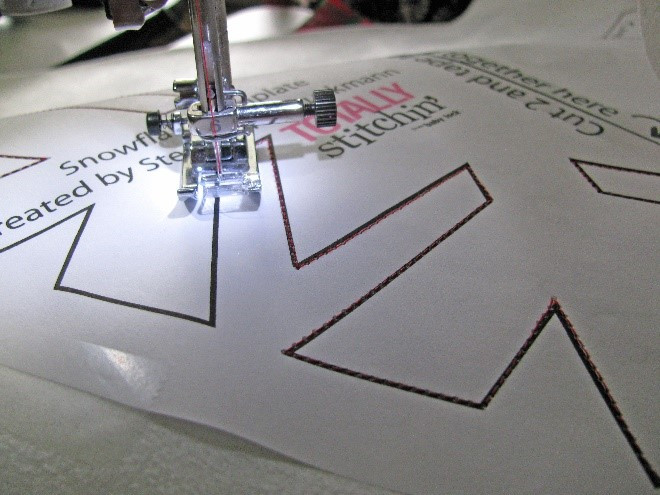
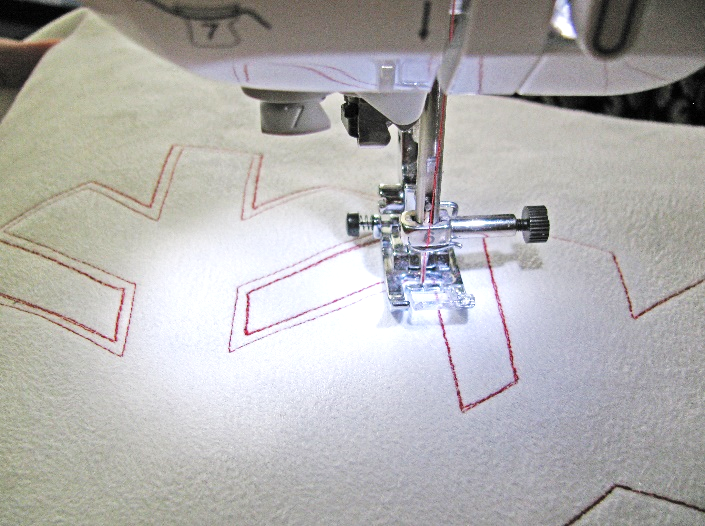
Thread your machine and make sure to use the appropriate needle for the fabric or thread that you are using.
-
You can use the standard presser foot or the Teflon foot if using fabrics like cork or pleather but the open toe foot is awesome for appliqué!
-
Place the pillow front layers into the machine.
-
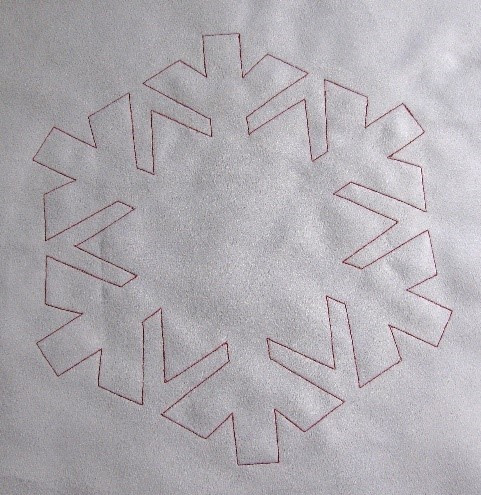
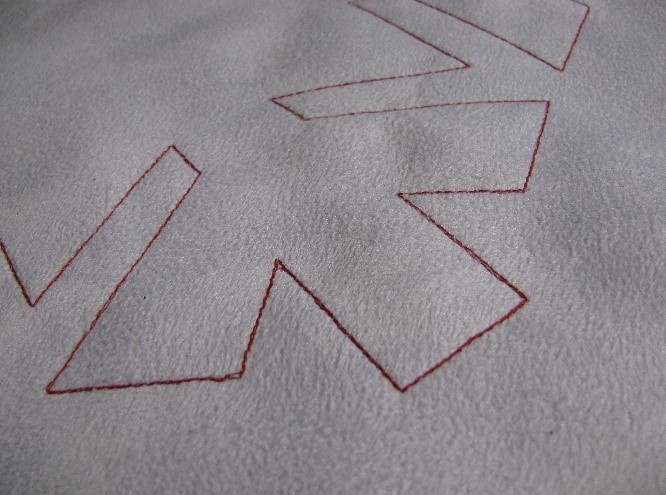
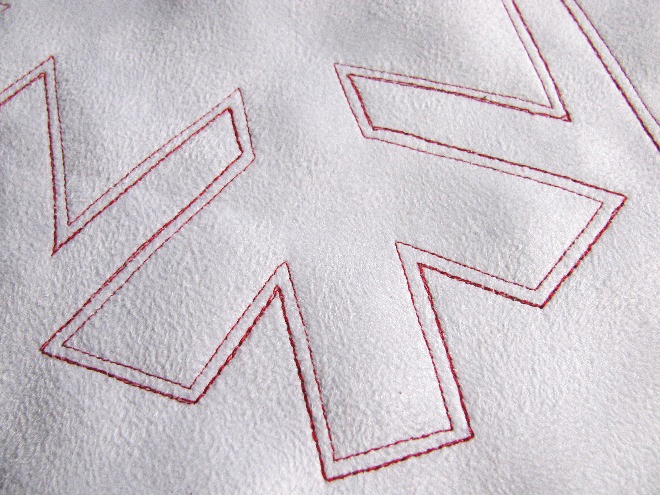
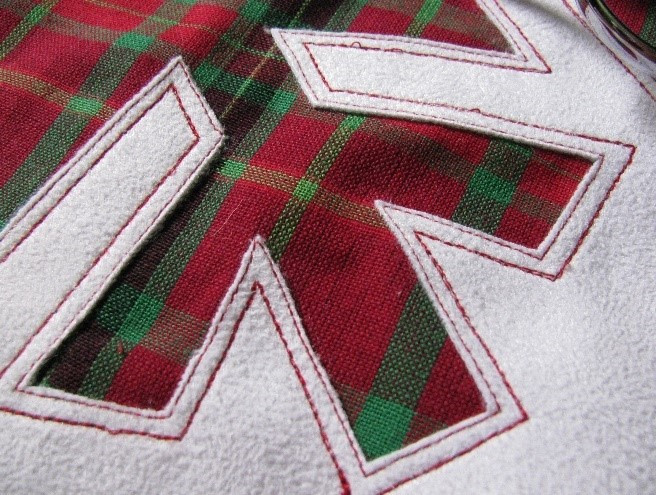
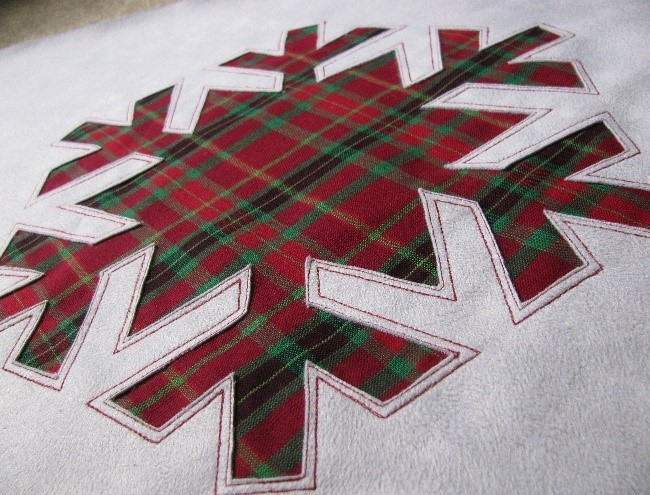
Use a center needle straight stitch and stitch over your outline two or three times or the triple stitch will also give you a nice outline!
-
With your needle in the center and your stitch length at 2.5-3.0mm (test the length prior to find your preference) stitch around the entire snowflake along the template lines!
TIP: If your Baby Lock machine has a hands-free presser foot lifter this is the time to use it for all of those pivots! Or if your Baby Lock machine has the Advanced Pivot Feature even better! Make sure to turn it on so that the foot raises every time you stop sewing so that you can make your pivot when ready!
-
-
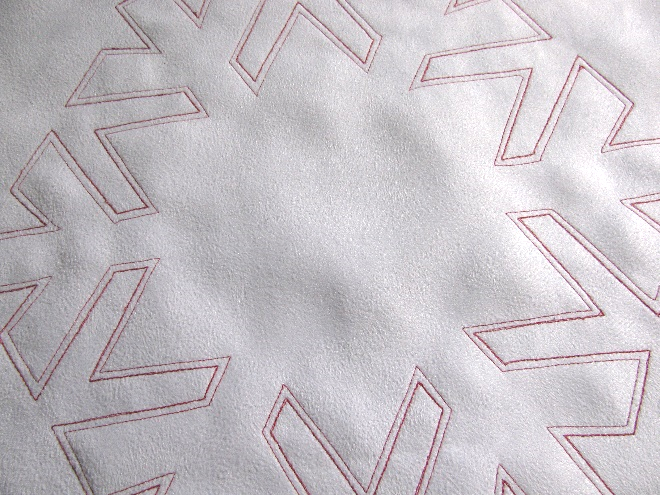
Support your stitch lines as you gently remove the stabilizer to reveal your pretty snowflake stitch line.
-
Optional: stitch a second line about 1/8” away on the inside or outside of your first stitch line.
-
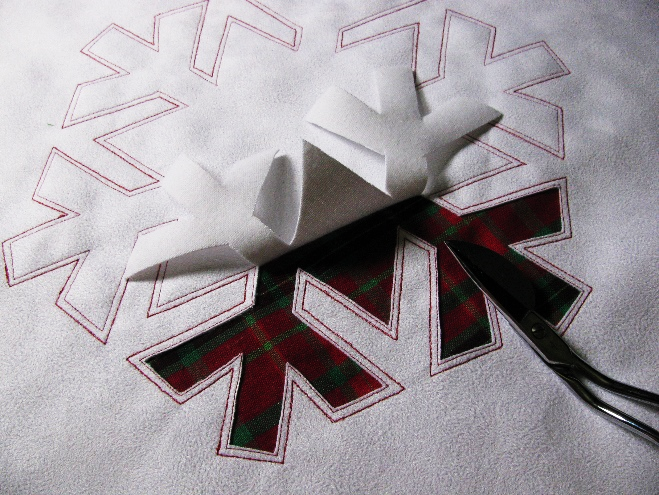
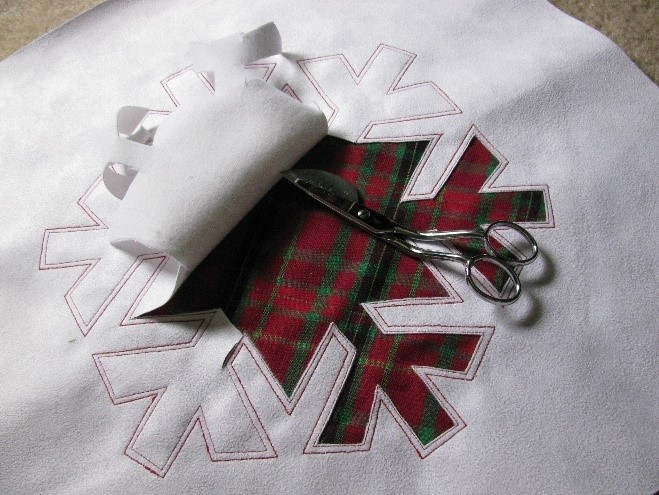
Carefully clip closely along the inside stitch line with your appliqué scissors or small snips when necessary.
-
Don’t nip your stitch line or clip the appliqué fabric underneath!
-
-
Trim the fabric down on the underside.
-
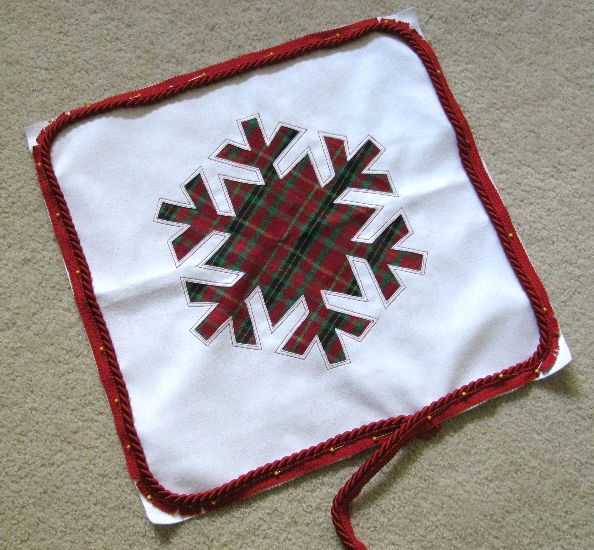
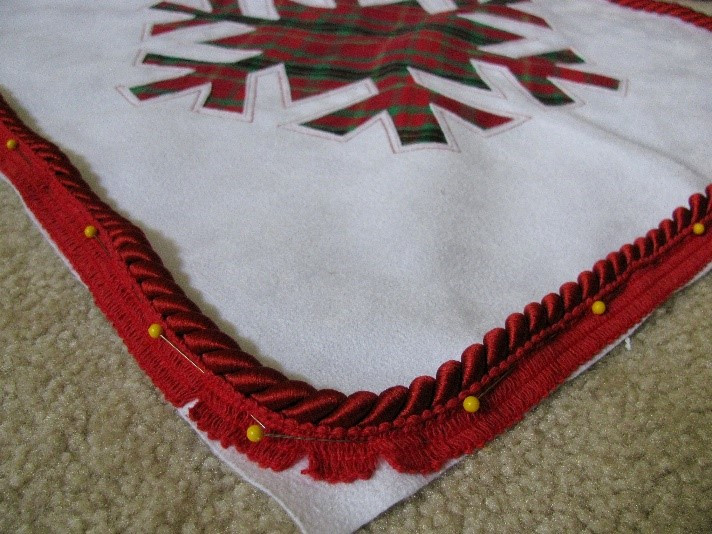
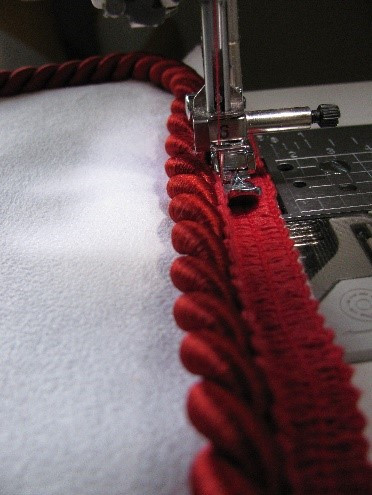
Pin your cording along the edge clipping the curves of the seam allowance tape on the cording as you turn the corners.
-
Or stitch it on and clip the seam allowance at the corners as you go.
-
Use a left needle straight stitch position and the adjustable zipper foot or the narrow zipper foot
to get your stitch line as close to the cording/piping as possible without stitching on it. You can use a longer stitch length like 4-4.5mm to stitch the cording down.
-
-
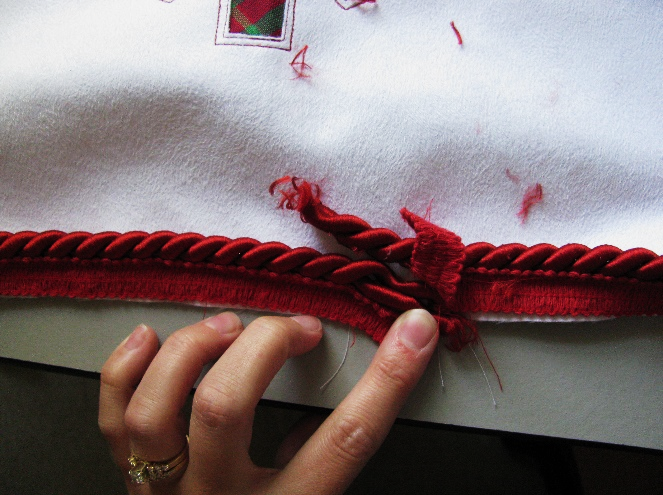
If you are using the twist rope cording overlap the cord ends by stitch ripping about 2” of the seam allowance tape from both ends of the rope.
-
Untwist on both ends about an inch or so of overlap.
-
Then wrap one side over the other to make it look like one continuous rope.
-
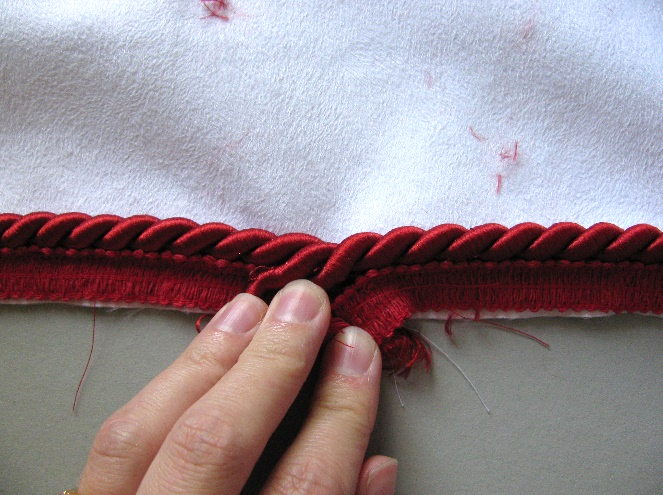
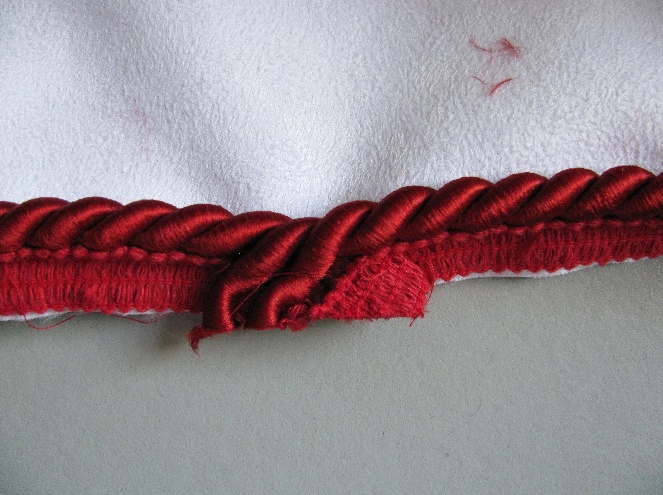
Carefully stitch as close to the stitch line as possible. Take it very slow; it’ll be thick!
-
I recommend switching to your standard presser foot to get the needed foot stability while going over the thickness.
-
If you have a leveling button on your standard foot you may or may not need to use it over the bulk.
-
-
Using the narrow zipper foot or the adjustable zipper foot align the top edge of the zipper with the lower edge of the back side of the pillow.
-
Line your zipper up so that when you stitch it on you’ll be stitching at a ½” seam allowance.
-
Stitch as closely to the zipper teeth as you can without stitching on them.
-
For the front side line the zipper teeth up as closely as you can to the cording and stitch again but don’t stitch right up next to the teeth.
-
Give it a little space away from the zipper so that you can more easily zip it considering the bulk of the cording.
-
Take it slow over the overlap!
-
If you need to switch to your standard foot to stitch over the bulky area.
-
After stitching make sure that it zips! Then zip it up half-way.
TIP: If you need to shorten your zipper stitch with a wide zig-zag and a 0mm stitch length and create a new bar tack over the zipper and create a new end. Cut the excess zipper off. Or you can just stitch over the ends when you stitch around the entire pillow in the next step!
-
-
Place pretty sides together pin and stitch around the remaining 3 sides of your pillow with one of the zipper feet mentioned and a standard straight stitch and stitch length.
-
Stitch as closely to the cording as possible and over both zipper ends (stitching them closed on both ends with the zipper pull in the middle).
-
After I’ve stitched once and the pins are removed I like to stitch a second time to get in more closely to the roping if needed.
-
-
After sewing reach inside your pillow and unzip it the rest of the way.
-
Turn right side out and stuff your pillow with a pillow form or stuffing.
-
And then admire your work!
-


