
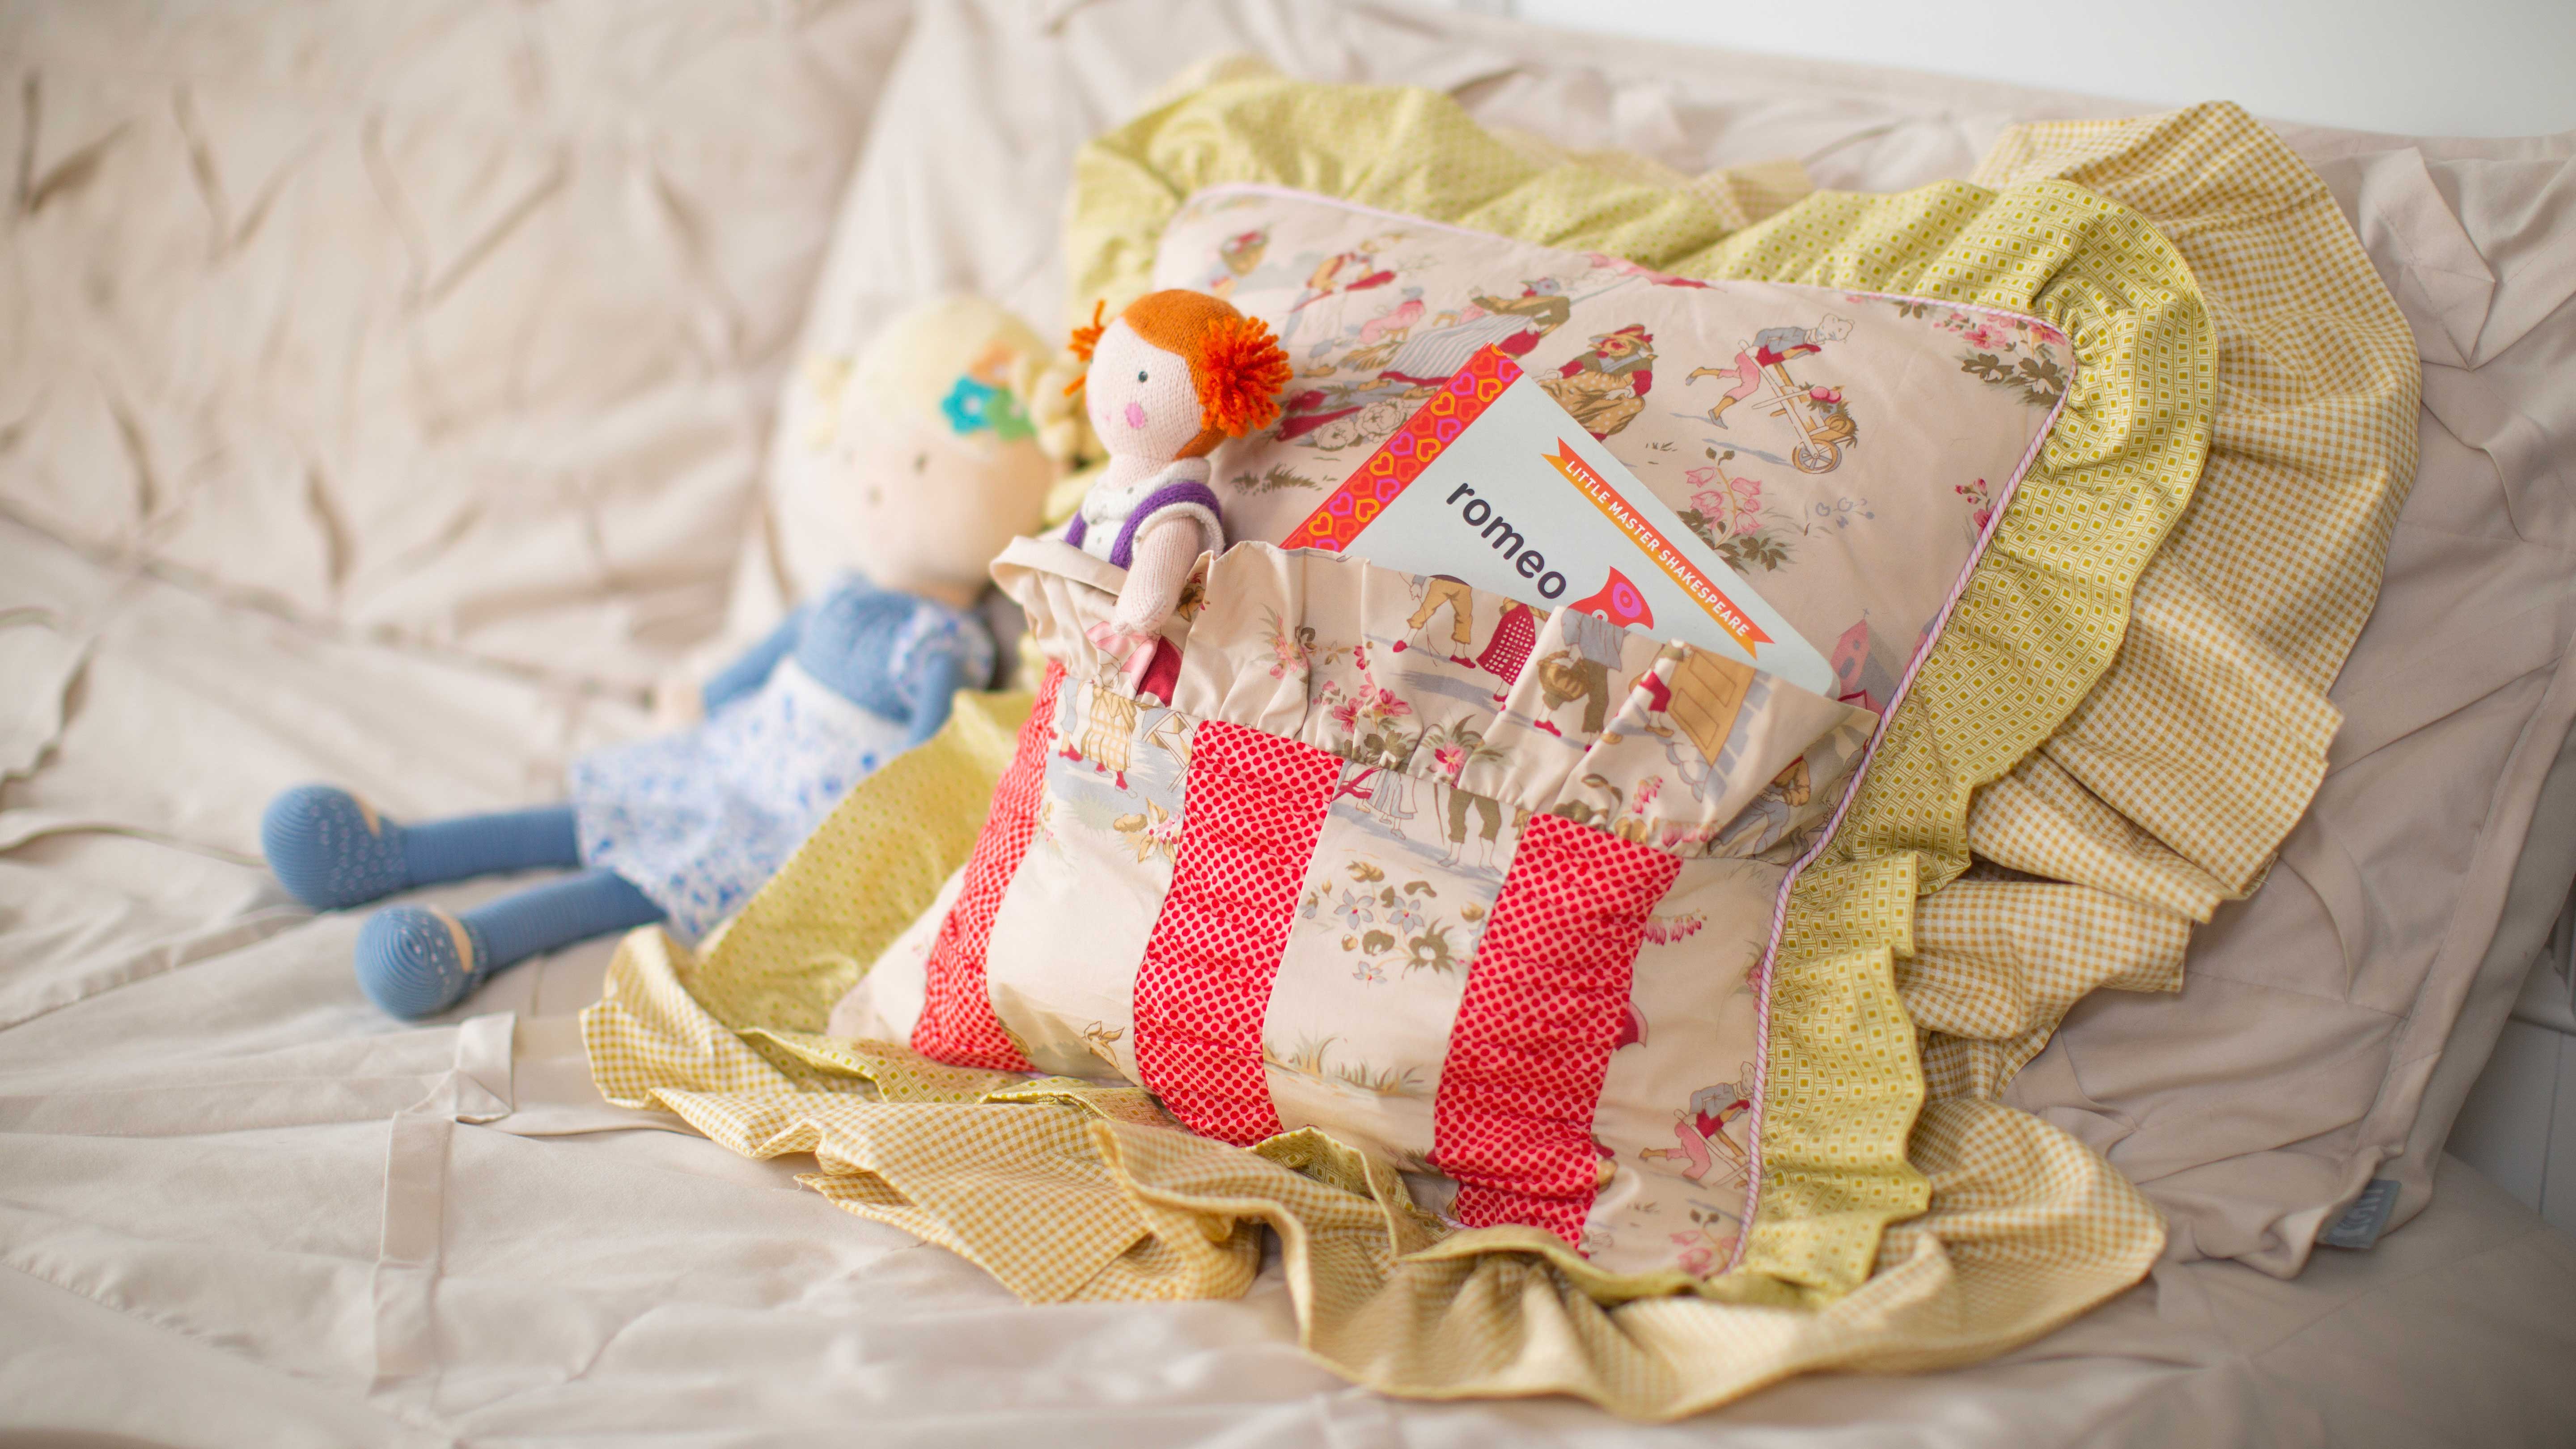
Want to show off your serger skills and create a fun pillow your little one will love? Try this pillow! With a pocket to hold books toys and treasures this pillow will be cute and functional. Make it on your new Baby Lock Vibrant serger. Download printable instructions.
Materials:
- 6” x 66” cotton print for pillow ruffle #1 (outside ruffle Print A)
- 3” x 66” cotton print for pillow ruffle #2 (inside ruffle Print B)
- 3” x 18” cotton print for pocket ruffle (Print C)
- 16” x 16” cotton print for pillow front (Print C)
- (2) 8 ½” x 16” cotton print for pillow back (Print C)
- 16” x 7” cotton print or solid for pocket lining (Print C or solid to match prints)
- (4) 3 ½ ” by 7 ½” cotton print for pillow front (Print C)
- 2 ½”by 45” cotton print for pillow front ruffles (Print D)
- 1 3/8” bias strips – 76” in length – this will result in a number of strips (Print E)
- 66” -1/8” cording
- 22” zipper
- 16” x 16” lightweight iron-on stabilizer
Tools:
- Baby Lock Vibrant Serger
Steps:
-
Use ¼” seams throughout project
-
Creating the puffing strips for the Pillow Pocket:
-
Attach the gathering foot. Set the serger for a 4-thread overlock adjusting the stitch length to 4.0 and the differential feed to 2.
-
Place the 2 ½” by 45” fabric strip under the presser foot and stitch trimming only a sliver of fabric.
-
Turn the fabric and serge down the opposite side of the fabric.
-
Cut puffing strips into three 2 ½” by 7 ½” pieces.
-
-
Creating the Piping:
-
Join the fabrics strips using a 4-thread overlock bias cut 1 3/8” wide to create a length that measures 76”. Press the seams to one side.
-
Attach the cording foot. Set the serger up for a 3-thread overlock stitch. Attach the cording foot.
-
Wrap the bias fabric strip around the cording positioning the cording against the fold and aligning the fabric edges.
-
Place the cording under the presser foot aligning the cording with the groove on the underside of the presser foot.
-
Stitch the entire length of the bias strip.
-
-
Creating the Ruffles:
-
Prep the outside and inside ruffles by piece together the strips to create the 66” using a 4-thread overlock stitch. Press the seams to the side.
-
Set the serger up for a rolled hem following the Vibrant Instruction and Reference Manual. Place overlock thread in the needle and upper and lower loopers.
-
Set the serger for the 4-thread overlock stitch by adjusting the stich length to 4.0 and the differential feed to 2.0.
-
Attach the gathering foot. Place the 6” x 66” fabric strip under the presser foot with the unfinished edge next to the cutting blade. Stitch.
-
For the 3” x 66” and 3” x 18” fabric strip repeat step 3. Set these two pieces aside.
-
-
Inserting the Zipper in the Pillow Back:
-
Attach the cording foot and set the serger for a 3-thread overlock wide stitch.
-
Open the zipper. Place zipper face down right sides together with one 8 1/2” by 16” pillow back pieces.
-
Place outside of zipper about ¼” in from the fabric edge. Serge attaching zipper to fabric.
-
Repeat for second 8 ½” by 16” piece.
-
-
Preparing the Pillow Front:
-
Iron stabilizer onto the back of the 16” x 16” pillow front fabric.
-
-
Pocket for Pillow Front:
-
Serge 3 ½ ” by 7 ½” fabric strips to 2 ½” by 7 ½” puffing strips
-
-
Pillow Pocket Front:
-
With raw edge of ruffles to raw edge of pillow pocket front right sides together serge first the 3” by 16” ruffle across the top using a 3-thread overlock.
-
Place pillow pocket lining right sides together on top of pillow pocket front aligning fabric edges and making sure that the ruffle placed toward the pocket.
-
Serge across the top. Press the seam on both sides to set.
-
Bring the lining to the wrong side of the pocket front and press along the seam.
-
Using binder clips secure the wrong side of pillow pocket to right side of pillow top.
-
-
Serge Piping to Pillow Top:
-
Place piping strip on right side of pillow front aligning the fabric edges.
-
Using the cording foot stitch the piping to the pillow front using a 3-thread overlock wide stitch overlapping the piping ends.
-
-
Serge Ruffles to Pillow Top:
-
With raw edge of ruffles to raw edge of fabric right sides together serge first the 3” ruffle and then the 6” ruffle around the pillow top using a 3-thread overlock stitch.
-
-
Attaching the Pillow Front to the Back:
-
Unzip the zipper about half way. With right sides together place pillow back on top of pillow front.
-
Serge around the pillow using a 3-thread overlock stitch. Press both sides of the seam to set the seam. Turn right side out and insert pillow form.
-


