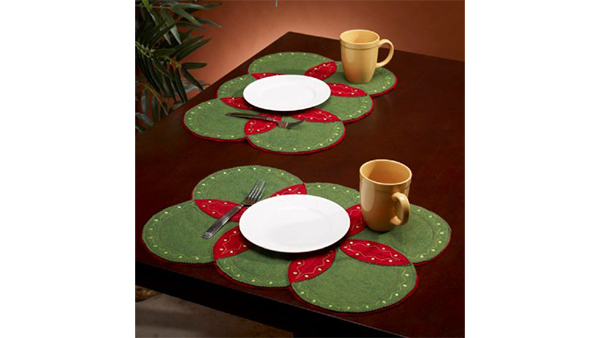
These holiday placemats make an elegant addition to any holiday meal setting. Use embroidery and the Baby Lock Sashiko machine to embellish placemats your guests will love. Pair this project with the Sashiko Holiday Table Topper for a complete dining set. Download printable instructions.
Materials:
- 1 2/3 yards of 45” wide green wool felt
- 2 2/3 yards of 45” wide red wool felt
- Lime green embroidery thread
- Cherry red all-purpose thread
- Monofilament thread dark colored
- Pinking shears
- Going in Circles Ruler large
- Water soluble marking pen
Tools:
- Baby Lock Sashiko Machine
- Baby Lock Embroidery and Sewing Machine
Steps:
-
Start with the Baby Lock Embroidery Machine; select from the Stitch Patterns the Frame with the zigzag and dot pattern.
-
Enlarge the pattern to 19.7 cm. Thread the machine with lime green thread.
-
Cut one yard of the red felt from the length of the felt and set aside.
-
Layer the red felt on the top of the green felt. Hoop the felts placing both layers in the hoop with the red layer facing up.
-
Note: four patterns can be embroidered across the width of the felt. No stabilizer is needed due to the thickness of the felt!
-
-
Repeat step three until there are a total of 24 circles embroidered on the felt. Allow approximately 1 1/2” between each pattern.
-
Prepare to cut out the circles by marking each circle using the “Going in Circles Ruler” and water soluble marking pen. Mark an 8 ¼” circle.
-
Cut out each circle with the pinking shears following the marked circle.
-
Next mark the circles on the green felt with a 5 ¾” square. Centering four dots on each side of the square.
-
Pin two circles together along one side of the marked squares matching the zigzag stitches of each circle.
-
Stitch the circles together along the marked line. Press the flaps open using steam.
-
Continue adding circles until six circles are connected in a rectangle.
-
Sew the remaining circles together into three more placemats. Press.
-
Layer the placemats onto the remaining red felt. Pin the placemats securely to the red felt base.
-
Stitch the circles to the base with monofilament thread on the machine and red thread in the bobbin. First stitch in-the-ditch through the center of the flaps.
-
Next stitch around the flaps very near the edges of the flaps.
-
-
Pin the outside edges of the placemats to the felt.
-
Thread the Sashiko machine with red thread. Change the settings on the machine: Stitch Length of 4 and Stitch Spacing of 2.
-
In each of the middles of the circles stitch ¼” from the edge of the flaps and inside the edges of the zigzag embroidery.
-
On the outside of each placemat stitch ¼” from the outside of the dots.
-
Trim away the excess red felt base using the pinking shears. Allow ¼” of the red felt to show from under the green felt circles.


