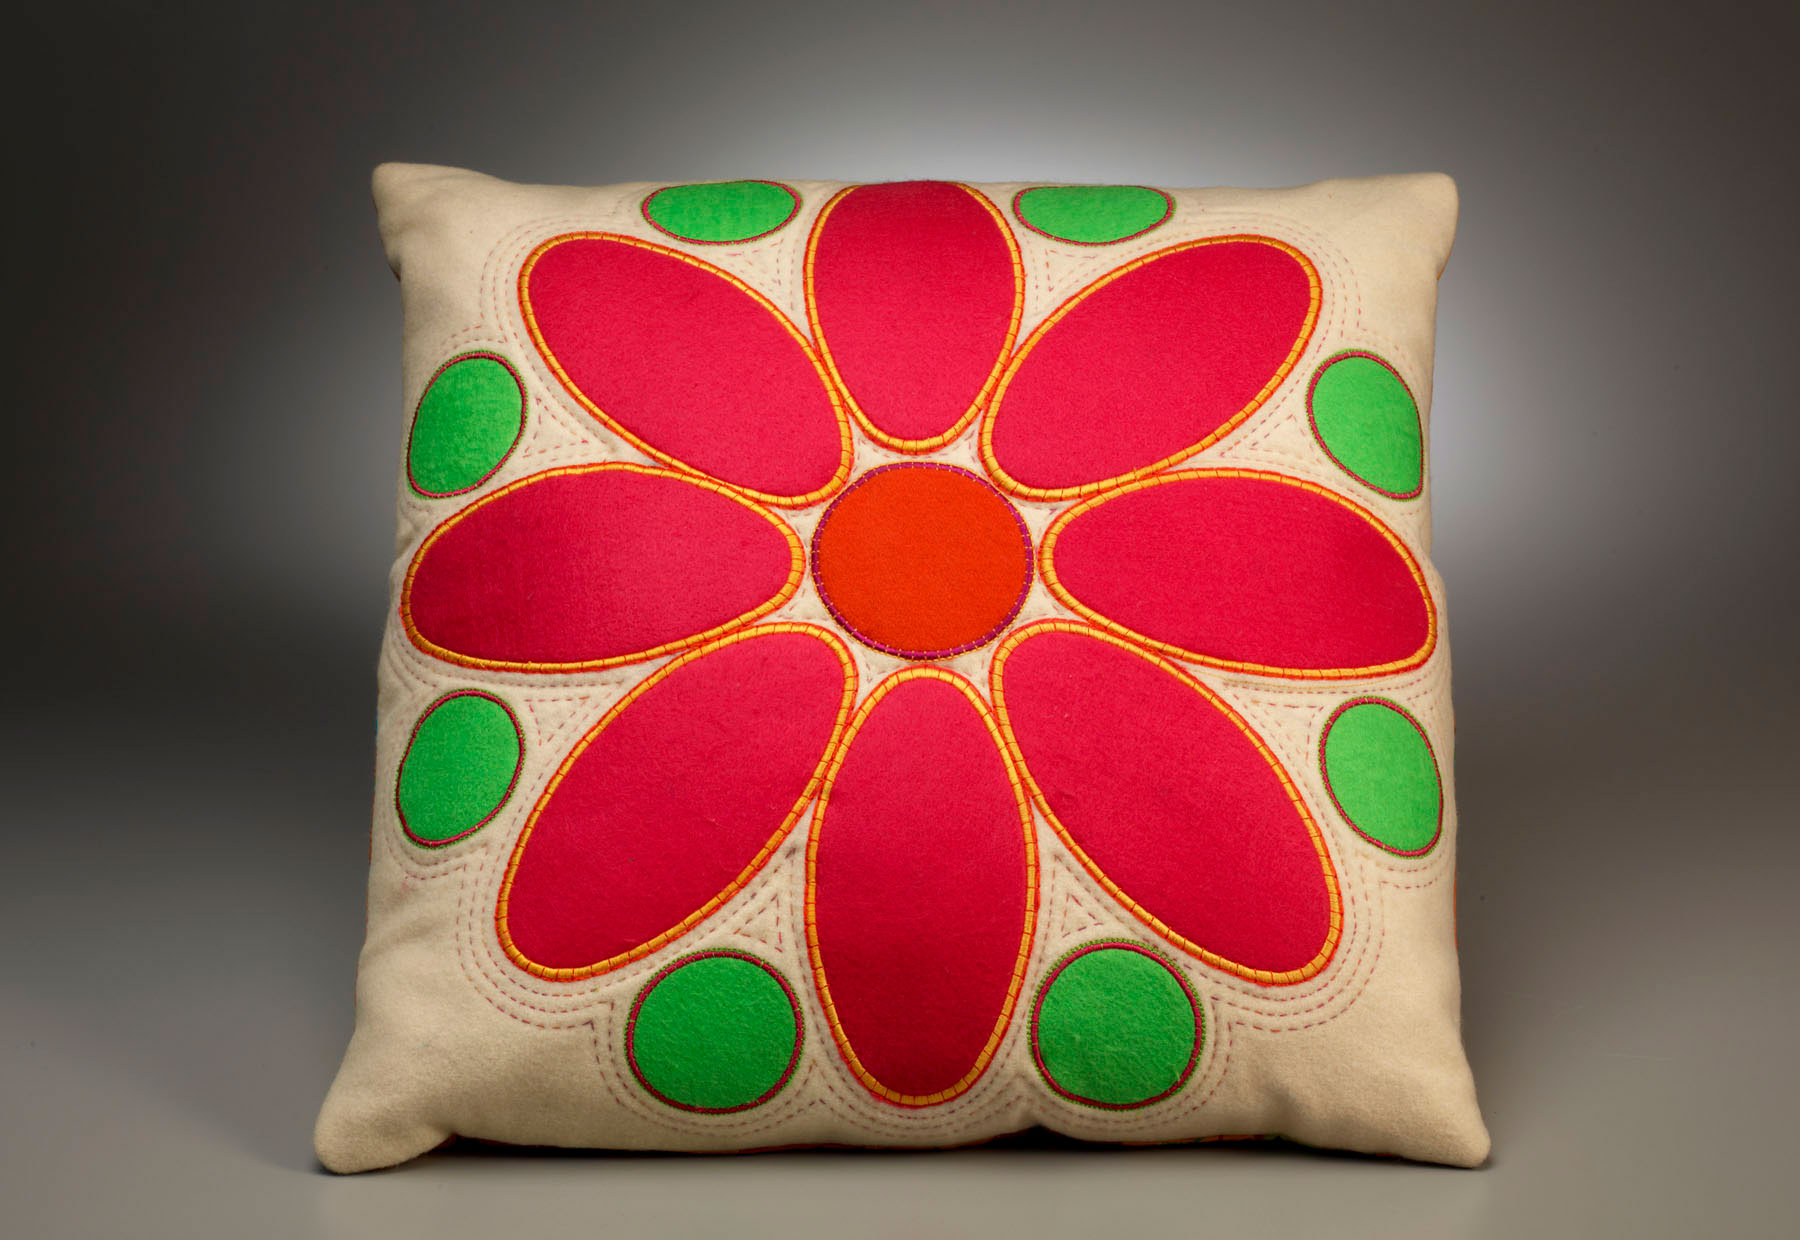
This pillow will add a touch of modern style to any room in the house. You’ll have fun creating the daisy using your Baby Lock embroidery machine's edit features. Then add the final touch with the unique Sashiko machine to give your new pillow a hand-stitched look. Download printable instructions.
Materials:
- ¾ yard of 45” wide ivory or white wool felt
- 1/8 yard of 45” wide orange wool felt
- 1/3 yard of 45” bright pink wool felt
- 1/8 yard of 45” lime green wool felt
- ¾ yard of 45” muslin
- 5/8 yard of 45” cotton for back of pillow
- Violet yellow orange bright pink and lime green embroidery thread
- Sulky Blendable thread for quilting color 4043 tropical
- Baby Lock® Tear-Away Soft stabilizer
- Quilt batting
- Ruler
- Water soluble marking pen
- Pillow form 20” x 20”
Tools:
Steps:
-
Prepare the wools by cutting as follows:
-
One ivory square 27” x 27” pillow top
-
One orange square 5” x 5” daisy center
-
Eight bright pink rectangles 4” x 8” daisy petals
-
Eight lime green squares 3” x 3” outside circles
-
-
Find the center of the ivory square; mark with a water soluble marking pen.
-
Using a ruler divide the pillow top into eight equal sections radiating out from the center.
-
These lines will be the placement lines for the center of each daisy petal.
-
-
To embroider the center of the daisy start with the Baby Lock Embroidery Machine:
-
Working in the embroidery edit mode select the straight stitch circle frame pattern.
-
Edit the frame pattern to 9.0cm x 9.0cm. Select the straight stitch circle frame again and edit to 9.0cm x 9.0cm.
-
Next select the satin stitch circle frame pattern and edit the size to 9.2cm x 9.2cm.
-
To finish select the blanket stitch circle frame pattern edit the size to 9.2cm x 9.3cm. Save this sequence of patterns.
-
-
Prepare to embroider the pattern by hooping the ivory wool and tear away stabilizer;
-
Thread the machine with the violet embroidery thread; place the hoop on the machine.
-
-
Embroider the straight stitched circle onto the ivory wool. Place the orange wool square over the embroidered circle. Embroider the second straight stitch circle.
-
Remove the embroidery frame from the embroidery unit and cut around the outside of the stitches.
-
Do not remove the fabric from the embroidery frame or pull strongly on the fabric. Otherwise the fabric may loosen from the frame.
-
-
Replace the hoop to the embroidery unit. Stitch the satin stitch circle frame pattern.
-
Change the thread color to yellow and stitch the blanket stitch circle frame pattern.
-
Repeat this pattern one more time to “build-up” the look and brightness of the blanket stitching.
-
-
Remove hoop from the ivory wool prepare to stitch the petals by marking from the center of the pillow out 5 ½” on each of the eight radiating lines.
-
Program the machine to embroider the petals again using the embroidery edit program. The patterns and sizes are as follows:
Oval - straight stitch 18.1cm x 9cm thread color yellow Oval - straight stitch 18.1cm x 9cm thread color yellow Oval - satin stitch 18.2cm x 9.2cm thread color yellow Oval - blanket stitch 18.3cm x 9.2cm thread color orange (stitch pattern twice)
-
Oval - straight stitch 18.1cm x 9cm thread color yellow
-
Oval - straight stitch 18.1cm x 9cm thread color yellow
-
Oval - satin stitch 18.2cm x 9.2cm thread color yellow
-
Oval - blanket stitch 18.3cm x 9.2cm thread color orange (stitch pattern twice)
-
-
Following Steps 4-9 embroider eight bright pink petals. Each petal will be centered on one of the eight radiating lines at the 5 ½” marking.
-
Next mark the placement for the lime green circles.
-
The center of each circle will be 8 3/8” from the center of the pillow top.
-
Place a ruler from the center of the pillow between the edges where two petals meet mark this line outward to the edge of the pillow top.
-
-
Program the machine to embroider the lime green circles using embroidery edit with the following settings:
-
Circle - straight stitch 6.8cm x 6.8cm bright pink thread
-
Circle - straight stitch 6.8cm x 6.8cm bright pink thread
-
Circle - satin stitch 7cm x 7cm bright pink thread
-
Circle - blanket stitch 7.1cm x 7.1cm lime green thread
-
-
Following steps 4-9 embroider the lime green circles.
-
Remove the tear away stabilizer and prepare for quilting by layering the pillow top quilt batting and muslin. Baste the layers together.
-
Thread the Baby Lock Sashiko machine with cotton thread. Change the settings on the machine: Stitch Length of 5 and Stitch Spacing of 3.
-
Outline quilt around the center of the daisy the petals and the lime green circles. Use the presser foot’s edge as a guide for the distance between each row.
-
Press the pillow top. Mark the pillow 21” x 21”. Baste along the marked line through all three layers. Cut close to the basting line.
-
Cut a piece of fabric for the back of the pillow measuring 21” x 21”.
-
Pin the pillow front to back right sides together
-
. Once pinned stitch the seams together using a 1/2” seam allowance. Leave a 10” opening at the bottom edge to allow for turning the pillow right sides out.
-
Turn out the pillow top and insert the pillow form.
-
Tuck the remaining seam inside the pillow and stitch the seam closed.


