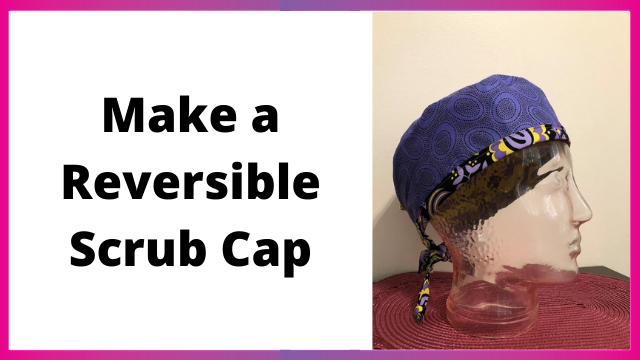
Learn how to make a unisex scrub or skull cap with this free pattern and instructions.. This cap pattern is made in the same style as a medical surgery cap and it is reversable. You can even add buttons to the sides to wear it with a face mask. These can be made on a serger or sewing machine
Download the instructions here.
Need a homemade face mask pattern? Visit this link for our pattern that includes a filter pocket and ties. We have also included links to additional patterns from a variety of other creators.
Materials:
- 2 Fat Quarters
- 2 buttons 5/8” or larger
- One 2 ½” x 44” strip or packaged wide double fold bias tape
- Matching thread for topstitching
- Clear tape
- Template Plastic - Optional
Tools:
- Baby Lock Serger
- Baby Lock Sewing Machine
- Button Fitting Foot- Optional
- Serger Curve Foot - Optional
- Wonder Clips
- Pressing Ham -Optional
- Basic sewing supplies
- 25mm Bias Tape Maker -Optional
Steps:
-
Print pattern pieces check to make sure the box prints to 1”.
-
The band pattern piece was split into two pages for standard paper size printing. Cut these pieces out and use clear tape to join together at the line to make the band pattern piece.
-
A wonderful way to preserve the pattern when making multiples is to trace the pattern onto template plastic
-
This makes a sturdier pattern that holds up better to multiple uses.
-
Since most template pattern is clear – you can also see through your pattern piece for aligning printed fabrics.
-
Be sure to Label edges and the fold edge.
-
-
Cut each piece from two different fabrics both pieces are cut on fold.
-
Serger Settings: Set up your serger for 3-thread overlock wide – left needle
• Neutral thread • 2.5 stitch length • 5.5 stitch width • 80/12 needle • Foot – Curve Foot Optional depending on the model • Differential feed as needed
-
With each color fabric you will stitch separately. Align center of band and center of crown pieces together. Clip or pin in place.
-
When serging align the fabric with the knife to just shave the edge not cut a full seam allowance.
Remove pins or fabric clips before they reach the foot do not sew or serge over pins or clips.
-
Repeat for the other color of fabric.
-
Press seams flat towards the band. Using a pressing ham will help to keep crown rounded while pressing.
-
With right sides together stitch the back along the curved edge of the cap. Press and flip to topstitch on sewing machine.
-
With wrong sides together stitch around the lower edge of the both bands. This will hold together when adding the on the next step.
-
Press 2 1/2” strip in half lengthwise.
Press raw edges towards the fold creating a binding piece that will finish the edge covering raw edges and become the straps.
-
Clip or pin the center of the strap and center of cap together.
-
Setting up sewing machine:
• 80/12 needle • Thread sewing machine with neutral thread • Straight stitch right needle position. • Position fabric long inside toe of foot • Standard foot
-
Start stitching at the end of the strap along folded edge.
-
When you reach the cap insert the edge into the folded binding/strap piece.
-
Continue topstitching the binding/strap piece across the length of the strip.
-
Try the hat on. Using pins or a fabric marker mark placement for optional tucks or mask buttons.
-
Two tucks can be put in the top pieces – center back for shaping or resizing for a customized fit.
-
To add buttons using the Button Fitting Foot (M) and engaging the clear built-in shank creator on the foot
Slide your button in the foot centering the holes (do the front holes first if you are using a 4-hole button then move to the back holes).
-
Find the Button Sewing Stitch (looks like a bar tack) on your machine.
Use the handwheel to check that the needle will not hit the button. Once you are certain that the needle will clear both holes on the button sew the button in place. Stitch it again for extra security.
-
Finish the straps by tying a knot in each end or topstitching.


