
Use the Baby Lock Venture to help quilt your in-the-hoop projects. Whether using the built-in quilting designs or creating your own in IQ Designer you can get the right look for your quilting projects. Combine large designs together to help fill those larger blocks. Finish off your quilting by using the Enhanced Border function on the Venture. With a multitude of placement options the Venture is sure to get your designs placed right where you want them to go! Download printable instructions.
Materials:
- ½ yard of light background fabric
- Various Fat Quarters of fabric
- ½ yard for border
- 1 yard for backing and binding
- Batting
- Madeira® Rayon or Polyneon thread for embroidery
- Madeira® Aerofil or Cotona thread for sewing
Tools:
- Baby Lock Venture 10-needle Embroidery Machine
- Baby Lock sewing machine (for binding)
- Optional Border Frame or Magnetic Sash Frame
- 8” X 14” Hoop
Steps:
-
Instructions:
-
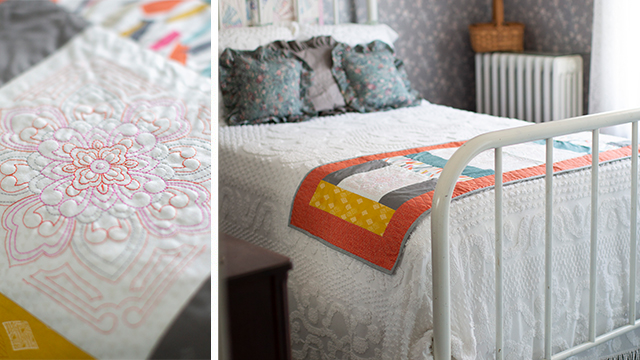
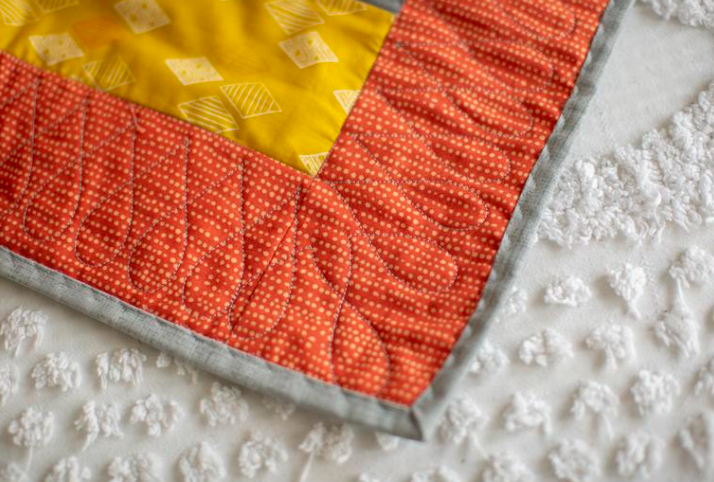
The techniques used for quilting this project will work with a variety of quilts and fabric panels.
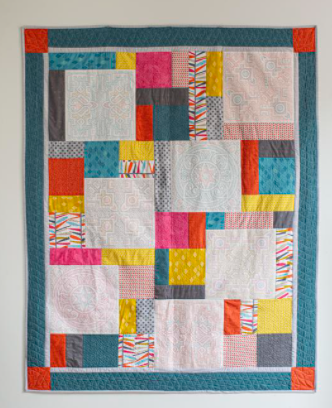
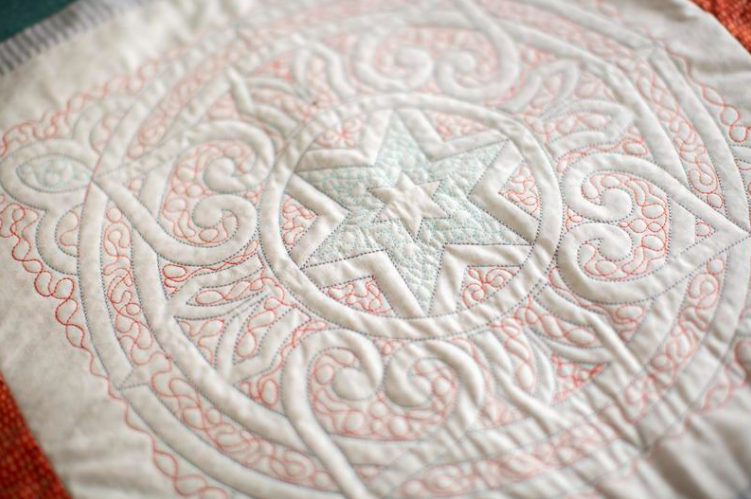
For this project a quilt top was created to showcase an 8” x 8” block 15“ x 15” center and a 3 ½” border. This is a great scrappy quilt. This project is more about the placement and quilting than it is about the actual quilt!!!
-
This truly was a scrappy project created using the extra fabrics from the inspiration quilt on the Venture Screen. Feel free to get creative!
The measurements for this runner are shown in a diagram on page 2 of the printable project instructions here.
-
-
Creating the Bed Runner:
-
The image above shows the cutting measurements for sections of the bed runner project.
-
Cut fabric from your scraps or fat quarters as desired. The larger blocks should be cut from the chosen background fabric.
-
Seam together using a ¼” seam allowance pressing seams along the way.
-
Once the top is completed sandwich the top with batting and backing.
-
To allow for excess fabric when hooping cut the backing 4-6” wider all the way around the top.
-
Baste spray baste or pin the top together to ensure that the layers have limited movement during multiple re-hooping.
-
TIP: You can also stitch in the ditch on the quilt top prior to adding the embroidery.
-
-
Quilting in the Hoop:
Three different embroidery designs were used with the bed runner. The first was using a built-in quilting design. The second was using a decorative fill from IQ Designer and the third was combing two designs together to create a larger design. Lastly the border was quilted using the Enhanced Border Function.
Each of these were placed using a different method of the Venture’s placement options.

-
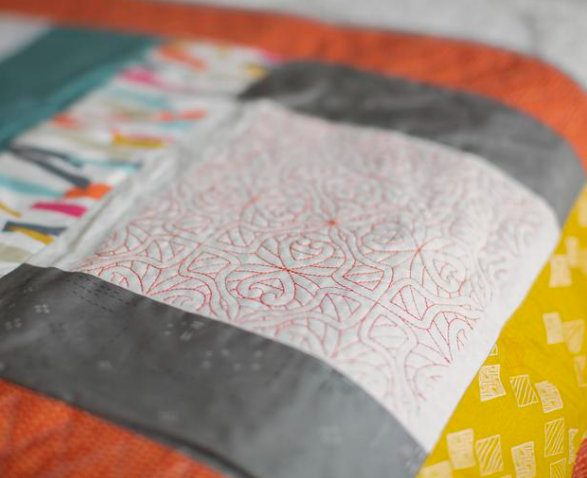
Using a Decorative Fill with IQ Designer
Let’s get started with one of the smaller blocks and quilt it using the decorative fills in IQ Designer. This a great way to add quilting to any embroidery project!
-
Since this block was around 8" select the shape/stamp key and choose the 5th tab for the frame embroidery areas frame holder B and the 8” Quilt Frame.
-
Next select the Region Fill properties and select the decorative fill of choice. Touch OK and with the Region Fill Cup selected simply touch inside the hoop area.
-
No need to worry about setting an outline as this shape comes in with a no-sew outline perfect for quilt blocks.
-
Touch Next and adjust the stitch properties to the thinner fill touch Set follow the prompt to embroidery. Just like that I have created a beautiful quilt block.
-
Now to place this first block I am going to using the built-in camera on the Venture. I love to scan my hooped fabric giving me a bird’s eye view of what is in the hoop.
- I simply select the camera scan feature the hoop will scan and quickly a background image appears on screen.
- With this view I can use the built-in editing features to move re-size or rotate the quilt block for precise placement. When ready to stitch select end editing touch embroidery I assign my thread color to the appropriate needle and stitch-away! Just like that the first block is quilted!!
-
-
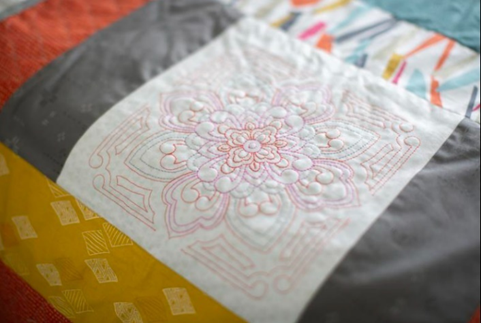
Using a Built-In Designs
Let’s move over to the other side of the quilt and hoop the other smaller block. For this block I am going to use one of the Venture’s built-in quilt designs.
-
Chose a quilt block from the second category of designs and touch set. (I used design #47).
-
Another great editing feature in the Venture is the ability to change the colors in the design to match my thread choice.
The Venture’s Color Palette has a unique feature that allows me to group my colors.
-
This way when I update the color chip for similar color sections both color sections are changed.
Once I am happy with my color choice I am ready to place my design.
-
On this block I have placed and marked the center of my block.
-
The positioning sticker has been placed on that marked spot on the fabric. My embroidery is all done touch Edit End.
-
The Positioning Sticker and the camera work seamlessly to help me get my designs perfectly placed even though my hooping may not be!!
-
Simply touch the Positioning Key define my point of placement and the camera does the rest! It will position and rotate my design just like that!
-
Touch Embroidery. Then assign my colors and stitch away!
Just make sure you remove the sticker before you get started so you don’t have some added texture to your design.
-
Just like that…block #2 is all stitched out! Such a pretty quilting design.
-
-
Pattern connecting to create a large design
The third center block is a 15” block which is larger than the Venture’s 8” x14” embroidery field but that is no problem! I can take advantage of the camera and the pattern connectivity feature to combine designs to make a larger pattern! First I need to mark my center point and hoop my quilt in the largest hoop! I want to hoop one half of the block.
-
For this block go back to the second design category and select design #44 and set the design.
-
Resize the design to about 6.44 X 12.65 using the resizing with stitch re-calculation
This will allow me to fill the center block and give me the needed room to use the pattern connection feature of the Venture.
-
I can choose to update colors to again coordinate with the thread choices.
Then I want to remember to save the design for the second half of stitching and touch Edit End when done.
-
This block has a few more levels to placement.
-
Let’s first place the block by selecting the Camera View.
-
When turned on you can see the fabric area right around the needle. A 3-D view of the selected design is also shown…how cool is that?
-
I can choose a different point of placement to use the bottom center of the design to help me line up with the markings on the block.
-
Once the design is positioned I can turn off the camera function.
-
Since I want to connect another design to this I want to turn on the Pattern Connection function on the machine.
-
This icon will indicate to the Venture that a pattern will be joined after this is done stitching. Once that is turned on I can touch embroidery assign colors and stitch away!!!
-
Once embroidery is complete the Venture will prompt me with messages about connecting another pattern. Say OK and retrieve the saved edit design from memory.
-
Then follow the prompts on screen for where to connect the next design.
For this design I will need to rotate the design so that it will create the large medallion in the center of the large block.
-
Touch OK and follow the prompts on the screen to place the positioning stickers where needed.
-
This is important to review the steps and not to re-hoop the fabric until indicated. It’s a good idea to remove the hoop and take the project to a nice flat surface.
-
I then can safely re-hoop the fabric ensuring that the positioning stickers are in the embroidery area and then place it back on the frame holder.
-
After I am back at the machine I carefully follow the prompts for the camera to find the positioning stickers.
-
Once the positioning stickers are detected I’m ready to stitch out the rest of my design!!
-
Depending on the method of color assignment the machine’s color memory should have the correct spools assigned!
-
Stitch away and be amazed at how perfectly the design lines up!!
-
-
Enhanced Border Function
Now that all my blocks are quilted I’m ready to tackle the border. The Venture has an exciting enhanced border function feature. I can add borders up to 118” or a king size quilt border using the Venture and the Camera view placement to help me keep the design lined up!
To help with Quilt Borders I have moved to the Venture’s Frame Holder B and am using the optional Border Frame Hoop. This hoop’s clamping system helps make rehooping a breeze! No need to remove the hoop from the frame holder. Just release the hoop’s clamps slide down the fabric and re-secure the fabric for the next section.
Setting up the border is quick and easy!
-
Select the Enhanced Border Function choose the border pattern and then follow the quilt measurements and frame being used.
-
For my project I made the width 22” length 65” and the border width 2.82” and made sure to indicate the border frame was being used. Then touch NEXT.
-
This will create the connected pattern and save the design to the machine’s memory!!
-
Once in machine memory be sure to select the combined quilt border design.
The Venture will know to walk you through the sections of the pattern starting with the top right corner of the border.
-
Step-by-step instructions will guide me through the quilting process starting with the placing of the initial corner design.
The Venture’s camera view will give the precision to know exactly where a design will be placed.
-
Once placed I just assign the thread and simply stitch the design.
-
Once the first section is completed the Venture will guide me through the remaining steps of the border prompting me to adjust the design placement and when to re-hoop the quilt project.
-
After the corner is stitched the Venture knows that the next section will not fit into the border frame. I can simply unclamp the hoop and slide down my border.
-
Then re-clamp to secure my fabric.
-
Next I need to tell the machine where to connect the design and then confirm any rotation by using the camera view to determine how my design is set to be placed.
-
Once I have everything lined up I can stitch the next section.
The process is the same but as I approach a corner I have an option to stretch or compress my design to prepare for the next connection of design.
-
Once the first side is done I decide to remove the hoop and rotate my fabric to continue down the length of my border.
-
After re-hooping place the hoop back on the machine and continue to follow the machine prompts!
-
Each time I confirm that connection point and any design rotation based on how skilled my hooping was!
-
The order hoop allows for easy manipulation of the quilt top on projects like this b/c adjustments can be made without removing the hoop! Talk about convenience!!
-
Continue stitching re-hooping placing and rotating until all the quilt borders are stitched!
-
As you connect the last piece the Venture will prompt you to confirm that connection point. This allows for a seamless quilt border that looks flawless!
-


