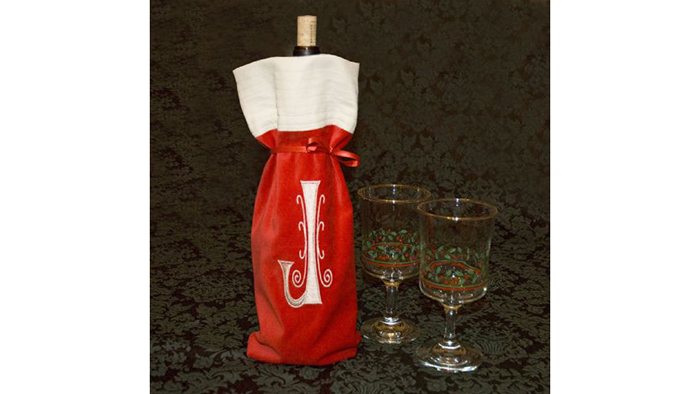
Looking for a quick personalized hostess gift this holiday season? Try this wine bag! Monogram it using MonogramWorks from Designer's Gallery and you're ready to go! Create this project on your multi-needle machine for a present that's ready in no time! Download printable instructions.
Materials:
- Baby Lock Tear-Away stabilizer
- Red velveteen fabric cut to 14” x 12”
- Off white velveteen fabric cut to 14” x 6”
- Madeira sewing and embroidery threads
Tools:
- Baby Lock® multi-needle embroidery machine
- Baby Lock sewing machine
- MonogramWorks from Designer’s Gallery
- Renaissance Font Pack (installed)
Steps:
-
Open MonogramWorks by clicking on the icon on the desktop
-
Click on View Hoop Size on the top toolbar and set the hoop size to 200mm x 200mm and click OK.
-
Click on the Create Monogram icon to open the properties.
-
Type in the initial you'd like to use in the Text field.
-
In the font field click on the down arrow and select the Ren Scroll 3C.
-
To resize the monogram click on any of the four resize handles and drag upward and inward to make the letter tall and skinny .
-
The size of the design will be displayed on the Status bar. You can make the letter as big as you choose but the letter must fit in the 200mm x 200mm hoop.
-
-
Click on the Save icon and save your design to media source that your machine reads in the .pes file format.
-
With the machine turned on place the design on the workspace
-
Click on the monochromatic icon. Only one color will be used for all elements of the design.
-
Hoop the tear-away stabilizer in the 200mm x 200mm hoop and lightly spray with the temporary spray adhesive.
-
To mark the red section fold the piece in half and finger press to create a crease line and mark using a Chaco liner.
-
Fold the other direction and finger press to create another crease line. Mark this crease line only in the center.
-
Where the two lines cross will be the center on the fabric and the location for placing the embroidered design.
-
-
Place the fabric in the center of the hoop with the cross marks as close to center as possible.
-
To fine tune the placement of the design click on the Camera icon. Move the design so that the design is centered over the cross marks.
-
The cross marks should show up on the screen when using the camera.
-
-
Embroider the design using off white Madeira thread along with white thread in the bobbin.
-
With right sides together and using a ½” seam allowance sew the off white section to the top of the red embroidered section.
-
Press the seam towards the off white section.
-
With right sides together sew the back seam together using a ½” seam allowance.
-
On the off white section fold the raw edge inward and press. Fold the off white section inside the bag and pin over the seam line.
-
Top stitch close to the seam and then top stitch additional rows ½” away from each other.
-
To form the bottom of the bag fold the sides inward at an angle and stitch one inch from the point.


