
Create the perfect pillow using Creative Cover Stitch on the Baby Lock Applaud. The combination serging over custom dyed threads and rick rack, make this a fun play on a serger. This pillow is quick and easy and will be a fun addition to any room!
Click HERE to download printable instructions with additional photos
Supplies:
- Baby Lock Applaud Creative Cover Stitch Machine
- Baby Lock Triumph Serger or other Baby Lock Overlock Serger for piping and inserting the zipper
- Applaud Cording and Taping Micro Insert Feet – BLPC-TCFEET optional
- Baby Lock Serger Cording Foot BLE8-CF
- Pillow front: 16” x 16” cotton fabric
- Pillow back: two 8 ½” x 16” cotton fabric
- 16x16” Ultra Soft Fusible by Baby Lock for pillow front
- Two 8 ½” x 16” Ultra Soft Fusible by Baby Lock for pillow back – if Ultra soft is not available use a one sided fusible fleece
- Gradient Rick Rack – For this project, dyed rick rack was sourced at a local needlepoint shop. Here is a link to 3 pack – 3 yard bundle of gradient rick rack.
- Gradient Six Strand Cotton Thread- Same as the rick rack. Here is a link to a collection of 5 gradient blue threads (8 yards each)
- 3/8” cording - 100” long
- 1 ¾” cotton fabric cut on the bias – 100” long
- Two-Three spools 12wt decorative thread for Creative Cover Stitch
- These threads should coordinate with the project OR you can use the cotton
thread in lieu of the decorative threads. - Also, try using crochet cotton thread. Click here for some of the threads used for the non-rick-rack stitching. There is also a variegated options of the
Artiste thread.
- These threads should coordinate with the project OR you can use the cotton
- Coordinating Madeira Overlock thread for the looper and needles.
- 20” zipper
- Chalk or Erasable fabric marker
- Other basic sewing supplies
- Cutting mat, rotary cutter, ruler
- Iron and ironing mat
- Wonder Clips or Pins
- Acorn Glue for Quilting – to help secure the rick rack to the pillow front
Instructions:
Preparing the Pillow Front:
1. Iron 16” x 16” Ultra Soft Fusible stabilizer to pillow front placing the fusible side of the stabilizer to the wrong side of the pillow front.
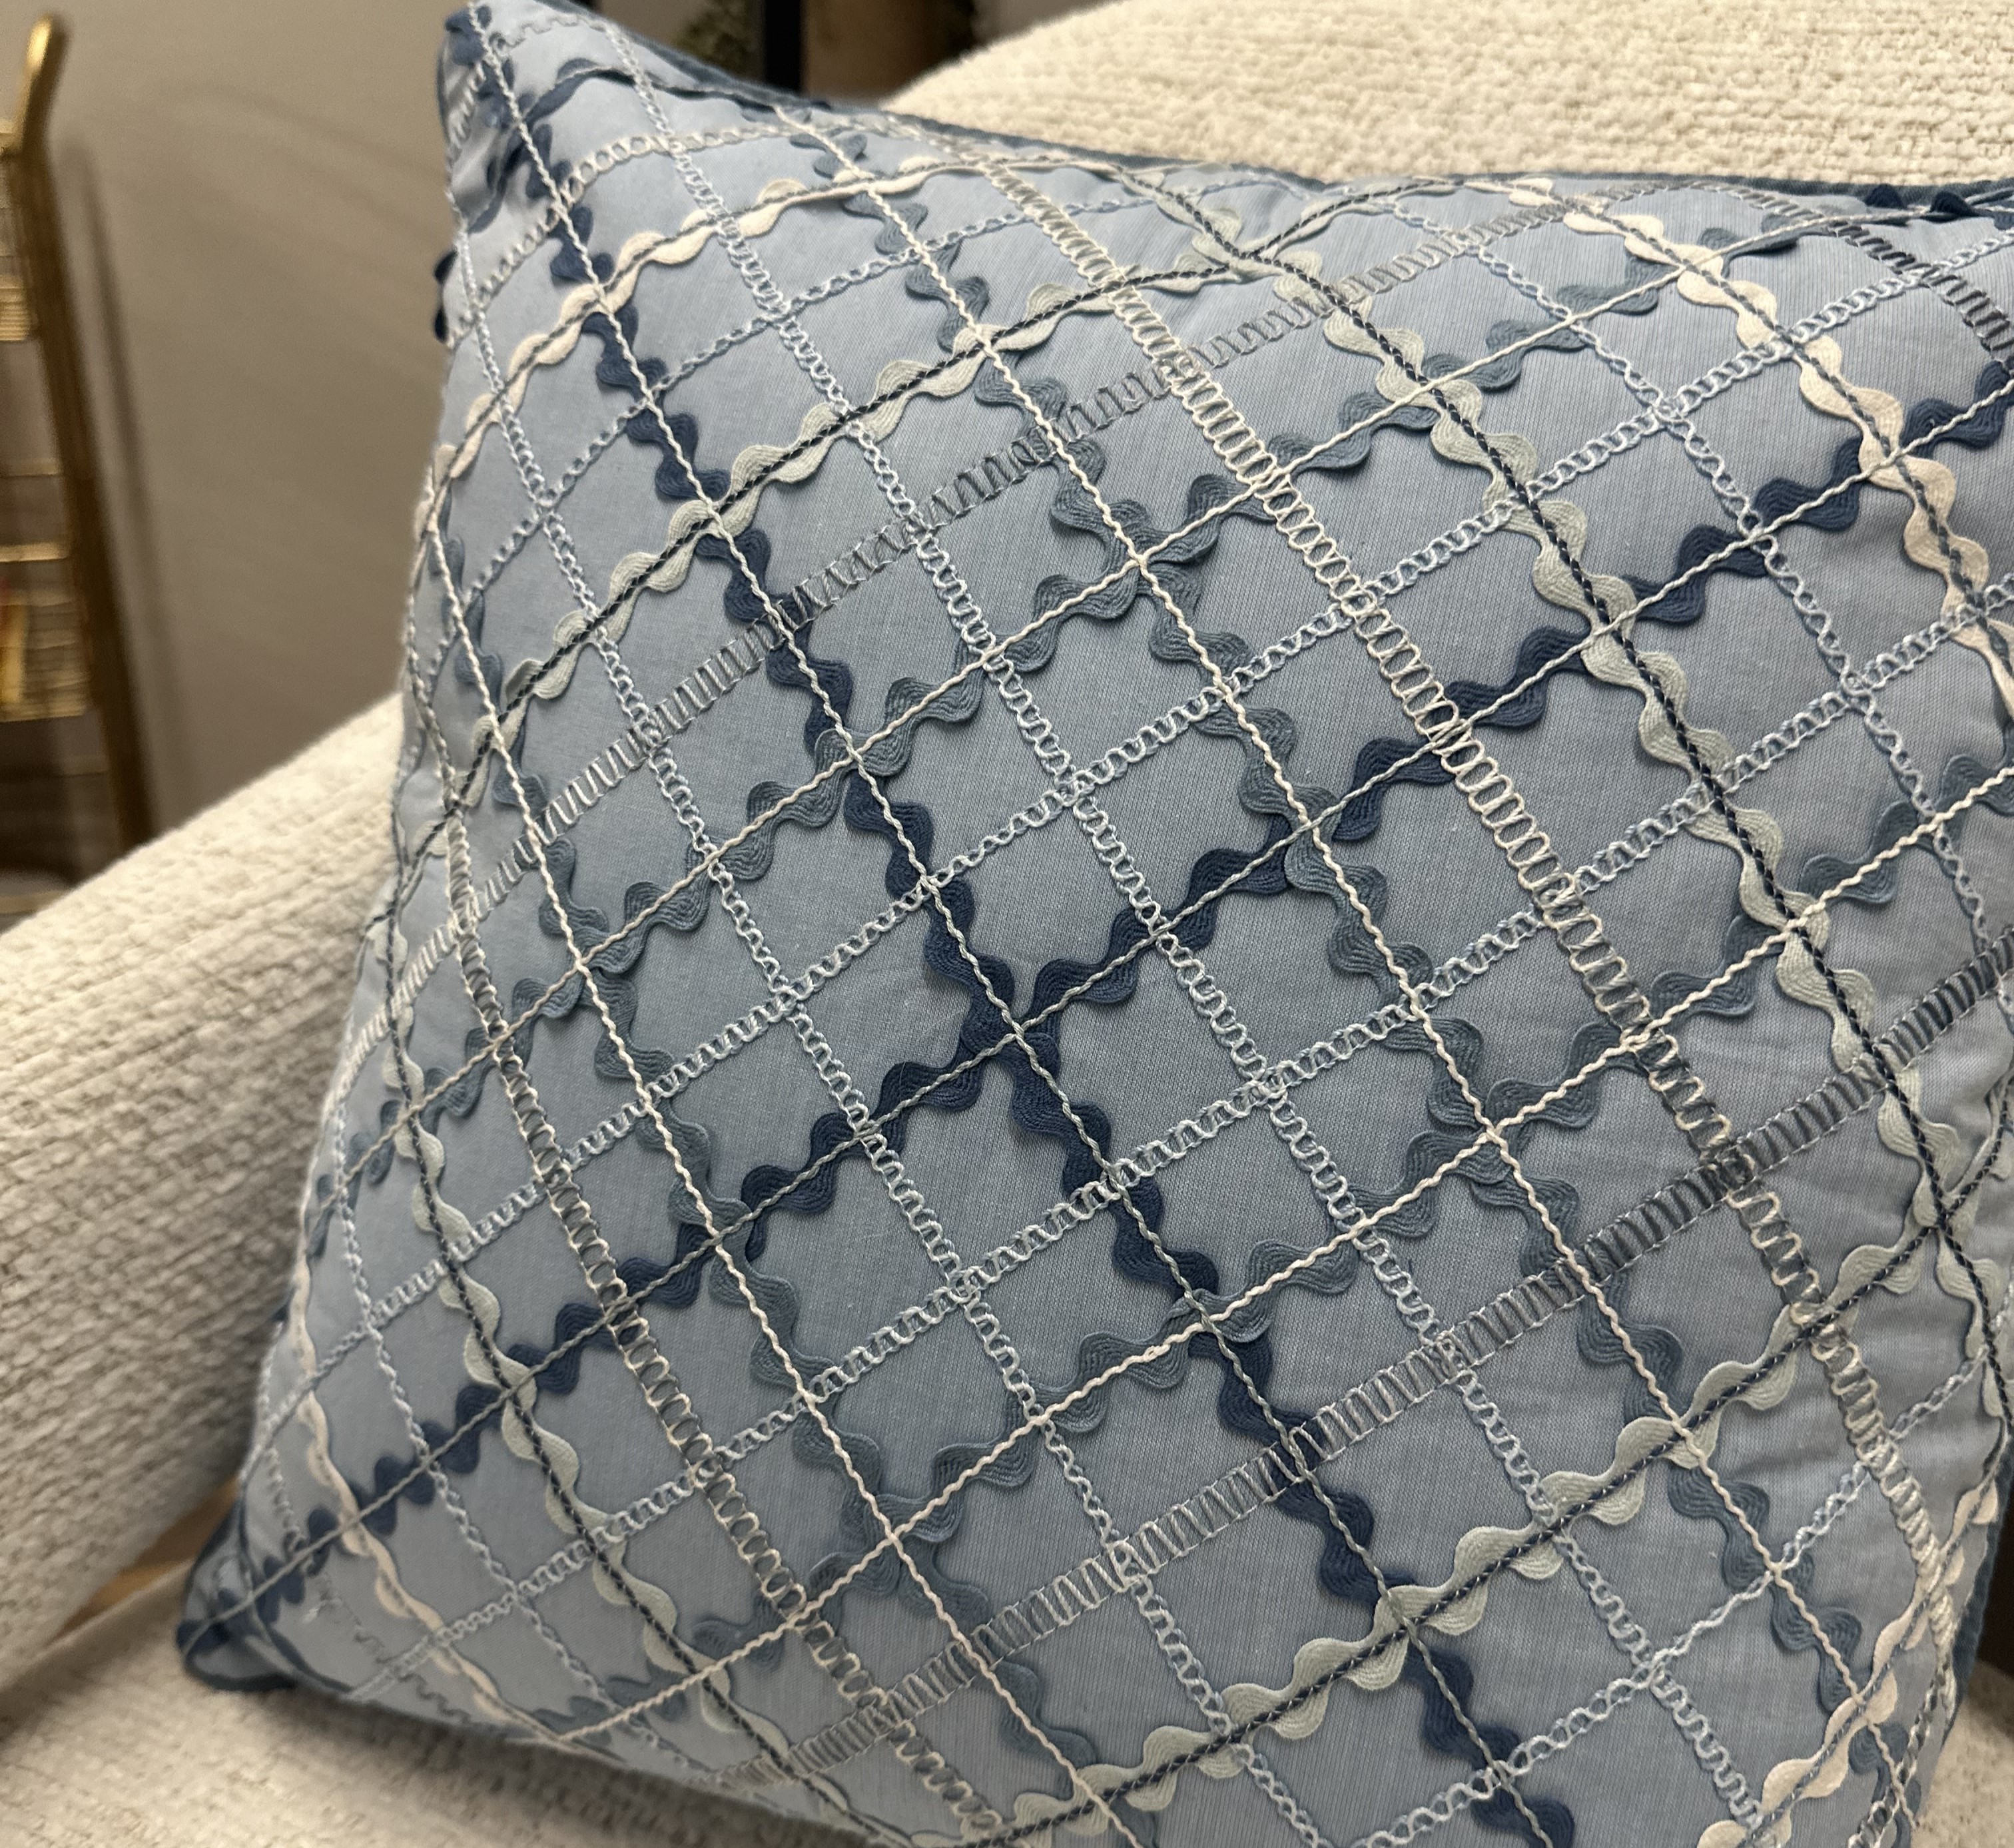
2. On the front of the pillow find the center front and using either a chalk marker or marking pen that erases, mark your pattern for whatever pattern you would like to create using the rick rack. For this project, diagonal lines were drawn to create a plaid look for the pillow.
3. Following the quick reference threading and set the Applaud up for a cover stitch wide with standard coordinating serger thread. Place the decorative thread in the wipers and overlock thread in both the chain needles and chain looper.
4. Please Note: If using something like cotton thread for hand embroidery, these strands will most likely not be on a spool. This will require you to manage the thread. To do so, wind on a spool or wrap on cardstock to help feed into the machine.
5. Determine a pattern of stitches that you might want to use for this project.
6. Arrange your rick rack in a desired layout. Use the acorn glue or other temporary glue to hold the rick rack in place. Press and secure by ironing down onto the pillow front fabric. Leave some lines exposed to stitch any of the creative cover stitch options.
7. See printable instructions for a sample of how this pillow was stitched out.
8. Place the marked fabric under the presser foot, aligning the appropriate needle position with the marked lines.
9. Stitch on the open lines with the stitch of choice. For this project, a narrow creative cover stitch was used with 2 threads in the wipers, a wide creative cover stitch with 2 threads and just one thread were also used. Threads were changed out to give it some different looks.
10. Set up the Applaud for a Chain Stitch with decorative thread in the wipers.
11. Stitch down the center of the rick rack.
12: Optional: Use the Micro Inserts for the Applaud to aid with the thickness of the rick rack.
13. In addition, you could also use the cording inserts as an alternative way for you to be able to stitch over the decorative threads for the pillow.
14. Continue to stitch over all the rick rack, changing out coordinating threads and stitch types along the way to achieve the patterned look you want for your pillow front.
15. Note: Using the embroidery cotton thread does limit you b/c they are in strands. This means that at some point this will not event be in the threading path. Be sure to manage those threads as you stitch.
Creating the Piping: Using Overlock Serger
1. Attach cording foot to the Triumph Serger (or Overlock Serger). Set the serger for a 4-thread overlock wide with overlock thread in the O1 and )2 and upper and lower loopers.
2. Wrap the fabric strip (wrong sides together) around the cording, making sure to position the cording along the fold and the fabric edges together.
3. Place the cording under the presser foot, making sure that the cording is in the groove on the underside of the presser foot.
4. Take a few stitches to catch the cording and the stitch the entire length of the fabric strip.
5. Set the strip aside for pillow construction.
6. NOTE: To be extra fancy, you could pre-stitch down the center of the fabric strip using the Creative Cover Stitch on the Applaud prior to creating the piping. This would add extra embellishment to the piping for the pillow if desired.
Attaching Piping to Pillow Front:
1. Using the 4 thread Overlock stitch and the cording piping, attach the piping.
2. Serge piping, raw edges facing out, all the way around pillow front overlapping ends 3. Be sure to cut a 45-degree notch in the piping at the corners to assist with being able to turn those sections.
Preparing Pillow Back:
1. To attach the zipper, use a 4-thread over lock stitch and the cording foot.
2. On each pillow back piece, measure in ¼” on each piece and mark a line from one end of the 16” to the other. This will be the placement line for the zipper.
3. To attach the first side, place the fabric right side up.
4. Place the zipper right side down (zipper coil). This will place the zipper tape on the right.
5. Align the zipper table with the marked line placing 2” of the zipper on each side beyond the fabric edge. Place the zipper under the cording foot aligning the coil with the groove.
6. Stitch. Repeat for the other pillow back piece.
Stitching Pillow Front & Back Together:
1. Open the zipper about halfway. This is very important to ensure you don’t serge off the zipper pull when serging the front and back together.
2. Place the pillow front and back right sides together.
3. Use Wonder Clips to assist with securing the pillow front and back in place.
4. With the serger, set-up for a 4-thread overlock stitch around the pillow on all four sides.
5. Press both sides of the seam to set, and turn the pillow right side out.
6. Insert 16” pillow form.


