
Supplies:
- Baby Lock Sewing Machine
- Walking foot
- Quilting cotton fabric to complete 2 placemats
- Greens for tree
- 2 - 2 ½” x 4 ½”
- 2 – 2 ½” x 6 ½”
- 2 – 2 ½” x 8 ½”
- 2 – 2 ½” x 10 ½”
- Tree background
- 20 – 2 ½” squares
- 4 – 2 ½” x 3 ½”
- 4 – 2 ½” x 1 ½”
- 4 – 2 ½” x 4 ¾”
- 4 – 1 ½” x 10 ½”
- 4 – 1 ½” x 12 ½”
- Tree trunk
- 2 – 2 ½” x 2”
- Patchwork
- 36 – 2 ½” squares from a variety of Christmas fabrics
- Backing fabric
- 3/8 of a yard
- Light weight batting
- 3/8 of a yard
- Greens for tree
- Binding
- ¼ of a yard (cut into 4 – 2 ¼” strips)
- Madeira Sewing Thread
Instructions:
1. Mark 8 of the 2 ½” squares with a diagonal line on the wrong side of the fabric from corner to opposite corner.
2. Lay one marked 2 ½” square onto a green 2 ½” x 4 ½” rectangle with right sides together and matching raw edges.
3. Stitch through both layers along the drawn diagonal line.
4. Trim ¼” from the sewn line, Press.
5. Repeat with the other side.
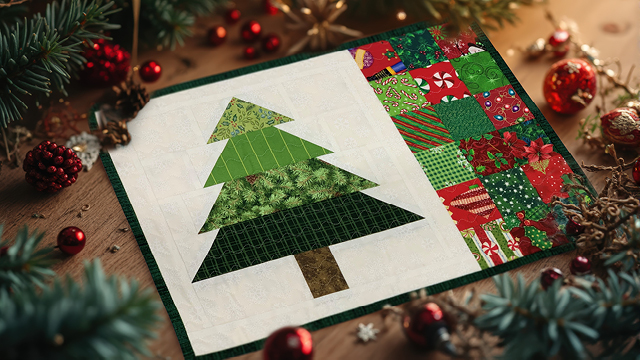
6. Repeat adding the 2 ½” squares to both ends of the 6 ½”, the 8 ½”, and the 10 ½” rectangles of tree fabric. You will have 3 new sections of the tree that look like the image to the right.
7. Using the image as a guide:
-
- Sew a 2 ½” x 3 ½” background piece to each side of Section 1 with right sides together and aligning the raw edges of the 2 ½” sides of both pieces.
- Sew a 2 ½” square background piece to each side of Section 2 with right sides together and aligning the raw edges of the 2 ½” sides of both pieces.
- Sew a 2 ½” x 1 ½” background piece to each side of Section 3 with right sides together and aligning the raw edges of the 2 ½” sides of both pieces.
8.For the bottom layer of the tree sew a 2 ½” x 4 ¾” piece to each side of the tree trunk 2” x 2 ½”, aligning the 2 ½” sides.
9. Sew the tree rows together and press all the seams in the same direction.
10. Add a 1 ½” x 10 ½” background strip to the left and right side of the tree block. Press seam allowance towards the background strip.
11. Add a 1 ½” x 12 ½” background strip to the top and bottom of the tree block. Press seam allowance towards the background strip.
12. Set your tree block aside while you piece together your patchwork piece.
13. Arrange the 36 – 2 ½” squares into a 3 x 6 grid.
-
- Sew squares together to create rows.
- Sew rows together to create a 6 ½” x 12 ½” patchwork piece.
14. Sew the pieced patchwork piece to the right side of the tree block along the 12 ½” side matching the raw edges.
15. Press the entire front piece of the placemat.
16. Layer the backing fabric right side down, batting over the backing and tree block with patchwork piece right side up over the backing and batting.
17. Repeat all instruction steps to create a second placemat.


