
Sewing with a Community: Bee Quilt Tips and Tricks
When a group of artists works together as a community to make a quilt—otherwise known as a quilting bee—they take part in an age-old tradition. Making a quilt together can help those who live far apart to feel connected and bonded over participating in the same project. Family friends colleagues neighbors students church members conference attendees—all types of groups can use a quilting bee to create a group quilt that will be treasured for years to come.
But there are many ways a group effort can go wrong and keeping things organized from the start will help your community quilt go smoothly!
Here are my favorite tips for quilting bee success:
1. Create detailed instructions Want an easy community quilt project that even non-quilters can participate in? Send a solid 5” fabric square to each participant in your chosen background color. Along with the fabric include a suggested color palette for them to design something on the square.
- Do you want them to draw a picture or write words around a certain theme? Think about what a quilt represents—warmth comfort heritage artistry diversity and in the case of a quilting bee the labor of a community.
- Ask participants to sketch their design on paper before rendering it on fabric. Make sure they know it doesn’t have to be fancy or complicated but it can be an illustration a simple shape a pattern or a word/phrase.
- Request that participants use fabric paint permanent marker embroidery supplies applique block printing or sewn embellishments like beads buttons or ribbons. Make sure they do not use pens that bleed fabric pieces that shrink (like wool) glitter or glued-on sequins. All materials must be machine washable.
- Make sure they leave a ¼” margin around their design so an important part of the artwork doesn’t disappear in the seams.
- Have them place their square in a plastic bag inside of an envelope and mail it to a central address by the chosen deadline.


2. Test the quilt squares Now that you have all of the 5” squares from participants it’s time to give them the “water test.” To make sure that none of the markers/paints bleed onto your finished quilt fill a spray bottle with water and lightly spritz each square. Use a paper towel to sop up the water. If there is no color on the towel you’re good to go. Set aside any squares that do not pass the colorfast test; you may ask the participant to remake these if you wish.

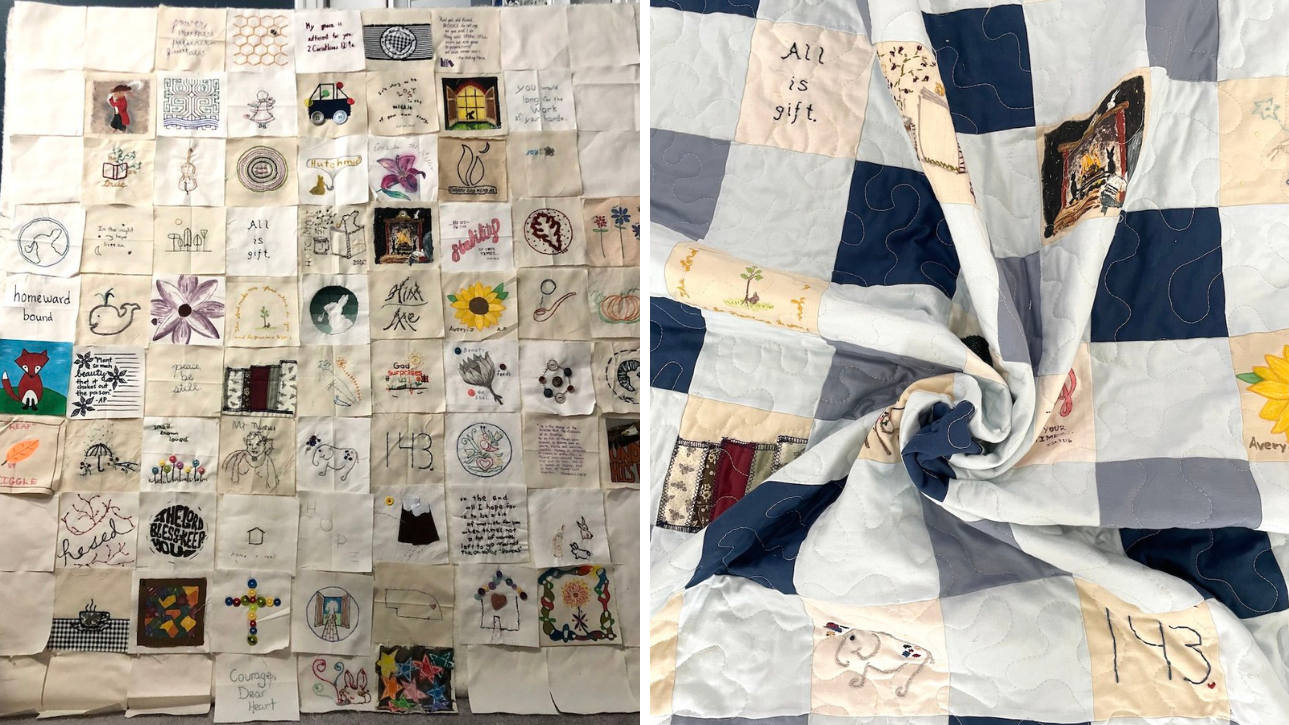
3. Sort the squares I ended up with about 80 squares in my finished quilt and added some blank squares as well near the corners. (This was part of a larger group project with hundreds of squares submitted and sewn into seven quilts!)
I recommend sorting the squares on a design board to make sure the overall arrangement is balanced in terms of color and theme. You can take photos of the arrangement then step back and look closely. Do any blocks stick out like a sore thumb? Is one half more intense in color than the other half? Flip blocks as needed and take another photo.

4. Add background squares or sashing With a community art quilt you’ll likely need to add background fabrics to make the quilt large enough to be usable. This also helps to visually break up the detailed designs of the submitted squares! Choose solid background fabrics from your chosen color palette and arrange them around the art squares. You can add sashing of any size you’d like between the blocks but bordering each block by 8 additional 5” squares works well.
5. Quilt When choosing a quilting design make sure you take into consideration any 3D elements of the quilt (like buttons or beads). A meandering free motion design works well for avoiding these embellishments. You can also stitch in the ditch or tie a community quilt but make sure to provide dense enough quilting that the finished product holds up to regular use over time.

6. Add a label and bind Don’t forget to add a quilt label to commemorate all of the hard work of the makers that contributed. A fun and easy way to make a quilt label is to take a 5” fabric square press it in half diagonally and draw a “corner label” on one half of the fabric. This gets sewn basted to the back corner of the quilt (your choice!) and the raw edges are secured in the quilt binding.

There you have it! Making a quilt with a group of people can be a wonderful way to commemorate special occasions and bring together people who live far apart to work on a project together. Have you made a community or bee quilt before? What advice or tips can you share with us?
The queen-size quilt was made in collaboration with many artists for The Rabbit Room. Artists submitted a 5 x 5 square. Pieced quilted and binding by Lindsay Conner of Lindsay Sews.


