Practice ruffles with the Ruffling Foot and sewing with elastic in this fun skirt tutorial! Then play with Madeira Glamour Thread in your serger on the hem! Download printable instructions. View matching bow tie or hair bow instructions. View matching suspenders instructions.
Materials:
- Fabric Measurements (see steps 1-3)
- 1.5”-2” waistband elastic (enough to fit waist see step 1)
- Matching Madeira Aerofil Sewing Thread
- 2 spools of Madeira Glamour 8-weight thread (I used silver to match metallic snowflakes on the fabric)
- 1 spool of Madeira Aerolock serger thread to match/blend with Glamour thread
- 3 spools of Aerolock serger thread to match fabric
- The Ruffling Foot SA122 (optional but really awesome! Check machine compatibility.)
Tools:
- Baby Lock Sewing Machine
- Baby Lock Serger
Steps:
-
Measure around child’s hips where the waistband will sit.
Waistband measurement is ____inches + 1” for seam allowance = 1st Width___ inches. You will need this much elastic for the waistband.
-
Place a band of elastic or cord around the hips to visualize where the waistband will sit.
Measure from the lower edge of the faux waistband to the desired length. Length measurement is __ inches + ½” for seam allowance = Cut Length ___inches (we’ll need this in a bit).
-
Based on 44” width fabric if the 1st Width is equal to or lesser than 35” get 2x the Cut Length in Step 2.
If the 1st Width is greater than 35” get 4x the Cut Length in Step 2. This will ensure you have enough to gather with.
- For example if my child’s 1st Width is 20” (lesser than 35”) and the Cut Length is 11.5” I would get 2x the Cut Length at 23” of fabric yardage.
- If my child’s 1st Width is 36.5” (greater than 35”) and the cut Length is 16” I would get 4x the Cut Length at 64” of fabric yardage.
-
Now we’re going to figure out the dimensions of the rectangles for the skirt front and back. We’re building in a 2.5x gather into our panels.
- If your 1st Width measurement is equal to or lesser than 35” you’ll need 2 panels. Last equation! Take your 1st Width Measurement and multiply it by 2.5 = inches. Take that number and divide it by 2 = Cut Width_inches. Cut two rectangles with the Cut Width by Cut Length measurement (from step 2).
- If your 1st Width measurement is greater than 35” you’ll need 4 panels. Last equation! Take your 1st Width Measurement and multiply it by 2.5 = inches. Take that number and divide it by 2 = 2nd Width inches. Take this number and divide it by 2 and add 1 inch = Cut Width inches. Cut four rectangles with the Cut Width by Cut Length measurement (from step 2).
-
Take your waistband elastic and cut it to fit the child’s hips (where the waistband will sit) plus 1” for seam allowance.
-
Serge both raw ends (individually) of the elastic with a 3-thread wide overlock serger stitch (2.5mm stitch length).
-
Stitch the ½” seam allowance to create the center back.
-
Try on again to ensure fit – take in more if needed (but take out the first seam if you do).
-
Stitch over this seam a couple times for added security.
-
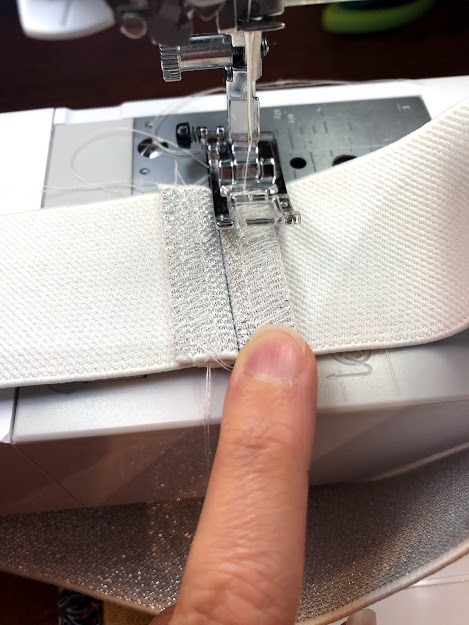
Open and stitch down each side of the seam allowance with a standard straight stitch (I tucked my serger tails into the stitch line underneath to secure them and then clipped them).
-
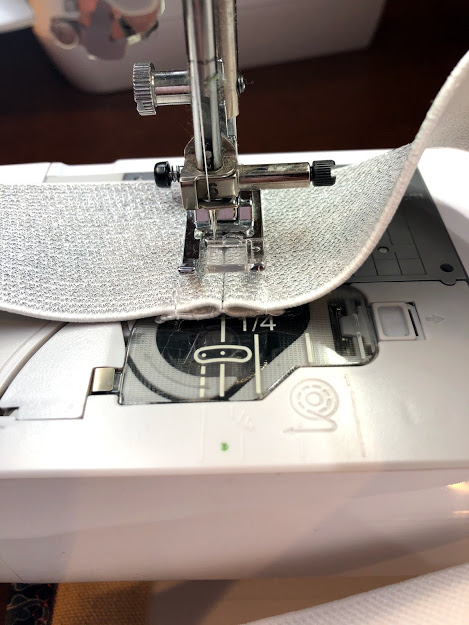
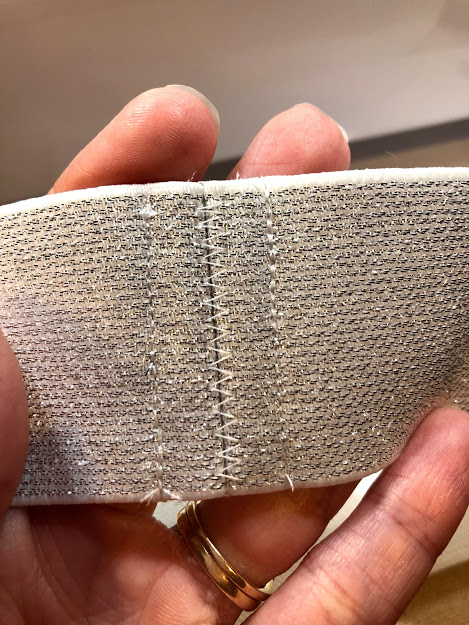
Then zig-zag over the center seam with a zig-zag stitch set at a 4.5mm stitch width and a 1.6mm stitch length.
-
-
Set up your serger with a 3-thread wide overlock stitch with regular serger thread and a 2.5mm stitch length.
-
Serge all of the single short edges on all of your rectangle panels.
-
-
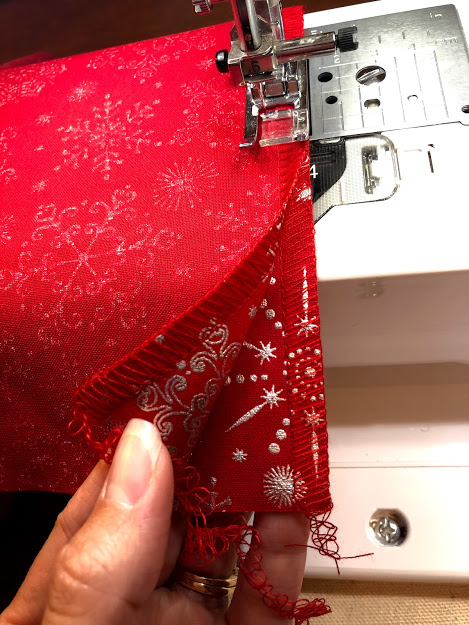
Using a sewing machine with regular sewing thread sew all of the long rectangle panels (right sides) together.
Use a ½” seam allowance along the short edges to create a continuous circle of panels. With 2 panels you’ll have 2 side seams. With 4 panels you’ll have 2 side seams a center front seam and a center back seam.
-
Press seams open.
-
-
Serge along the top edge of the skirt with the 3-thread wide overlock stitch 2.5mm stitch length.
-
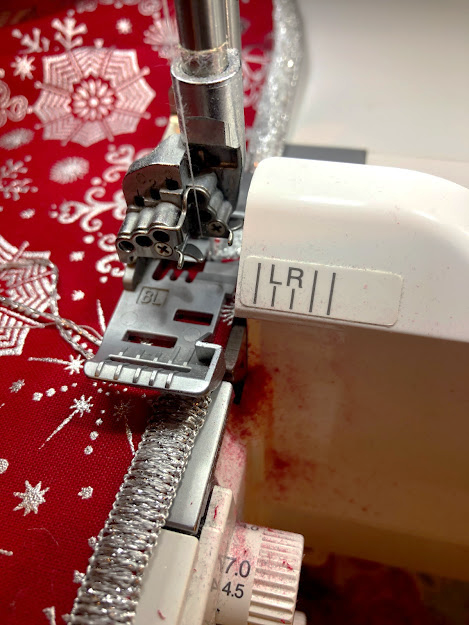
For the decorative thread hem keep your serger at the 3-thread wide overlock stitch.
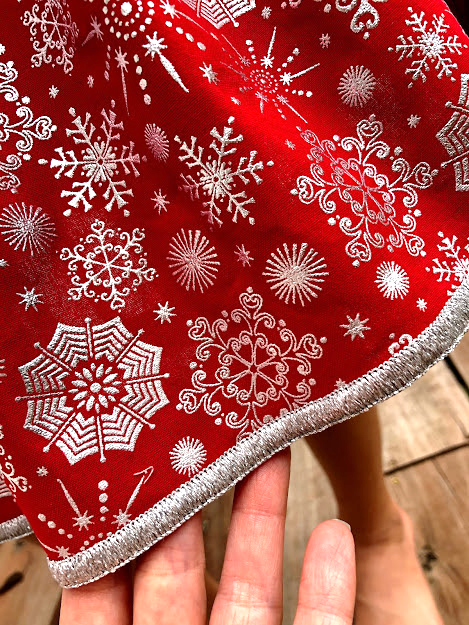
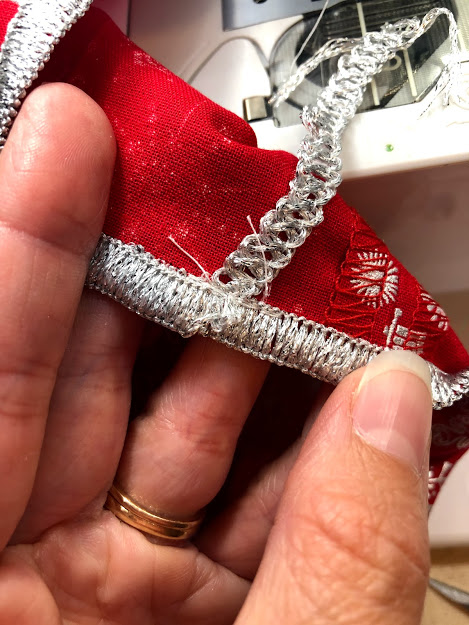
Place the Glamour Thread in the Upper and Lower loopers and the blending (regular) serger thread in the needle. Test your stitch with different stitch lengths (mine was at 1.5mm stitch length). Slowly serge along the entire lower edge of the skirt (ensuring the seam allowances underneath stay pressed open). Start in the back somewhere and then when you get around to the beginning again lock your blade down so that it doesn’t clip your serger thread and overlap your stitch about ¾”. Lift your needle up and gently pull the project straight to the back slightly just behind the needle and serge off. With a large eyed needle weave the serger thread tail into the backside of the stitch. Or stitch it to the back side with a sewing machine straight stitch and clip threads. Doesn’t it look awesome?!
-
At this point you can baste and gather two parallel stitch lines around the upper edge of the skirt to fit your elastic waistband.
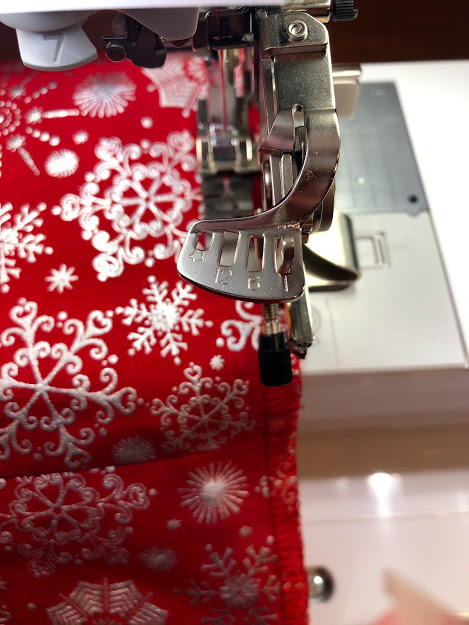
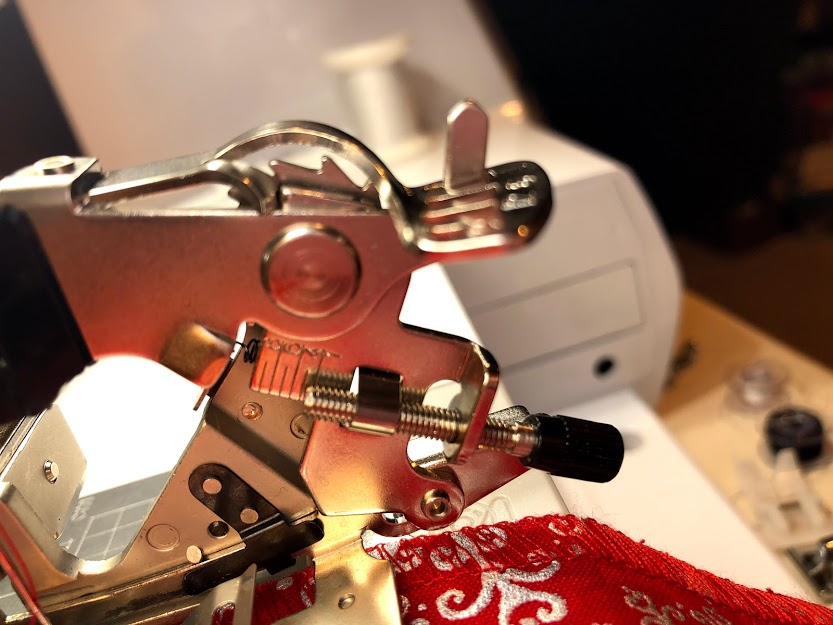
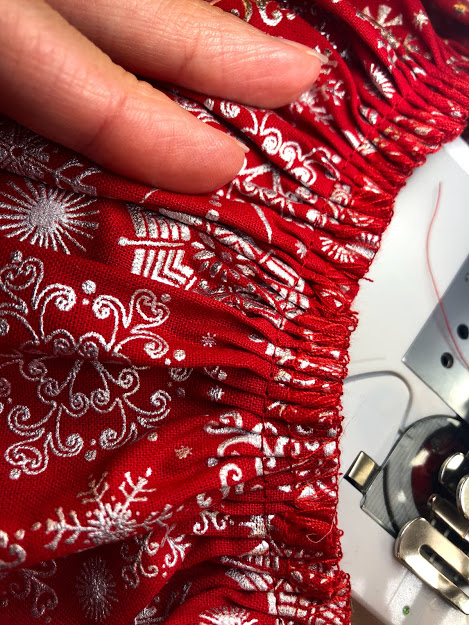
But it’s way more fun to gather and stitch at the same time with the Ruffling Foot SA122! Plus the ruffling foot makes the gathers lie flat as it puts tiny pleats into the fabric making the gathers more manageable when stitching to the elastic. When you use the Ruffling Foot make sure to set it up to gather per every 1 stitch with a depth of 4 (the short line even with 4 on the side of the foot). Set a center straight stitch with a 3.0mm stitch length to your machine and make sure that the opening on the foot is lined up with your needle and that your needle clears it.
-
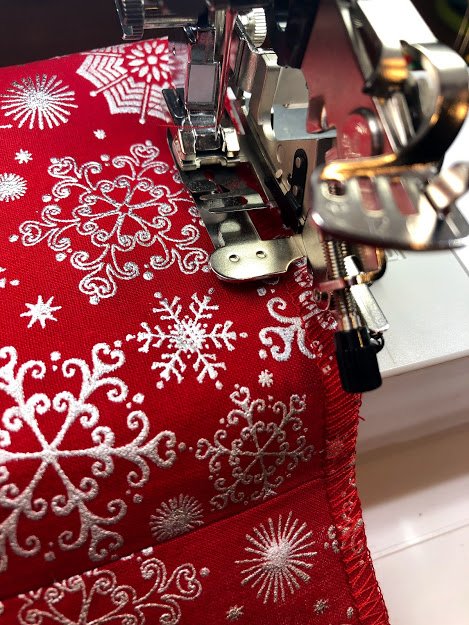
Carefully run the top edge of the skirt through with the Ruffling Foot lining up the serger stitch just to the right of the toothed fork that gathers the fabric.
Gather all the way around. Compare it to the elastic waistband and ensure a close fit. If it’s a little bit bigger than the elastic we can cinch it in when we pin it to the elastic. If it’s a little bit small but gently pulling on it (without popping stitches) enables enough ease to fit to the elastic you’re still good. Now if it’s just too small I like to pop all of the stitches and then adjust the depth on the Ruffling Foot a little bit smaller than 4 and try again.
-
You might be wondering – there is no stretch in this gathered waist! How is this going to work?
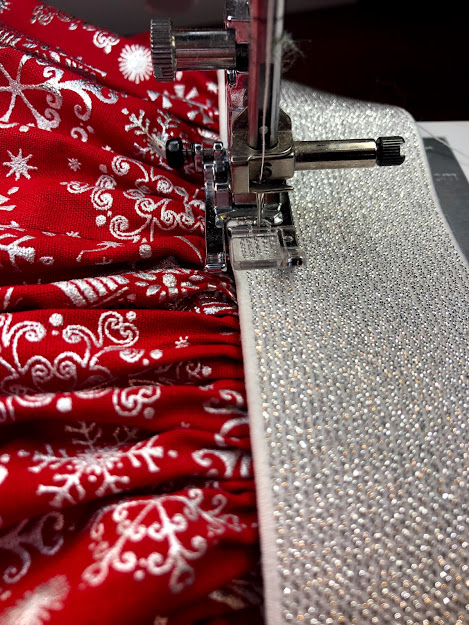
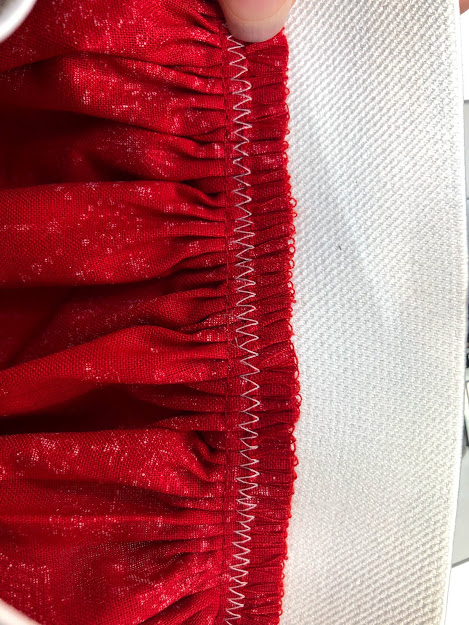
Trust me! Do not pop any of the stitches just yet. Quarter your elastic and your skirt. Match up the quarter marks and pin the gathered stitch line just under the edge of the elastic to where it just hides underneath it and pin all the way around evenly spacing your gathers. Use a zig-zag stitch to sew the elastic waistband to the gathers around the entire waistband. Set the center zig-zag stitch to have a 4.0mm stitch width and a 1.6mm stitch length. Line up the zig-zag stitch as shown below. The second picture shows how the zig-zag looks on the back side. Once the gathers are secured to the elastic with the zig-zag stitch you can stretch the elastic at the seam to pop the straight stitch stitches and it’s ready to be worn!
