
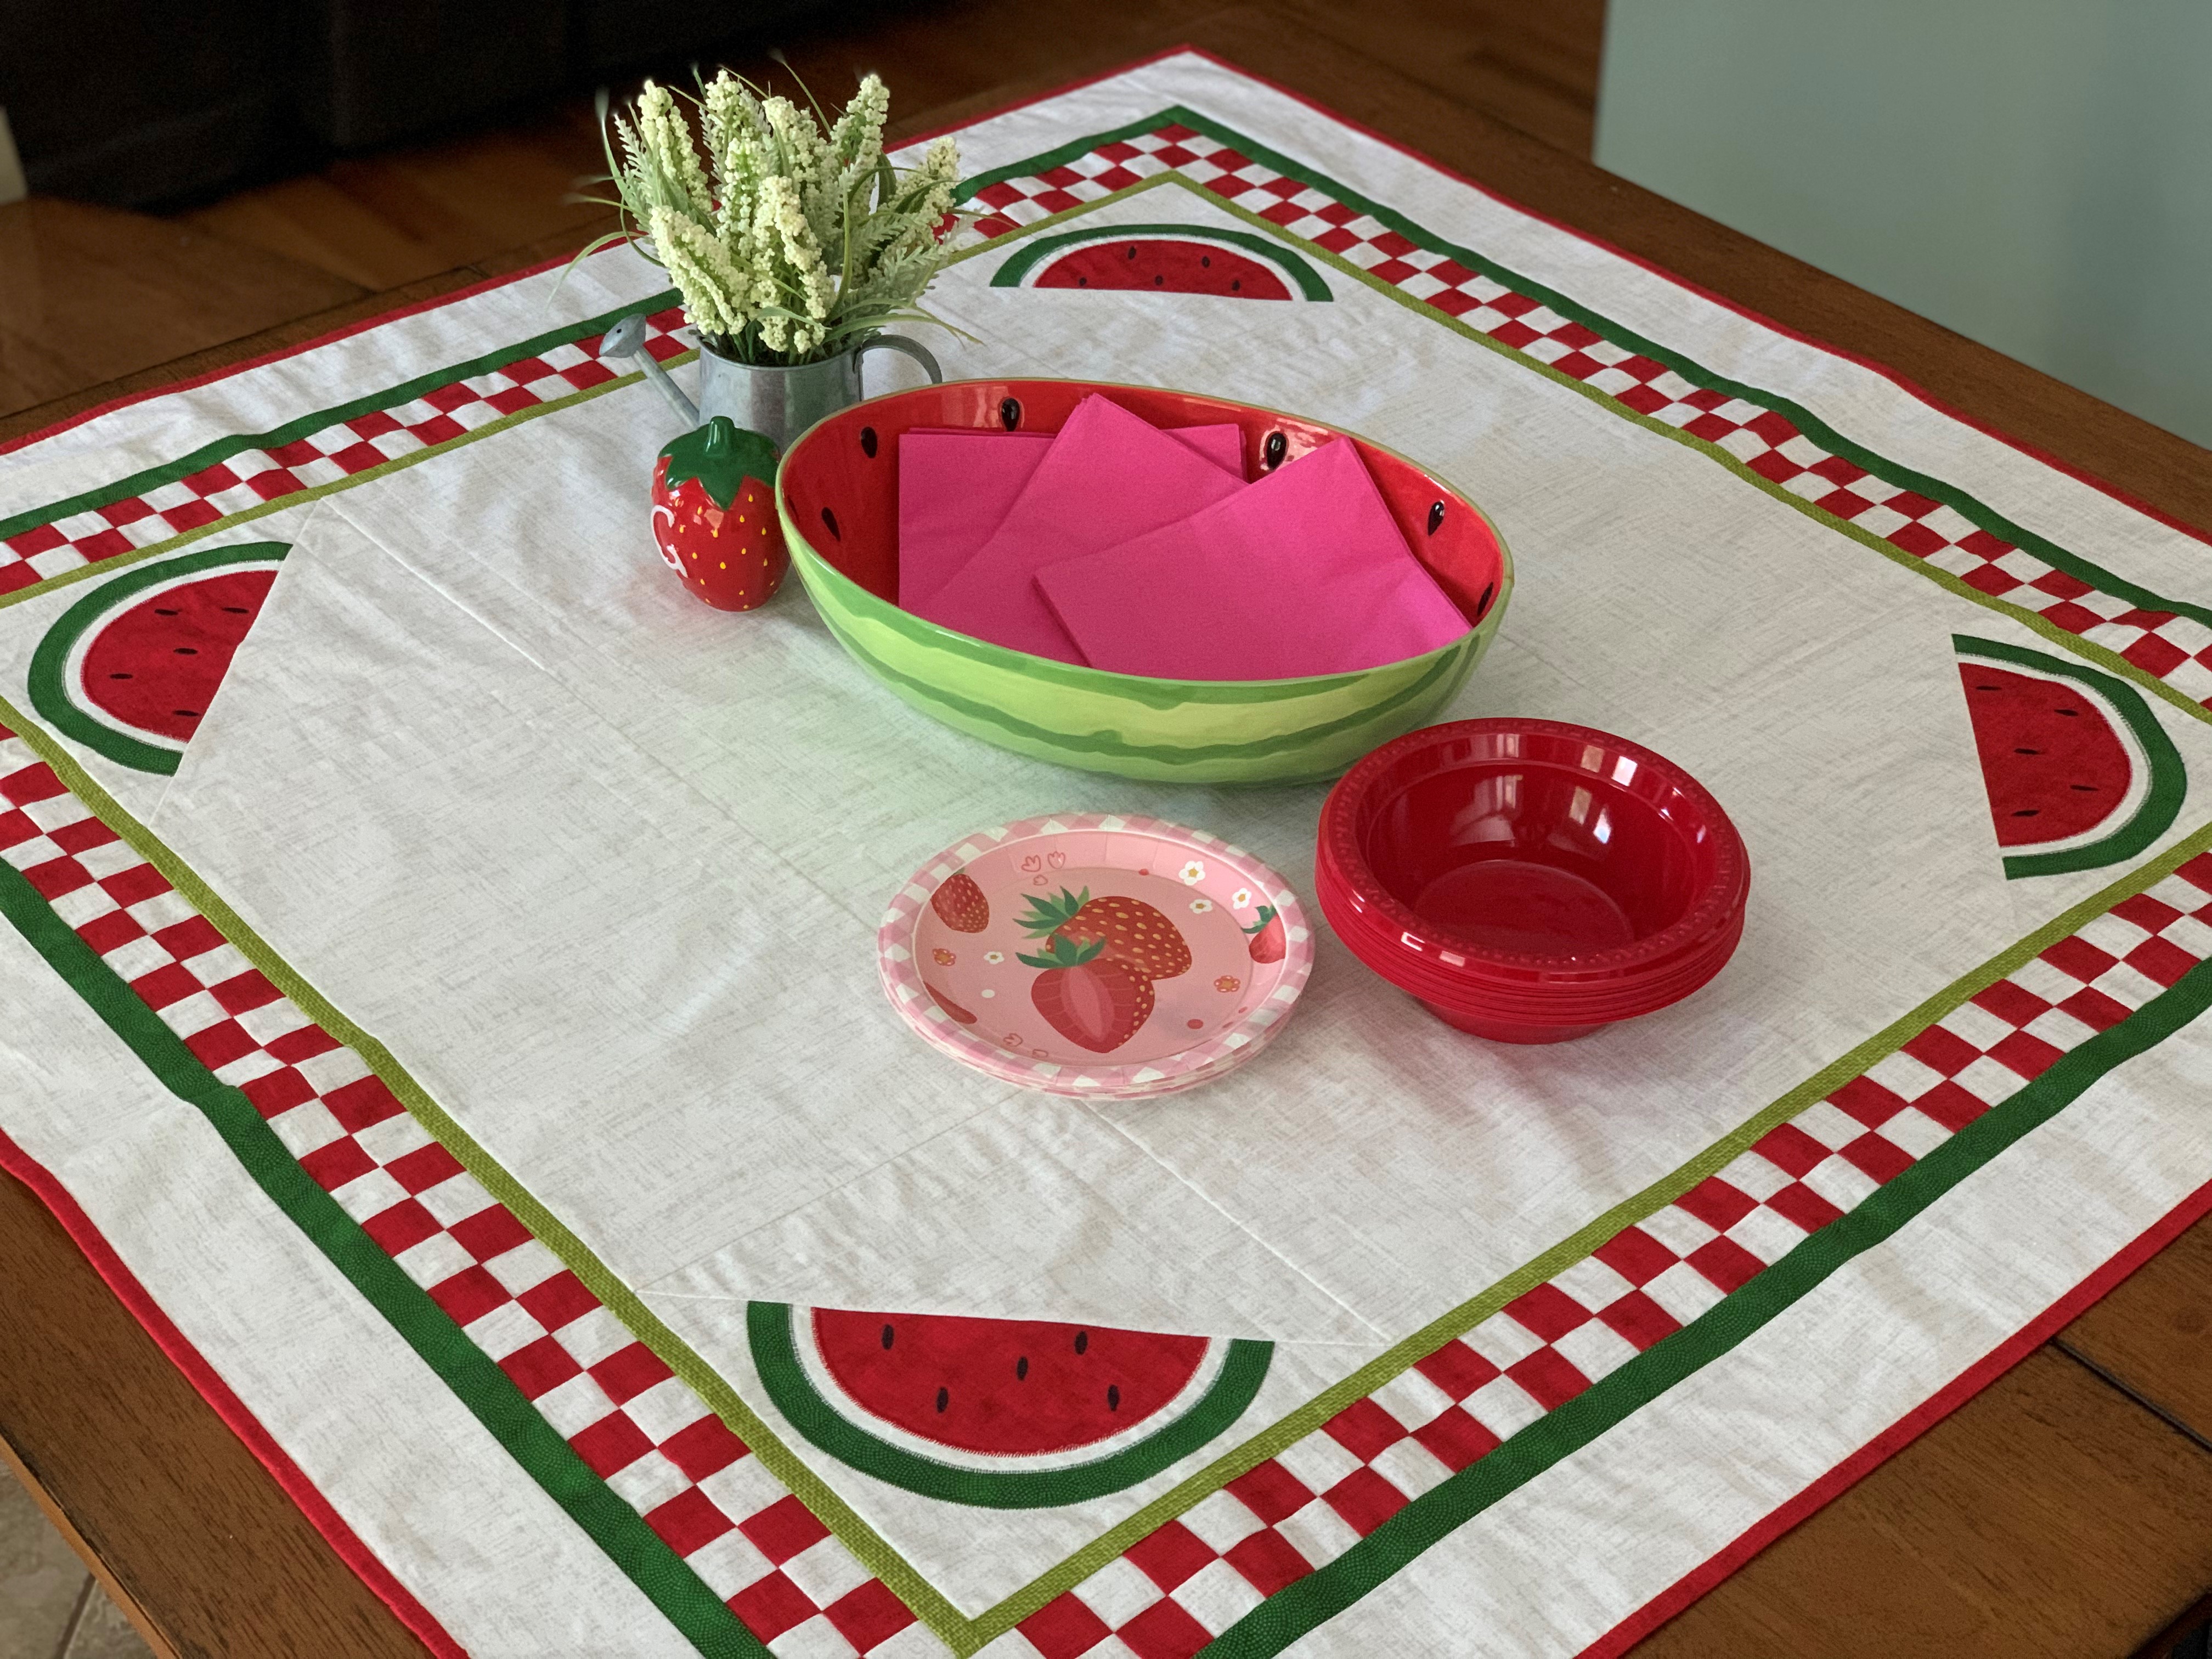
Supplies:
- Baby Lock Sewing Machine
- Baby Lock Circular Sewing Attachment
- Fabric
- Background and checkerboard - 1 ½ yards
- Red - checkerboard and watermelons – 2/3 yard
- Light Green – inner border – 1/8 yard
- Green – watermelons and border – ½ yard
- Madeira Sewing Thread Cotona 50-weight thread
- Baby Lock Tear-Away Firm Stabilizer (BLT103)
- Flannel for backing – 1 ¼ yard
- Klassé 75/11 Embroidery or Universal Needle
- Basic Sewing supplies
Instructions:
Cutting Instructions:
| Fabric | No. of Pieces | Dimensions | Used For |
| White | 6 | 1 ½” x WOF strips | Checkerboard |
| White | 4 | 9 ½” squares | Watermelon corners |
| White | 4 | 8 ½” x 15 ½” | Center piecing |
| White | 2 | 7 ½” squares | Watermelon applique |
| White | 1 | 15 ½” square | Tablecloth center |
| White | 4 | 3” x WOF strips | Outside border |
| Red | 6 | 1 ½” x WOF strips | Checkerboard |
| Red | 5 | 2” x WOF strips | Binding |
| Red | 4 | 6 ¾” squares | Corner watermelon squares |
| Red | 2 | 7” squares | Watermelon applique |
| Light Green | 4 | 1” x WOF strips | Inner border |
| Dark Green | 4 | 1 ¼” x WOF strips | Middle border |
| Dark Green | 2 | 8 ¾” squares | Watermelon applique |
| Baby Lock Tear Away Stabilizer | 2 | 9 ½” squares | Watermelon applique |
1. Sew together the 6 - 1 ½” x WOF white strips to the 6 - 1 ½” x WOF red strips, alternating the fabrics. Press all the seams towards the darkest fabric as you go.
2. Cut the strip sets into 1 ½” strips.
3. Sew 3 of the 1 ½” strip sets together. You will have 8 sets of 36 squares of red and white.
4. Sew 2 -36 square strips together so they form a checkerboard.
5. Create 2 checkboard sets that measure 2 ½” x 36 ½” and 2 that measure 2 ½” x 32 ½”. Use a seam ripper to remove excess checkerboard for the shorter rows.
6. Attach the Circular Sewing Attachment to the machine.
7. Find and mark the vertical and horizontal center on each of the following:
- 2 – 9 ½” squares of Baby Lock Tear Away Stabilizer
- 2 – 9 ½” squares of white fabric
- 2 – 8 ¾” squares of green fabric
- 2 – 7 ½” squares of white fabric
- 2 – 6 ¾” squares of red fabric
8. Lay a white 9 ½” square of white fabric over a 9 ½” square of stabilizer, with the wrong side of the white fabric facing the stabilizer. Align the center marks.
9. Lay a green 8 ¾” square over the white square with wrong side of green square facing right side of white square. Aligning center marks.
10. Push the circular sewing attachment pin through the center mark of the entire stack of stabilizer, white fabric and green fabric.
11. Put the pin into the circular attachment in the middle of the red lines to hold the fabric stack in place and secure while stitching.
12. The first stitch is the outside of the watermelon applique tack-down stitch.
- Set the pin position on the circular attachment to the 100mm mark.
- Thread the machine with green
- Using a straight stitch, stitch the tack down stitch for green rind of the watermelon.
13. With the tack down circle stitch complete. Trim only the green fabric just outside of the stitched line.
14. If the fabric stack has been removed from the machine, place it back in place making sure not to move the pin holder on the circular sewing attachment.
15. Select a zig zag stitch for the satin stitch around the outside of the watermelon rind.
16. Stitch the satin stitch in a perfect circle.
17. Without removing the fabric stack lift the front edge so the mm marks on the front of the circular sewing attachment are visible. Carefully lift the move lever and move the pointer so it aligns with the 85mm mark.
18. Select a straight stitch on the machine and stitch inside cut line for the watermelon rind.
19. Release the pin from the circular sewing attachment by pushing the metal release button in front of the pin. Take the pin out of the fabric stack.
20. Cut the green fabric close to the inside of the straight stitched cut line. This will remove excess unneeded fabric.
21. Lay the white 7 ½” square over the fabric stack aligning the center points. Push the pin through the center point of the fabric stack with the added white fabric square.
22. Place the fabric stack back on the machine with the pin secured in the circular sewing attachment.
23. Stitch the tack down stitch with a straight stitch.
24. Trim the white fabric on the outside of the tack down stitch.
25. Change the stitch to a zig zag for a satin stitch or other decorative stitch and stitch around the edge of the white and green fabrics.
26. Without removing the fabric stack, lift the front edge so the mm marks on the front of the circular sewing attachment are visible. Carefully lift the move lever and move the pointer so it aligns with the 75mm mark.
27. Change the thread to a red color to match the inside of the watermelon.
28. Change the stitch to a straight stitch and stitch the tack down for the inside of the white fabric.
29. Remove the fabric stack from the machine by releasing the pin and trim the white fabric on the inside of the tack down stitch.
30. Lay the red fabric right side up on the top of the fabric stack. Align the center points and push the pin of the Circular Sewing Attachment through the center of the red fabric and fabric stack.
31. Put the fabric stack back on the machine inserting the pin into the attachment.
32. Without moving the pin position stitch the tack down stitch over the red fabric.
33. Trim the red fabric outside the tack down stitch.
34. Change the stitch to a zig zag for a satin stitch or other decorative stitch and stitch around the edge of the white and red fabrics.
35. Create a second whole melon block following the steps 8-34.
36. Layer one of the remaining 9 ½” square of white and one of the whole melon appliqued squares right sides together and draw a diagonal line on the wrong side of the white square.
37. Sew ¼” away from the drawn line on each side.
38. Cut directly on the drawn line.
39. Press the seam allowance towards the plain white side.
40. Trim half-square triangle block to measure 8 ½” square.
41. Repeat steps 36 – 40 to make 2 more watermelon halves half-square triangle blocks.
42. Sew a half melon block on either side of each of the 8 ½” x 15 ½” rectangles of white fabric along the 8 ½” sides.
43. Sew an 8 ½” x 15 ½” piece to one side of the 15 ½” white center square.
44. Sew the remaining 8 ½” x 15 ½” piece to the opposite side of the center square.
45. Sew the melon strips on the remaining side of the center square.
46. Cut 2 of the light green 1” strips to a length of 31 ½”. Sew these 2 strips to the top and bottom of your tablecloth center with the corner melon halves.
47. Press seams to the light green border.
48. Cut the remaining 2 light green strips to a length of 32 1/2'”. Sew these 2 strips to the sides of the tablecloth center.
49. Press the seams to the light green border.
50. Attach the 2 ½” x 32 ½” checkerboard border to the top and bottom.
51. Press all seams to the light green border.
52. Sew the 2 ½” x 36 ½” checkerboard borders to the sides. Press seams to the light green.
53. Sew dark green 1 ¼” strips to the top and bottom. Press seam toward the dark green border.
54. Sew the remaining 2 dark green 1 ¼” strips to the sides. Press.
55. Sew 2 of the 3” strips of white to the top and bottom. Press
56. Sew the remaining white 3” strips to the sides. Press.
57. Layer the flannel (the backing of the tablecloth) and the front of the tablecloth wrong sides together.
58. Quilt as desired.
59. Bind with the 2” red strips using your favorite binding method.


